Tanner the Triceratops – Free Dinosaur Crochet Pattern
*** I hope you enjoy this free crochet pattern available here on my blog! An ad-free, formatted PDF version of this crochet pattern is also available for purchase here:
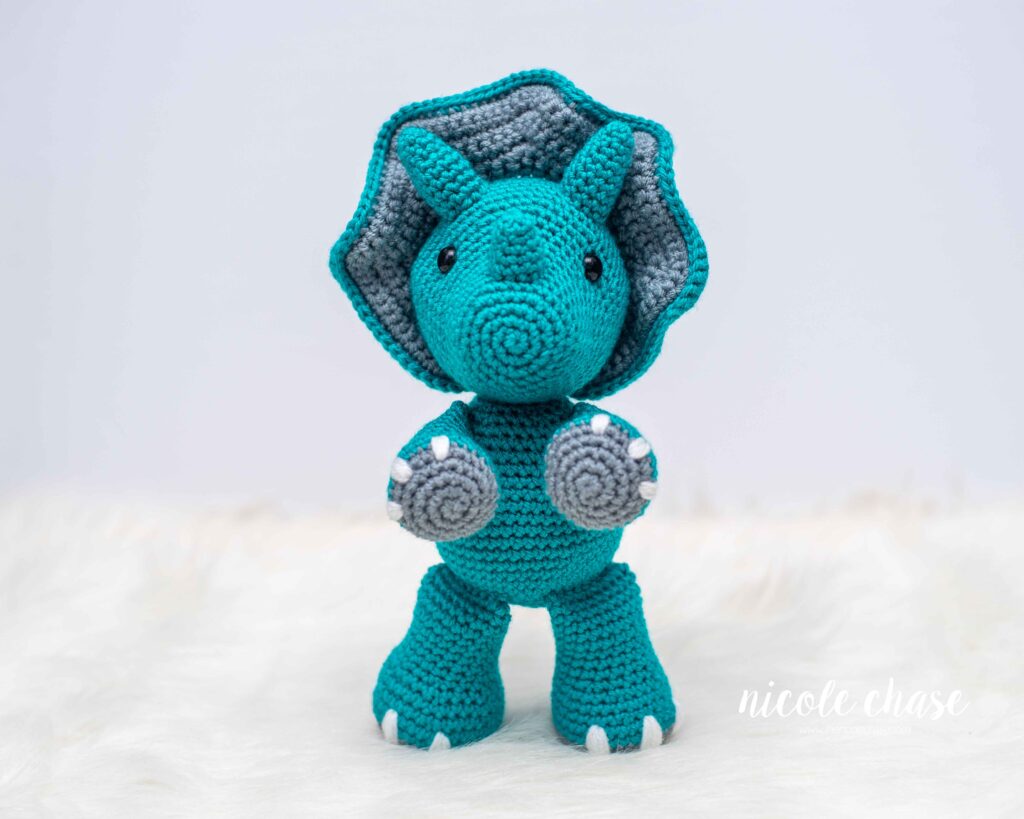
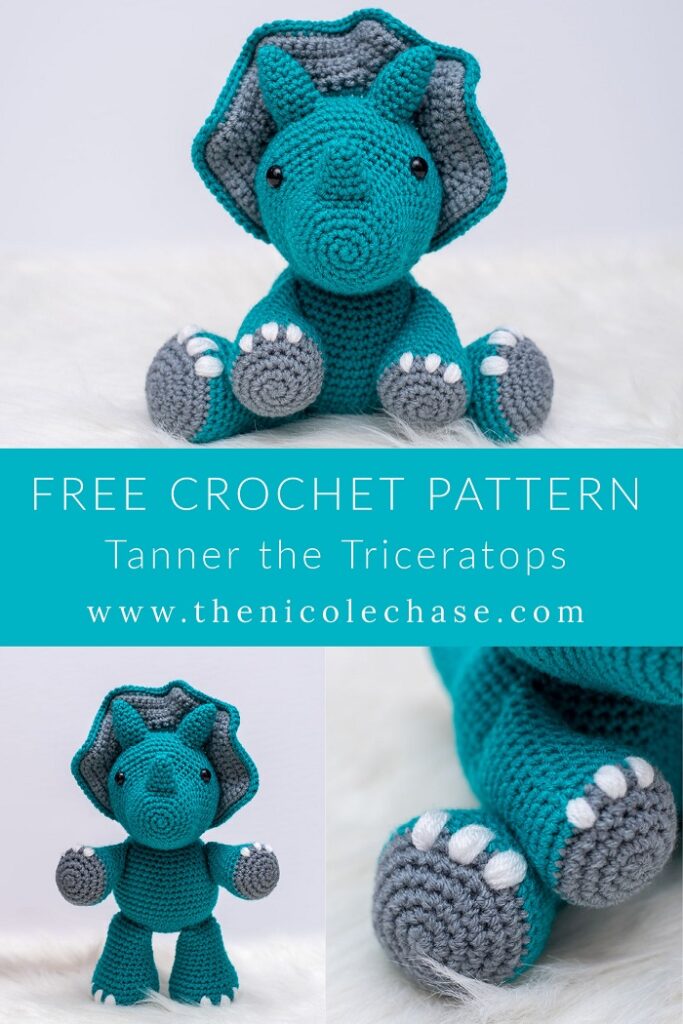
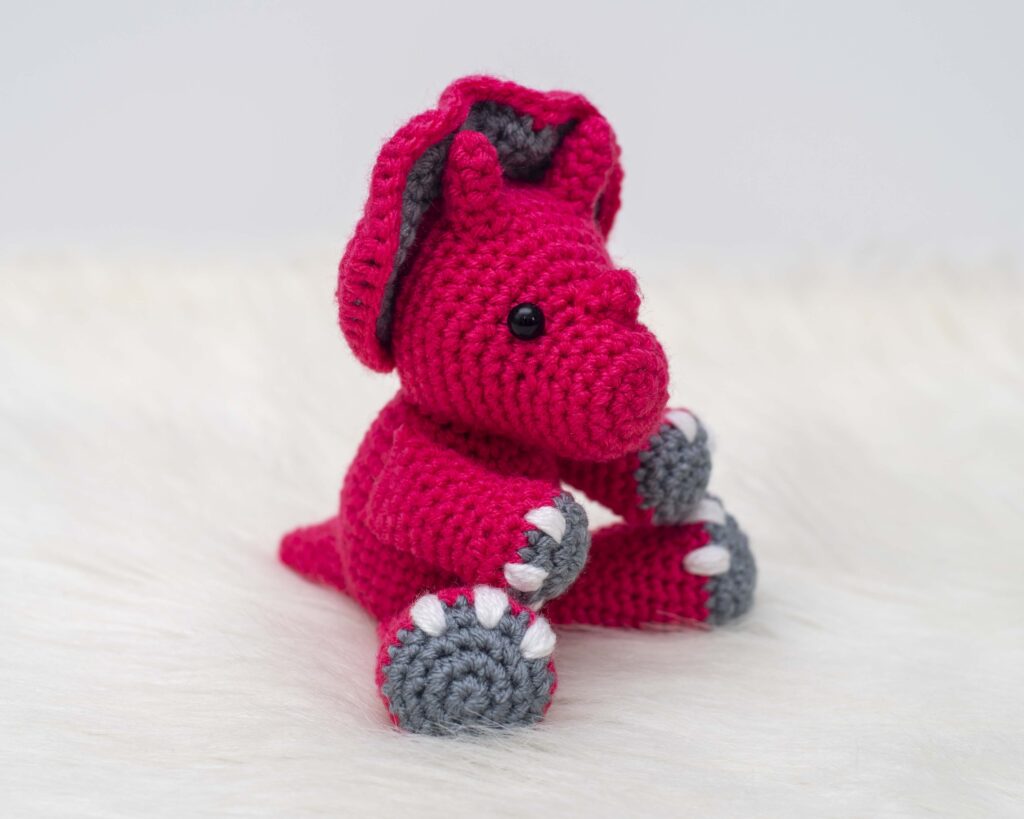
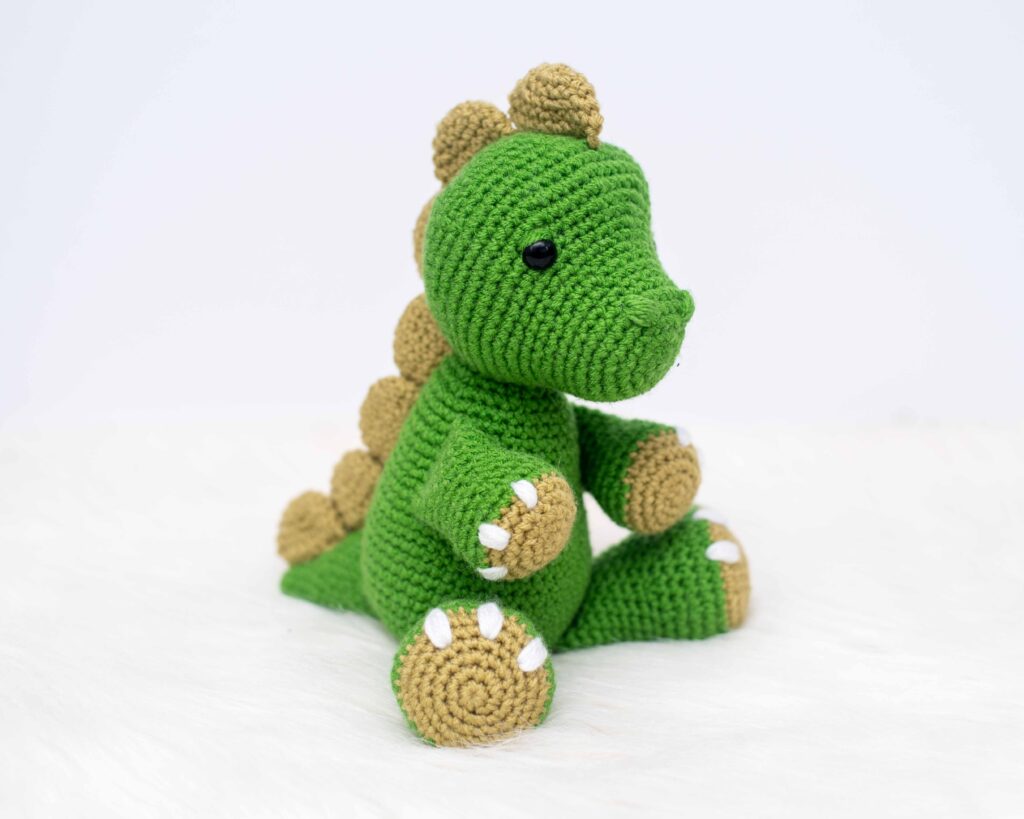
Dinosaurs are so popular these days! My son just loves them, and his dino obsession is what gave me the inspiration for my latest free pattern, Tanner the Triceratops.
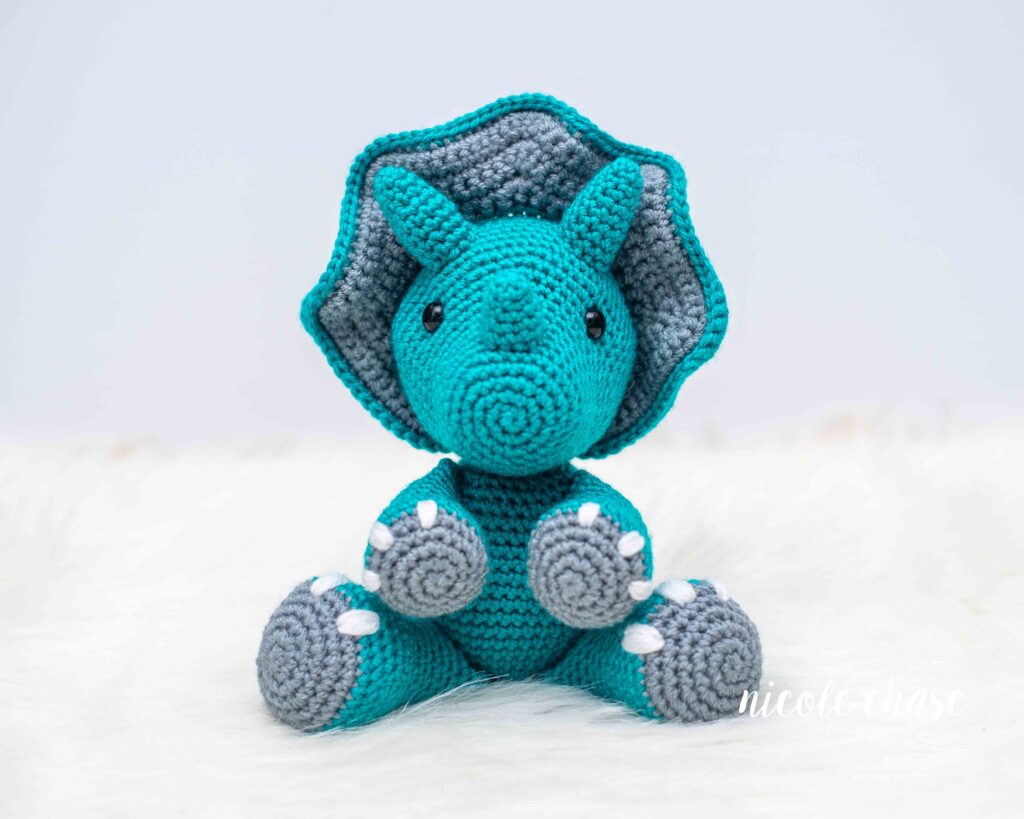
Tanner is a beginner friendly dinosaur amigurumi. He is about 10″ tall when sitting down, and about 13″ tall when standing. Most pieces are worked in the round and then sewn together at the end, with a bit of embroidery for the nails.
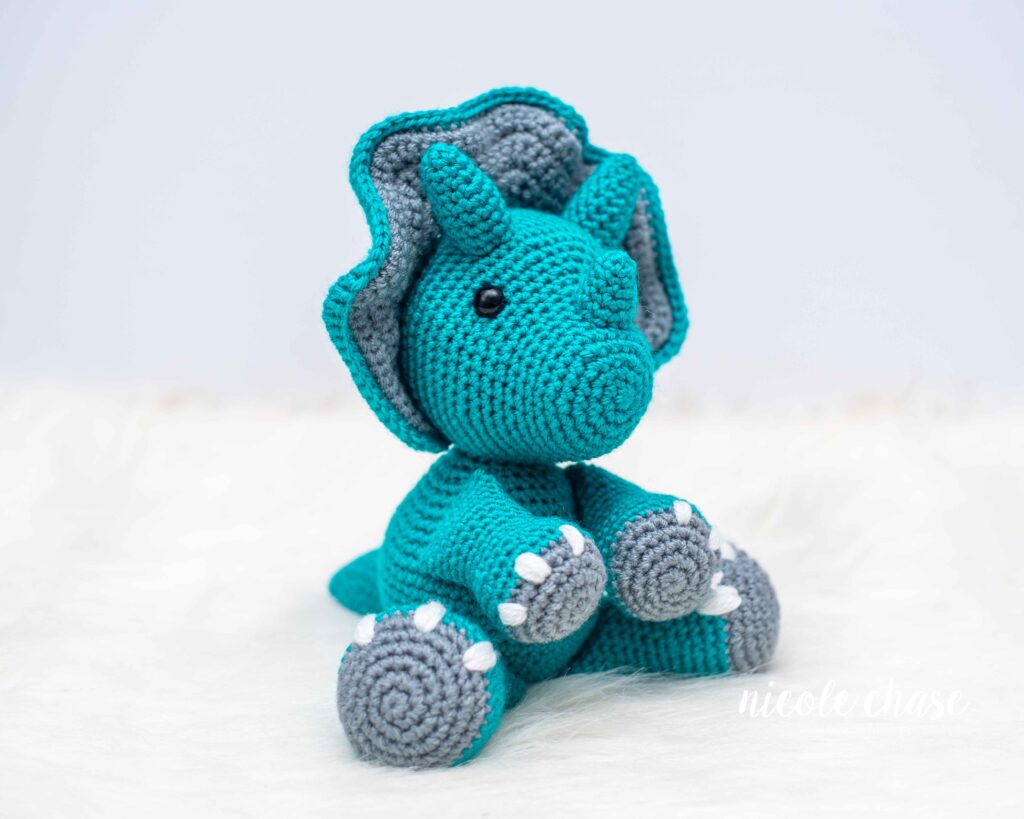
I used WeCrochet’s Brava Worsted yarn to make Tanner. You’ll also need a 4.0mm (G) crochet hook, tapestry needle/yarn needle, scissors, safety eyes (if desired), and poly-fil stuffing. You can find all of these over on my Amazon page here.
If you like this free pattern, you may be interested in my other amigurumi dinosaur patterns. You can find all of my dinosaur crochet patterns here.
Don’t forget to save this pattern in your favorites and add it to your project queue to save it for later! View this pattern on Ravelry here.

I would classify this crochet pattern as “advanced beginner”. It would be helpful to have had some experience with amigurumi before creating this project.

I’d love to see what you make with this tutorial! Don’t forget to share a photo of your finished work in your Ravelry projects and my Facebook group!
Tanner the Triceratops

PATTERN SPECIFICS
Measurements: Approximately 8.5” tall (sitting) or 11.5” tall (standing)
Gauge: Not necessary for this pattern; see notes
Hook Size: 4.0mm (G)
Other Tools: tapestry needle, stitch markers, scissors
Yarn Weight: Medium (4), Worsted
Yarn Used: WeCrochet/Knit Picks Brava Worsted
Yardage: color A (teal): 218 yds, color B (gray): 59 yds, color C (white): 4 yds
Other Materials: poly-fil stuffing, 12mm safety eyes
ABBREVIATIONS
st = stitch
sl st = slip stitch
SC = single crochet
SC2tog = single crochet 2 stitches together (invisible decrease is recommended)
FSC = foundation single crochet
SPECIAL STITCHES
SC2tog (using invisible decrease method): Insert hook into front loop of the first stitch. Insert hook into front loop of second stitch. Yarn over. Draw through the first two loops on hook. Yarn over. Draw through both loops on hook.
NOTES
- Checking your gauge is not required for this pattern. Use a hook that is smaller than the size recommended for your yarn weight. This will ensure that your stuffing will not show through the stitches.
- All pieces, with the exception of the frill, are worked in the round. Use a stitch marker to indicate the beginning of each round.
- Body, head, legs, arms, horns, and tail require stuffing. Stuff as you work it to ensure each piece is completely filled. Do not add stuffing to the frill.
- See tutorial photos.
PATTERN
Body
Using color A (shown as teal):
R1: Begin with 6 SC in a magic ring. (6 sts)
R2: 2 SC in each st around. (12 sts)
R3: *2 SC in next st, 1 SC in next st. Repeat from * around. (18 sts)
R4: *2 SC in next st, 1 SC in each of the next 2 sts. Repeat from * around. (24 sts)
R5: *2 SC in next st, 1 SC in each of the next 3 sts. Repeat from * around. (30 sts)
R6: *2 SC in next st, 1 SC in each of the next 4 sts. Repeat from * around. (36 sts)
R7: *2 SC in next st, 1 SC in each of the next 5 sts. Repeat from * around. (42 sts)
R8: *2 SC in next st, 1 SC in each of the next 6 sts. Repeat from * around. (48 sts)
R9-16: 1 SC in each st around. (48 sts)
R17: *SC2tog, 1 SC in each of the next 6 sts. Repeat from * around. (42 sts)
R18: 1 SC in each st around. (42 sts)
R19: *SC2tog, 1 SC in each of the next 5 sts. Repeat from * around. (36 sts)
R20: 1 SC in each st around. (36 sts)
R21: *SC2tog, 1 SC in each of the next 4 sts. Repeat from * around. (30 sts)
R22: 1 SC in each st around. (30 sts)
R23: *SC2tog, 1 SC in each of the next 3 sts. Repeat from * around. (24 sts)
R24: *SC2tog, 1 SC in each of the next 2 sts. Repeat from * around. (18 sts).
Cut yarn, leaving long strand for sewing. Fasten off.
Fill with stuffing.
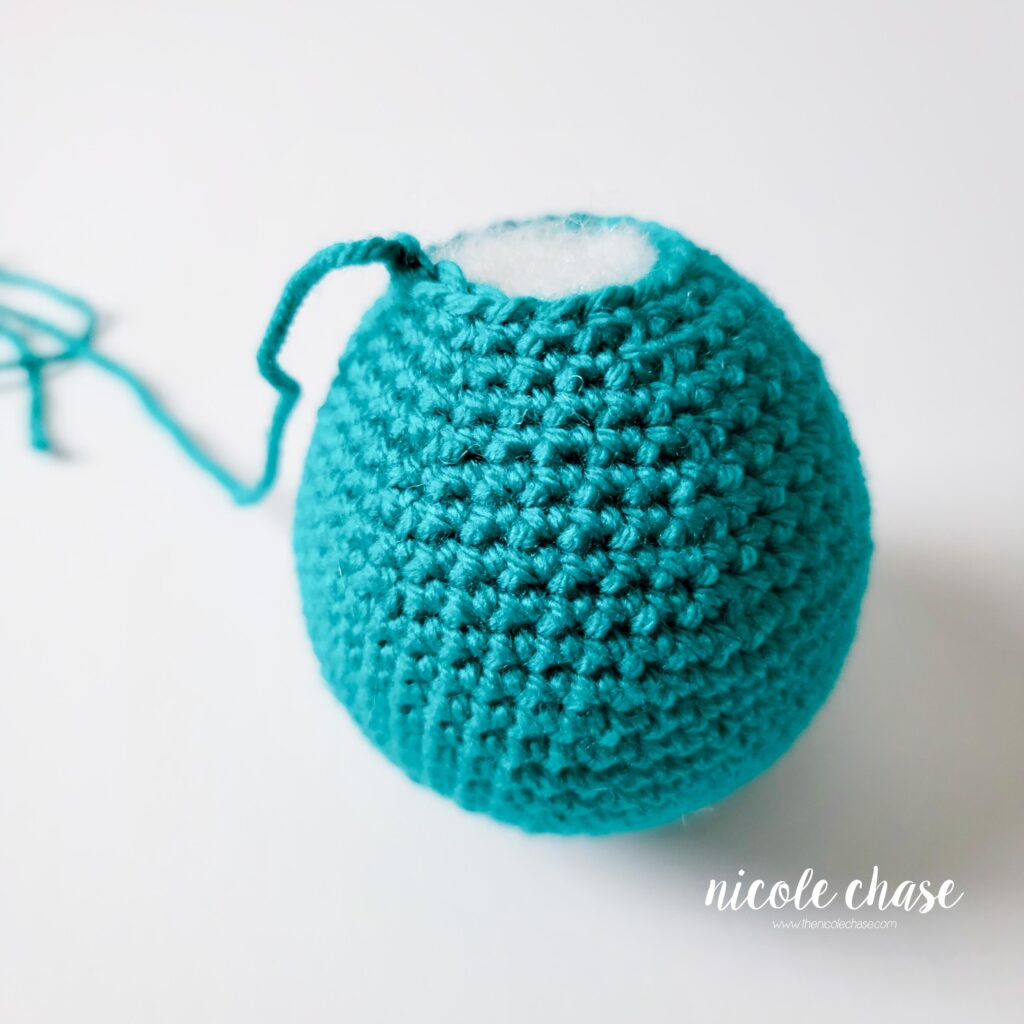
Head
Using color A (shown as teal):
R1: Begin with 6 SC in a magic ring. (6 sts)
R2: 2 SC in each st around. (12 sts)
R3: *2 SC in next st, 1 SC in next st. Repeat from * around. (18 sts)
R4: *2 SC in next st, 1 SC in each of the next 2 sts. Repeat from * around. (24 sts)
R5: *2 SC in next st, 1 SC in each of the next 3 sts. Repeat from * around. (30 sts)
R6-10: 1 SC in each st around. (30 sts)
R11: *2 SC in next st, 1 SC in each of the next 4 sts. Repeat from * around. (36 sts)
R12: 1 SC in each st around. (36 sts)
R13: *2 SC in next st, 1 SC in each of the next 5 sts. Repeat from * around. (42 sts)
R14: *2 SC in next st, 1 SC in each of the next 6 sts. Repeat from * around. (48 sts)
R15: *2 SC in next st, 1 SC in each of the next 3 sts. Repeat from * an additional 5 times. 1 SC in each of the next 24 sts around. (54 sts)
R16: *2 SC in next st, 1 SC in each of the next 4 sts. Repeat from * an additional 5 times. 1 SC in each of the next 24 sts around. (60 sts)
R17: 1 SC in each of the next 32 sts around. Add a st marker to the last worked st. 1 SC in each of the next 28 sts around. (60 sts)
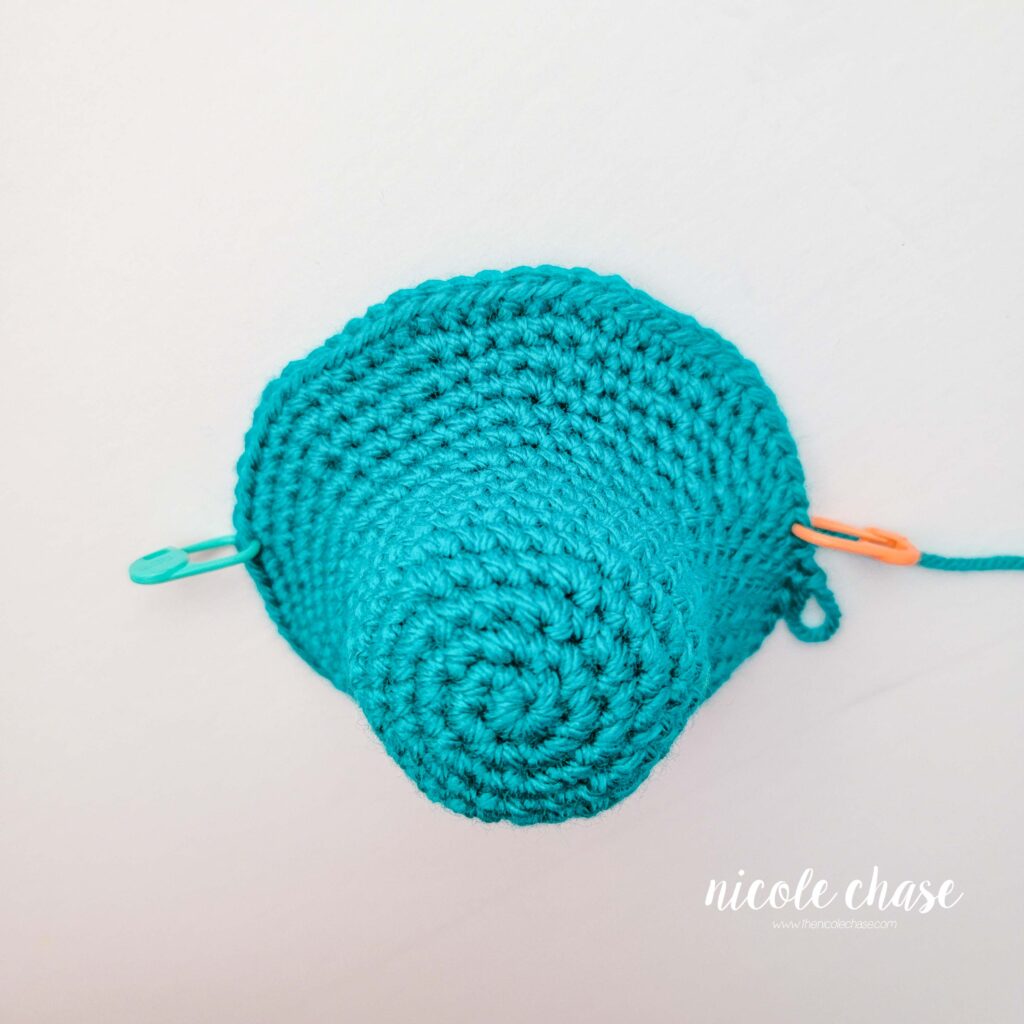
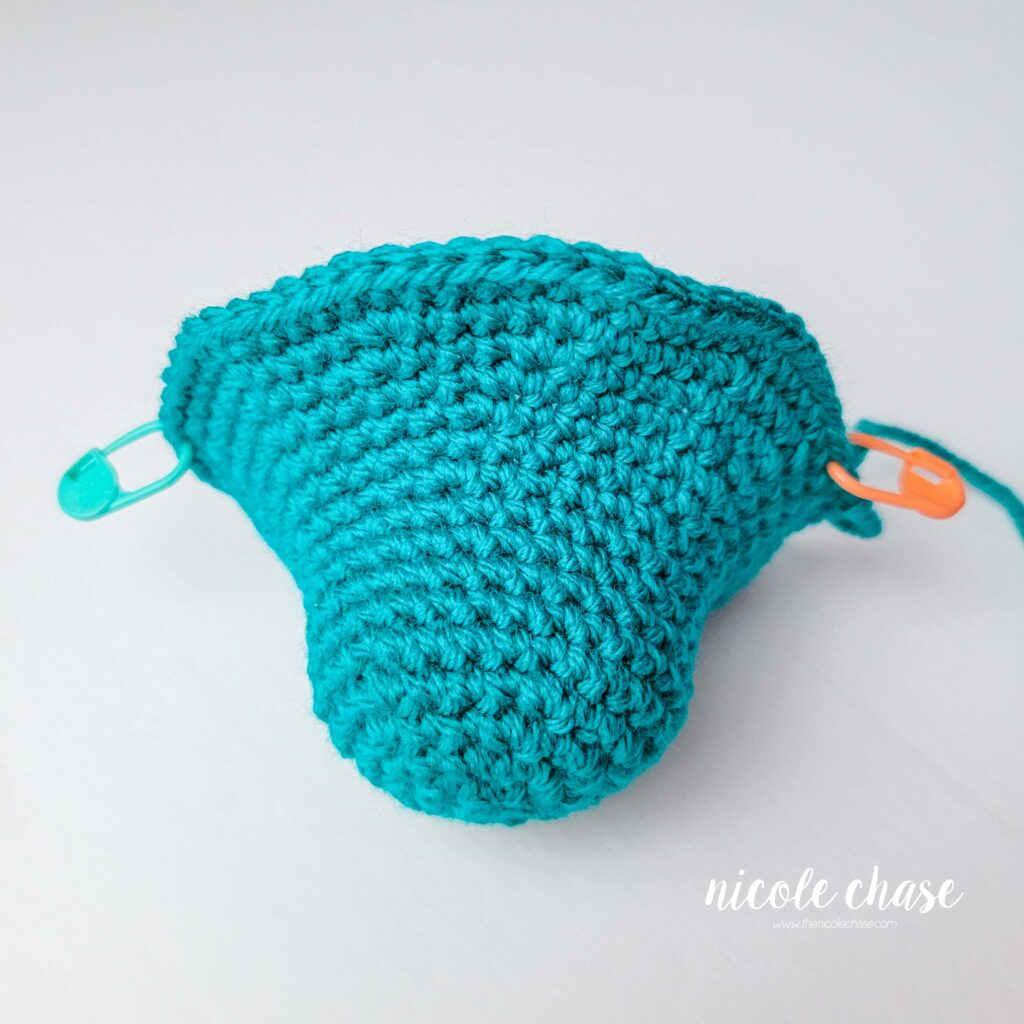
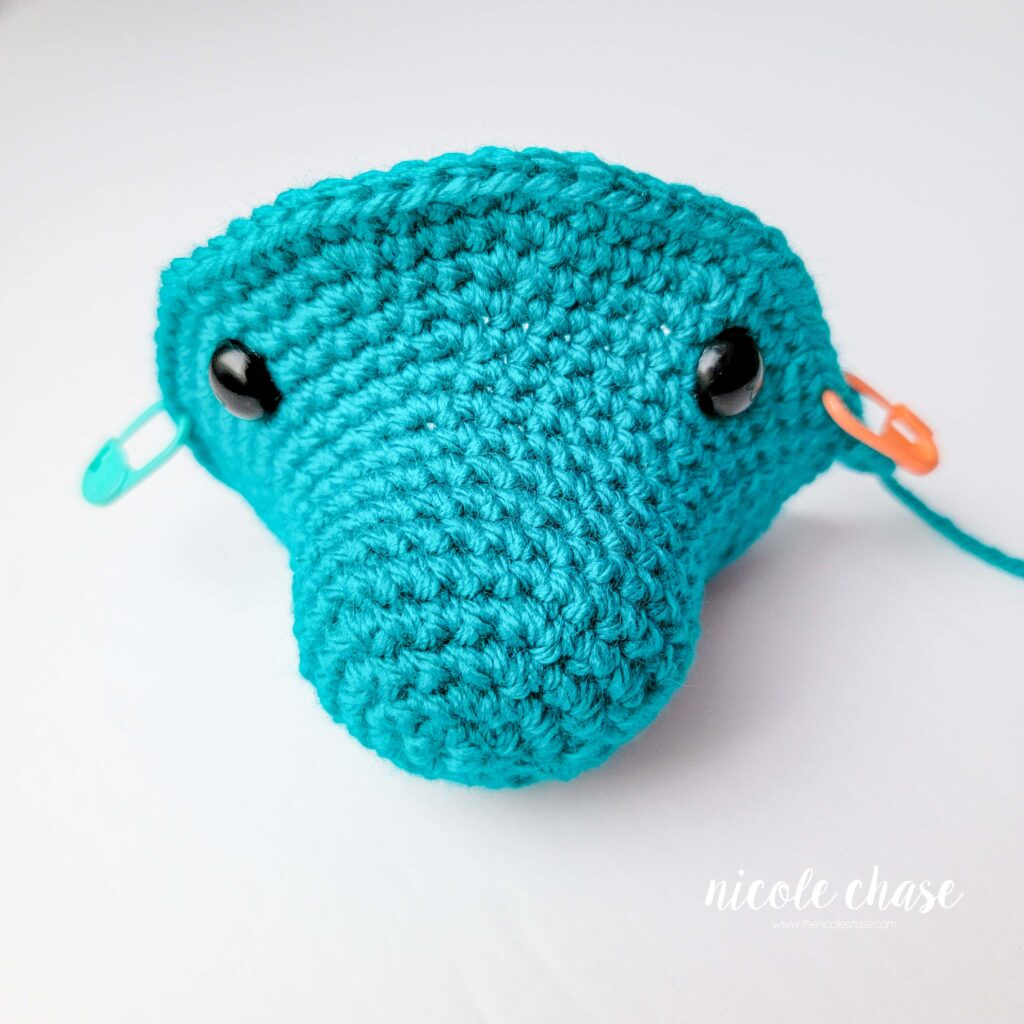
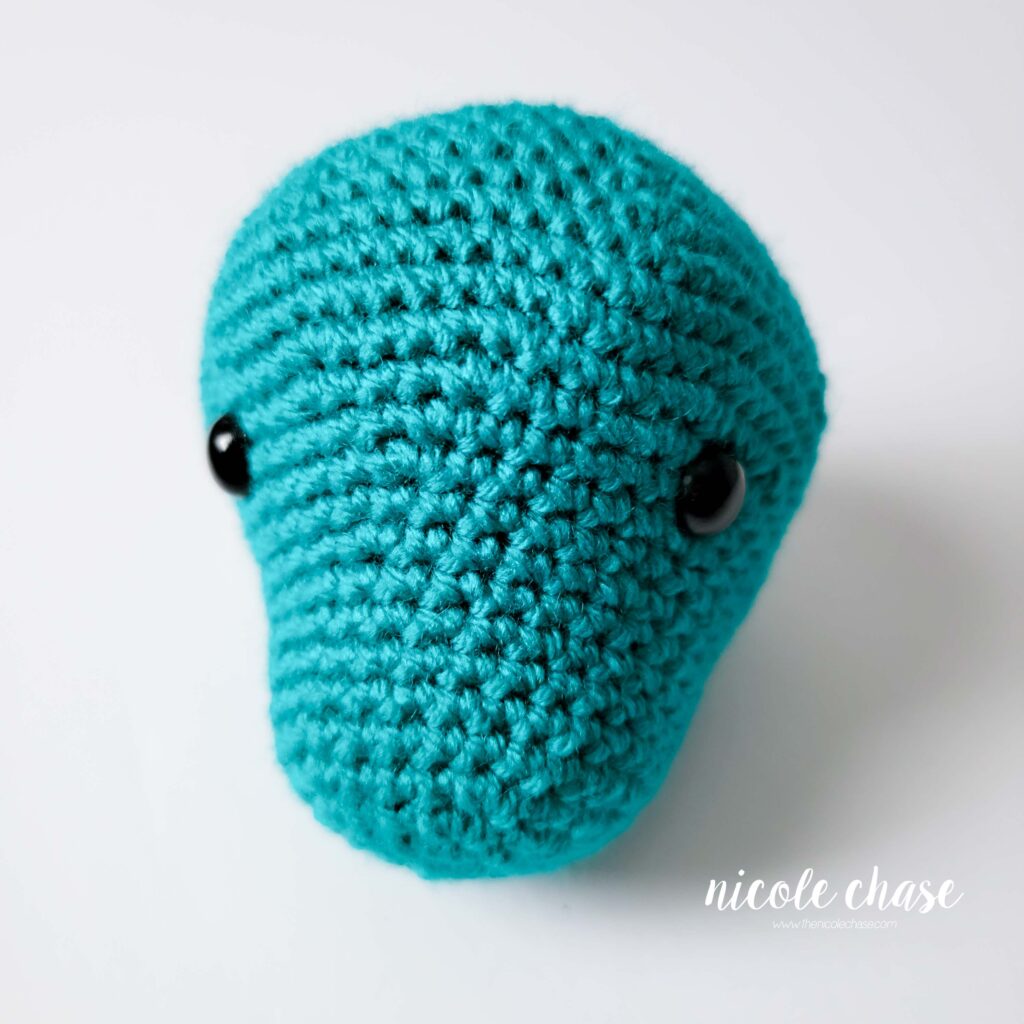
The added st marker, and the st marker at the beginning of this round helps to indicate the front of the face. The 28 sts between the two st markers sit flat and indicate the bottom of the head. If using safety eyes, insert eyes between R14 and R15, with 14 sts between. Embroider around eyes for additional detail, if desired. You can now remove your second st marker. See tutorial photos.
R18-19: 1 SC in each st around. (60 sts)
R20: *SC2tog, 1 SC in each of the next 8 sts. Repeat from * around. (54 sts)
R21: * SC2tog, 1 SC in each of the next 7 sts. Repeat from * around. (48 sts)
R22: 1 SC in each st around. (48 sts)
R23: *SC2tog, 1 SC in each of the next 6 sts. Repeat from * around. (42 sts)
R24: *SC2tog, 1 SC in each of the next 5 sts. Repeat from * around. (36 sts)
R25: 1 SC in each st around. (36 sts)
R26: *SC2tog, 1 SC in each of the next 4 sts. Repeat from * around. (30 sts)
R27: *SC2tog, 1 SC in each of the next 3 sts. Repeat from * around. (24 sts)
R28: *SC2tog, 1 SC in each of the next 2 sts. Repeat from * around. (18 sts)
Fill with stuffing.
R29: *SC2tog, 1 SC in the next st. Repeat from * around. (12 sts)
R30: *SC2tog. Repeat from * around. (6 sts)
Cut yarn, weave yarn in and out of remaining sts. Pull tight to close. Weave in ends.
Small Horn
Using color A (shown as teal):
R1: Begin with 6 SC in a magic ring. (6 sts)
R2: 1 SC in each st around. (6 sts)
R3: 2 SC in next st, 1 SC in next st. Repeat around. (9 sts)
R4: 1 SC in each st around. (9 sts)
R5: 2 SC in next st, 1 SC in each of the next 2 sts. Repeat around. (12 sts)
R6: 1 SC in each st around. (12 sts)
Leave long tail for sewing. Fasten off.
Fill with stuffing.
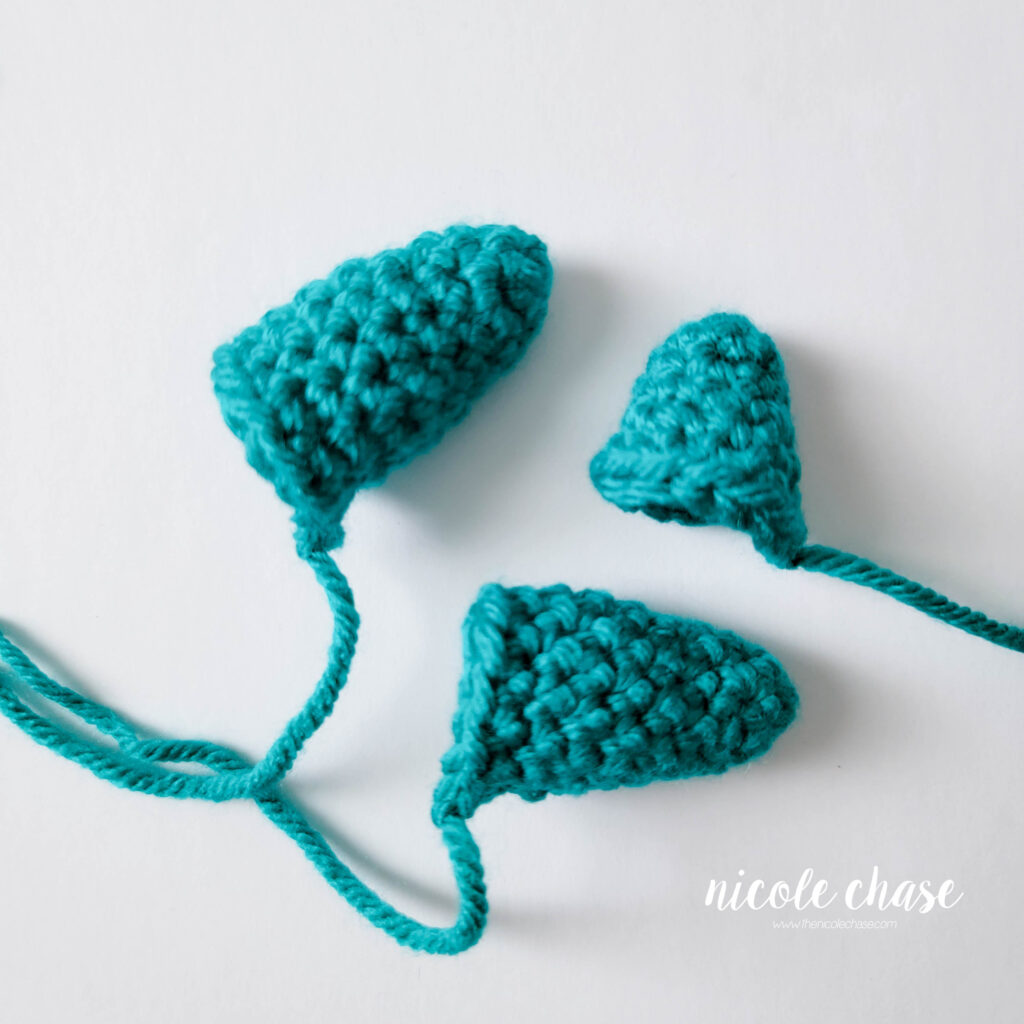
Large Horns (make 2)
Using color A (shown as teal):
R1: Begin with 6 SC in a magic ring. (6 sts)
R2: 1 SC in each st around. (6 sts)
R3: 2 SC in next st, 1 SC in next st. Repeat around. (9 sts)
R4: 1 SC in each st around. (9 sts)
R5: 2 SC in next st, 1 SC in each of the next 2 sts. Repeat around. (12 sts)
R6-9: 1 SC in each st around. (12 sts)
Leave long tail for sewing. Fasten off.
Fill with stuffing.
Frill Front
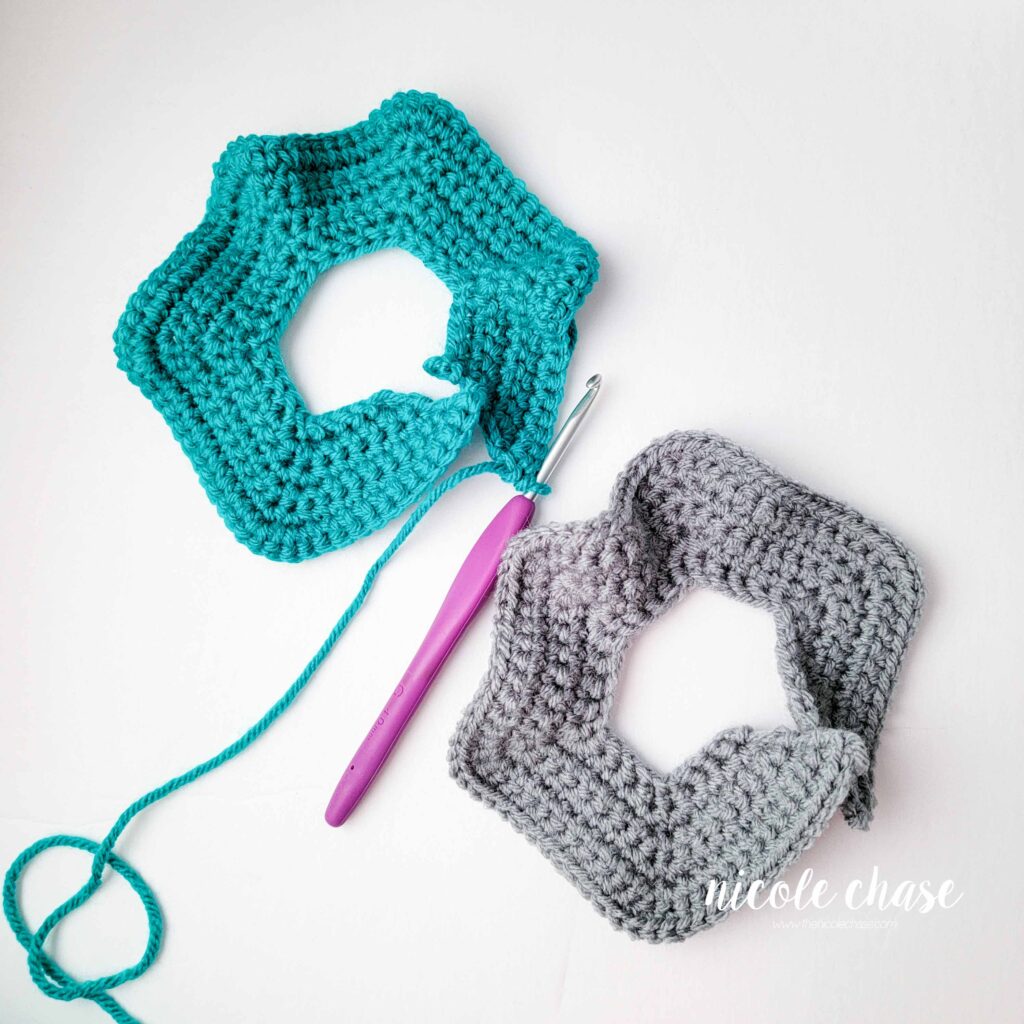
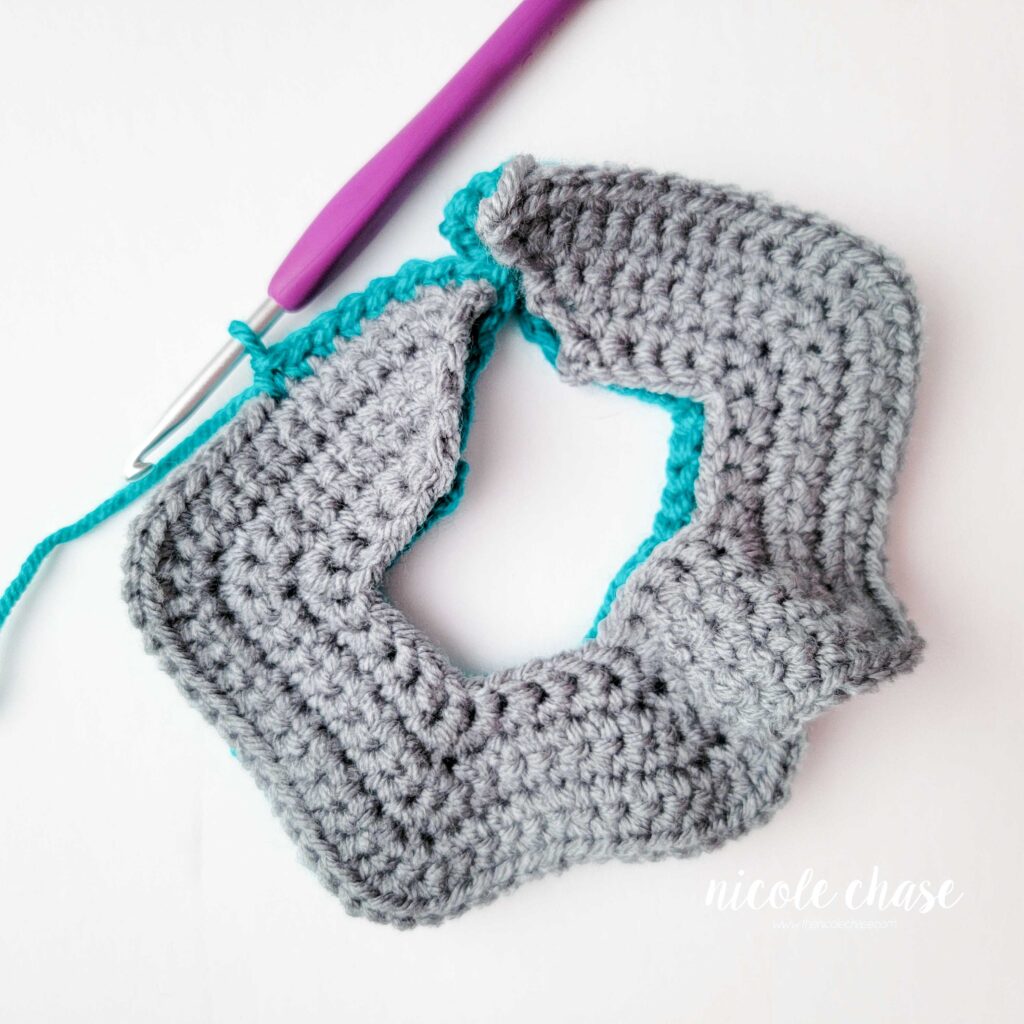
NOTE: When working the frill, be sure to complete the entire repeat. The repeat both starts and ends with 2SC. Therefore, when working the full sequence of stitches, followed by the same sequence of stitches, the row will look something like this like this: (2SC, 1SC, 1SC, 1SC, 2SC), (2SC, 1SC, 1SC, 1SC, 2SC), (2SC, 1 SC, 1 SC, 1SC, 2 SC), and so on.
*** NOTE: The foundation single crochet stitch is preferred; however, you could alternatively replace R1 with: Ch 31, SC in second ch from hook and each ch to end. (30 sts), and then proceed as written with R2.
Using color B (shown as gray):
R1: 30 FSC***. (30 sts)
R2: Ch 1, turn. *2 SC in next st, 1 SC in each of the next 3 sts, 2 SC in next st. Repeat from * across. (42 sts)
R3: Ch 1, turn. *2 SC in next st, 1 SC in each of the next 5 sts, 2 SC in next st. Repeat from * across. (54 sts)
R4: Ch 1, turn. *2 SC in next st, 1 SC in each of the next 7 sts, 2 SC in next st. Repeat from * across. (66 sts)
R5: Ch 1, turn. *2 SC in next st, 1 SC in each of the next 9 sts, 2 SC in next st. Repeat from * across. (78 sts)
R6: Ch 1, turn. *2 SC in next st, 1 SC in each of the next 11 sts, 2 SC in next st. Repeat from * across. (90 sts)
Fasten off.
Frill Back
Using color A (shown as teal):
R1: 30 FSC. (30 sts)
R2: Ch 1, turn. *2 SC in next st, 1 SC in each of the next 3 sts, 2 SC in next st. Repeat from * across. (42 sts)
R3: Ch 1, turn. *2 SC in next st, 1 SC in each of the next 5 sts, 2 SC in next st. Repeat from * across. (54 sts)
R4: Ch 1, turn. *2 SC in next st, 1 SC in each of the next 7 sts, 2 SC in next st. Repeat from * across. (66 sts)
R5: Ch 1, turn. *2 SC in next st, 1 SC in each of the next 9 sts, 2 SC in next st. Repeat from * across. (78 sts)
R6: Ch 1, turn. *2 SC in next st, 1 SC in each of the next 11 sts, 2 SC in next st. Repeat from * across. (90 sts)
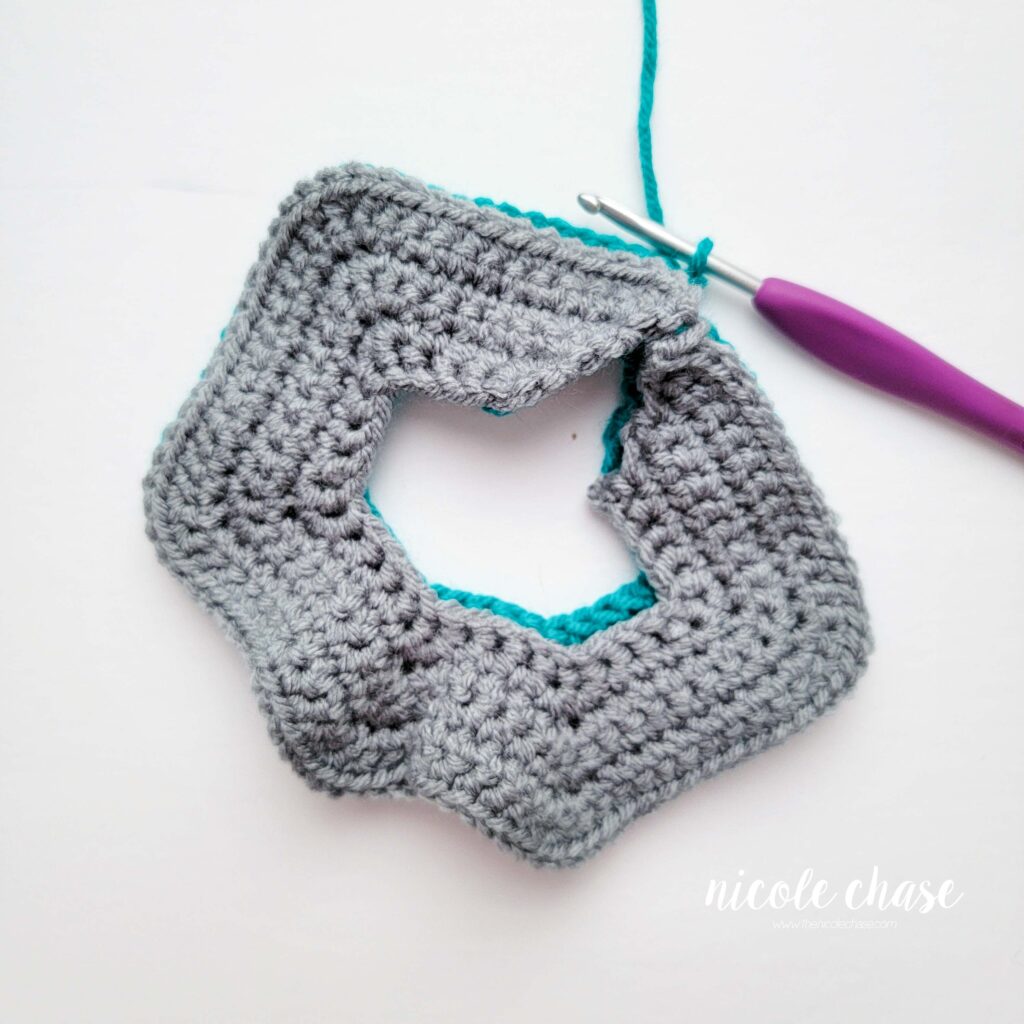
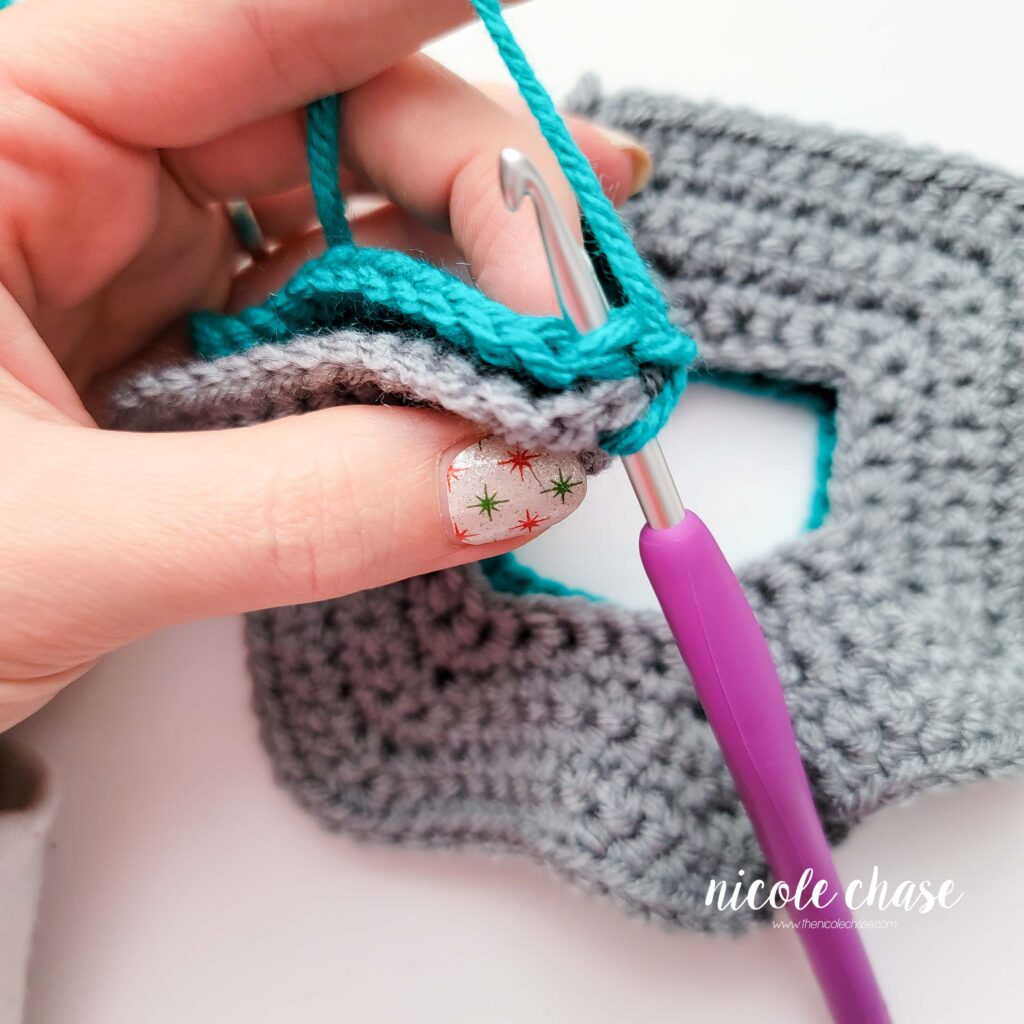
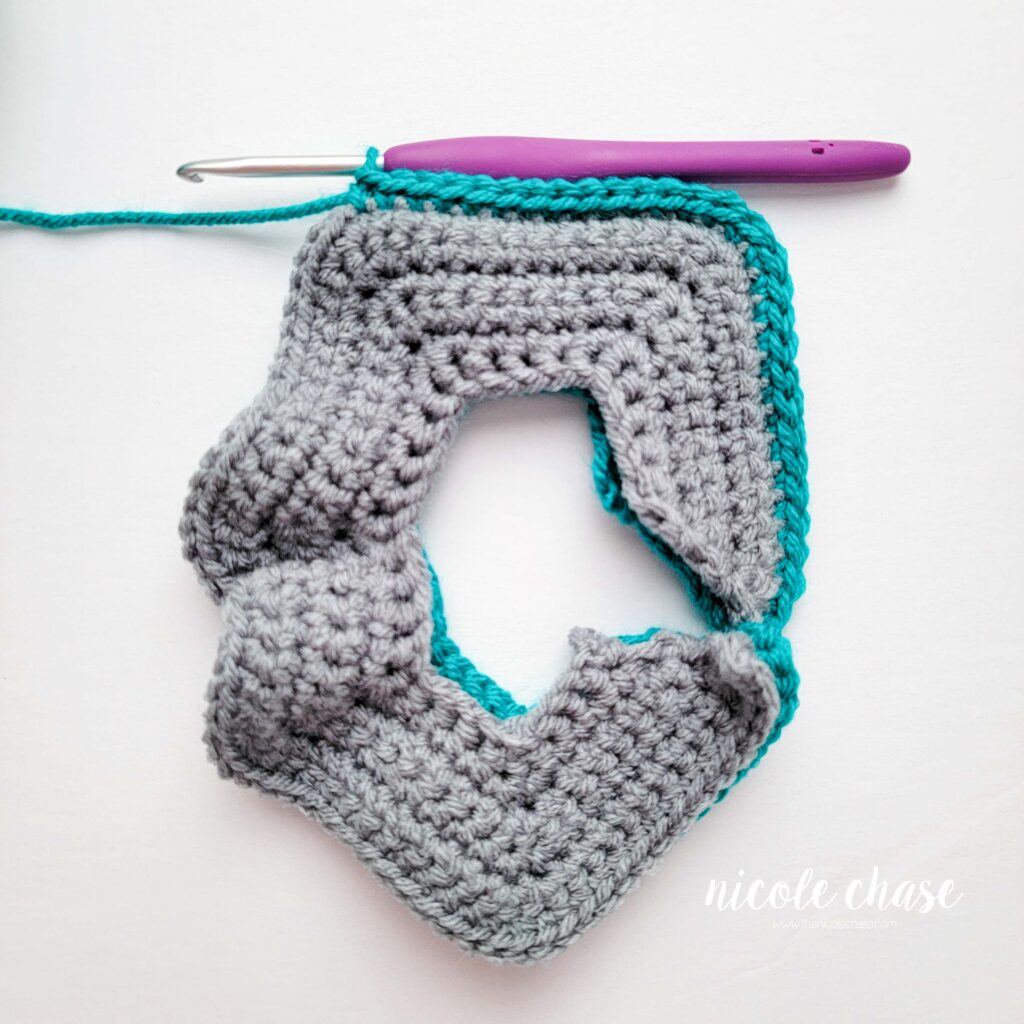
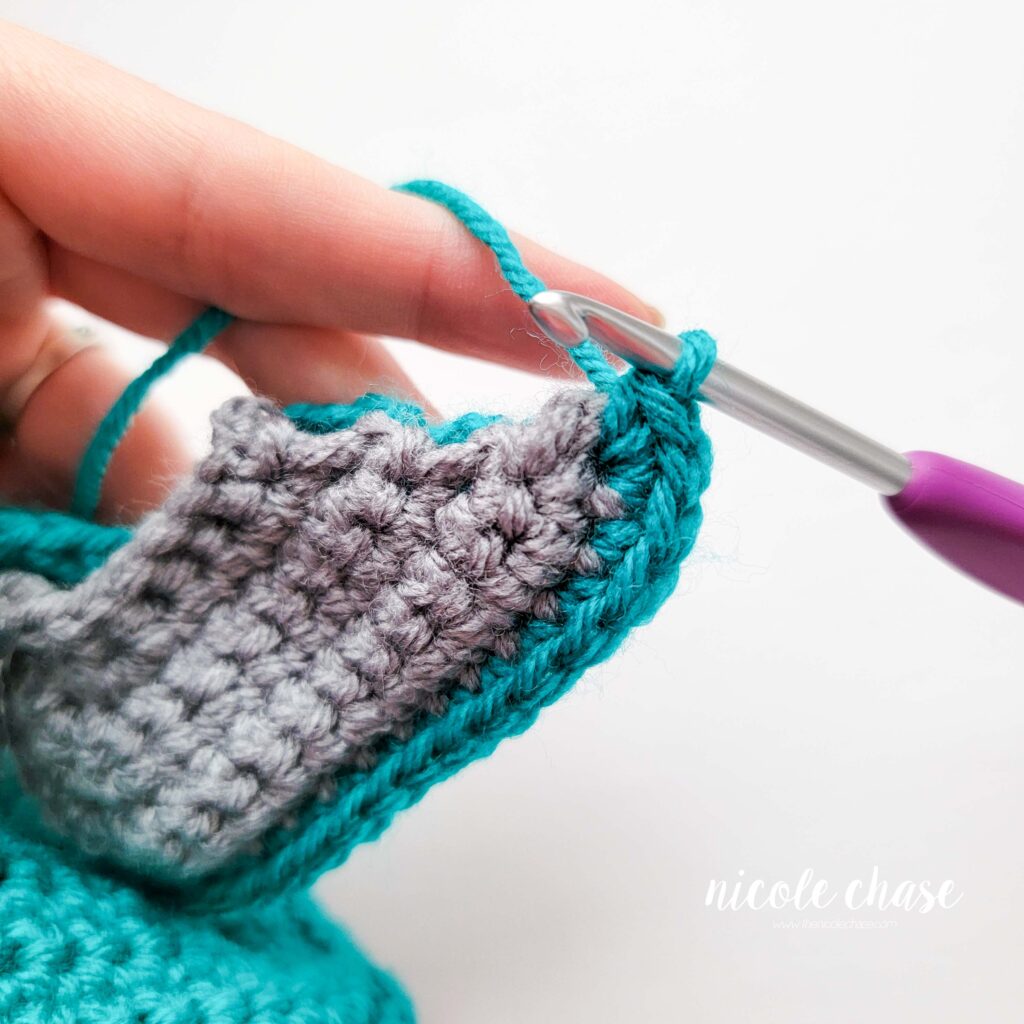
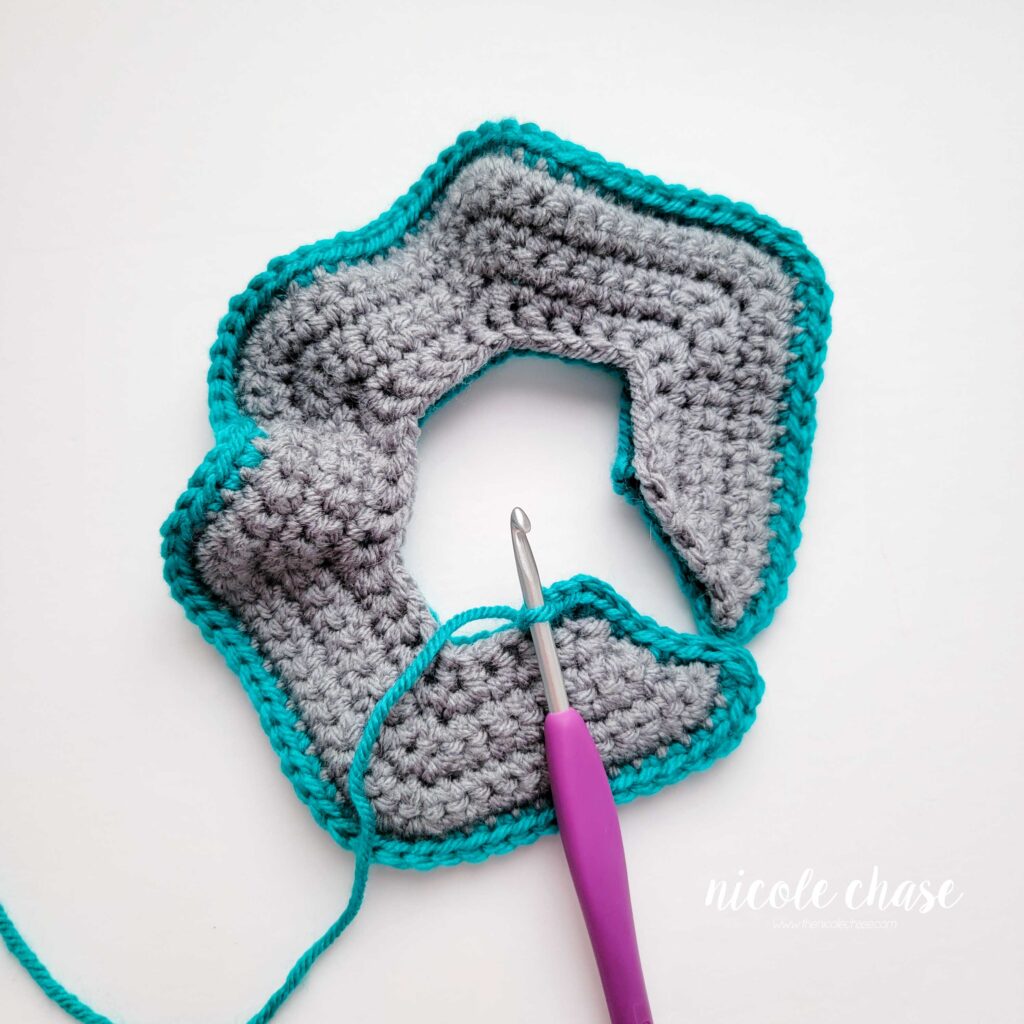
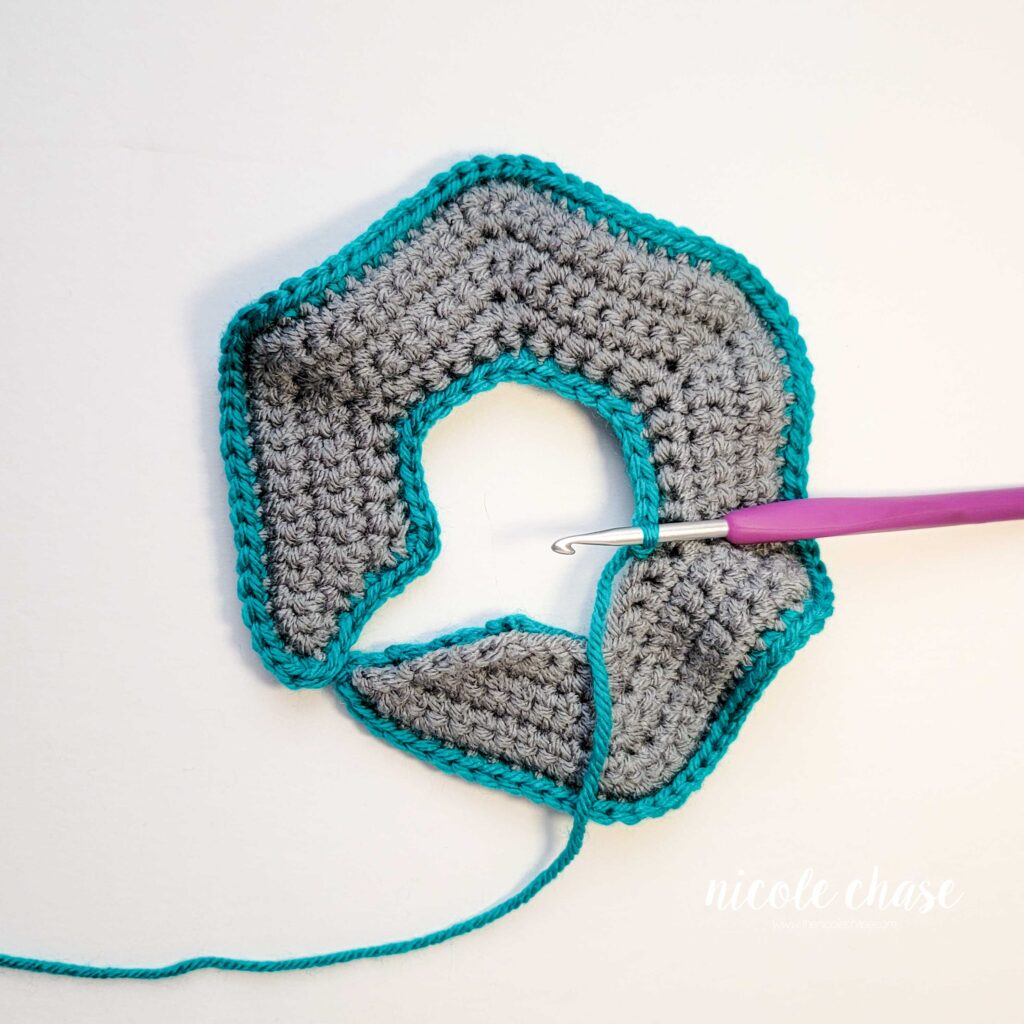
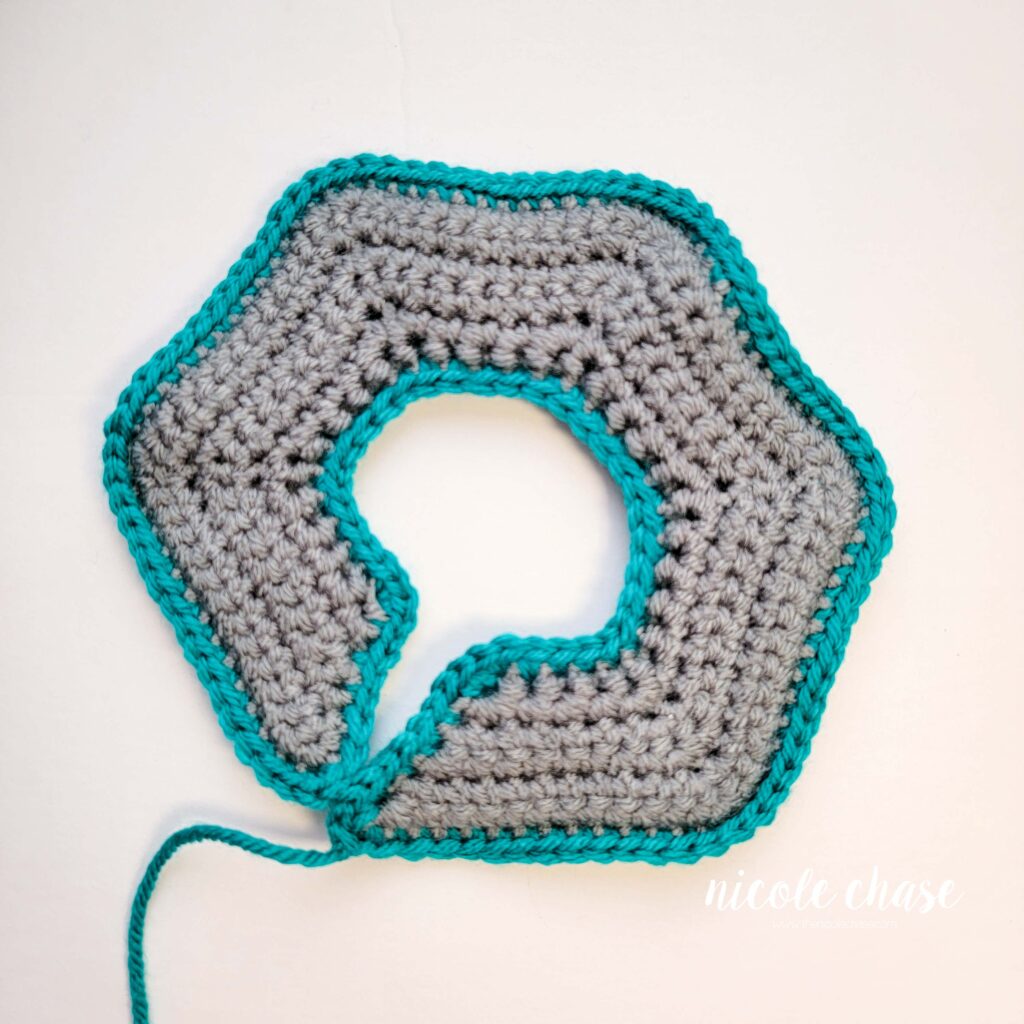
R7: Ch 1, turn. Hold the Frill Front against the Frill Back. Working through each layer, SC around the entire Frill to beginning, working 1 SC in each st, and 3 SC when rounding each of the four corners. See tutorial photos.
Cut yarn, leaving long strand for sewing. Fasten off.
Legs (make 2)
Using color B (shown as gray):
R1: Begin with 6 SC in a magic ring. (6 sts)
R2: 2 SC in each st around. (12 sts)
R3: *2 SC in next st, 1 SC in next st. Repeat from * around. (18 sts)
R4: *2 SC in next st, 1 SC in each of the next 2 sts. Repeat from * around. (24 sts)
R5: *2 SC in next st, 1 SC in each of the next 3 sts. Repeat from * around. (30 sts)
R6: *2 SC in next st, 1 SC in each of the next 4 sts. Repeat from * around. (36 sts)
Using color A (shown as teal):
R7-8: 1 SC in each st around. (36 sts)
R9: *SC2tog, 1 SC in each of the next 4 sts. Repeat from * around. (30 sts)
R10: 1 SC in each st around. (30 sts)
R11: *SC2tog, 1 SC in each of the next 3 sts. Repeat from * around. (24 sts)
R12: *SC2tog, 1 SC in each of the next 4 sts. Repeat from * around. (20 sts)
R13-20: 1 SC in each st around. (20 sts)
Fill with stuffing.
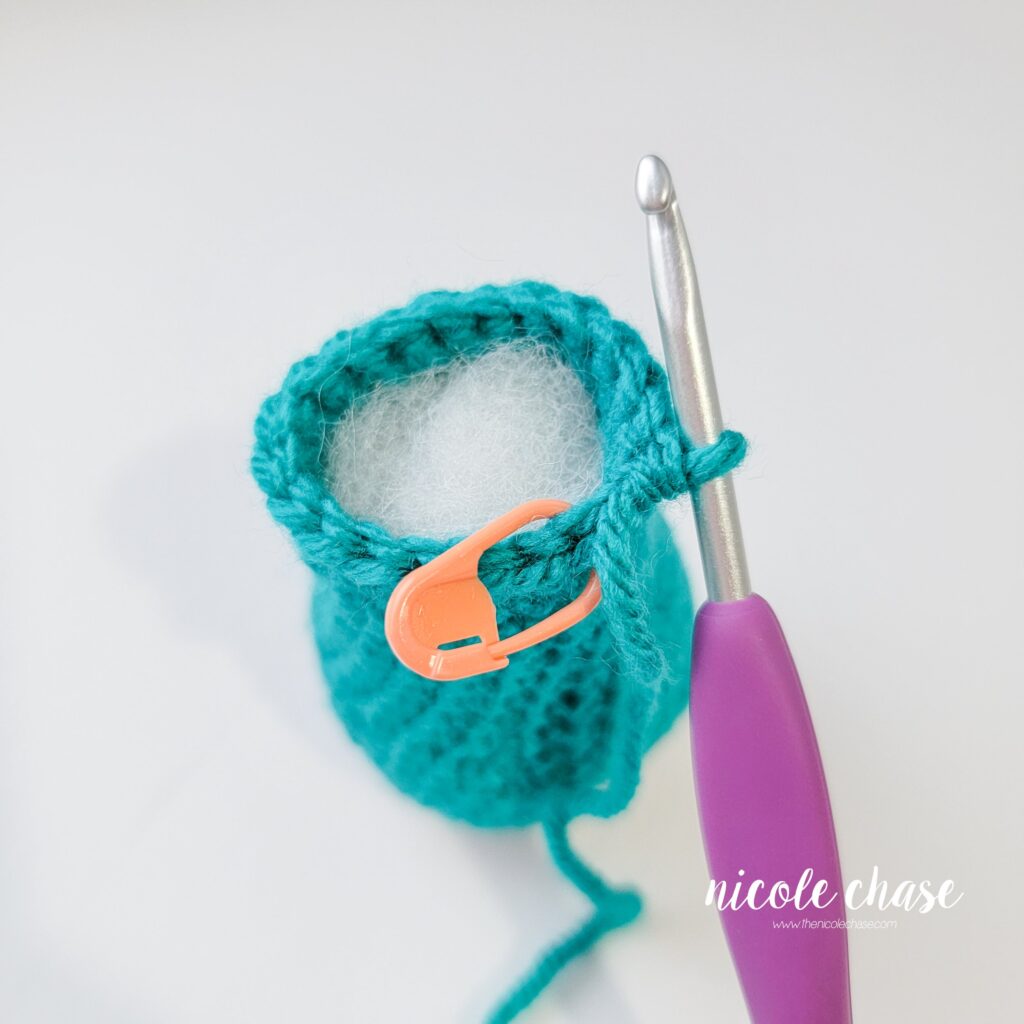
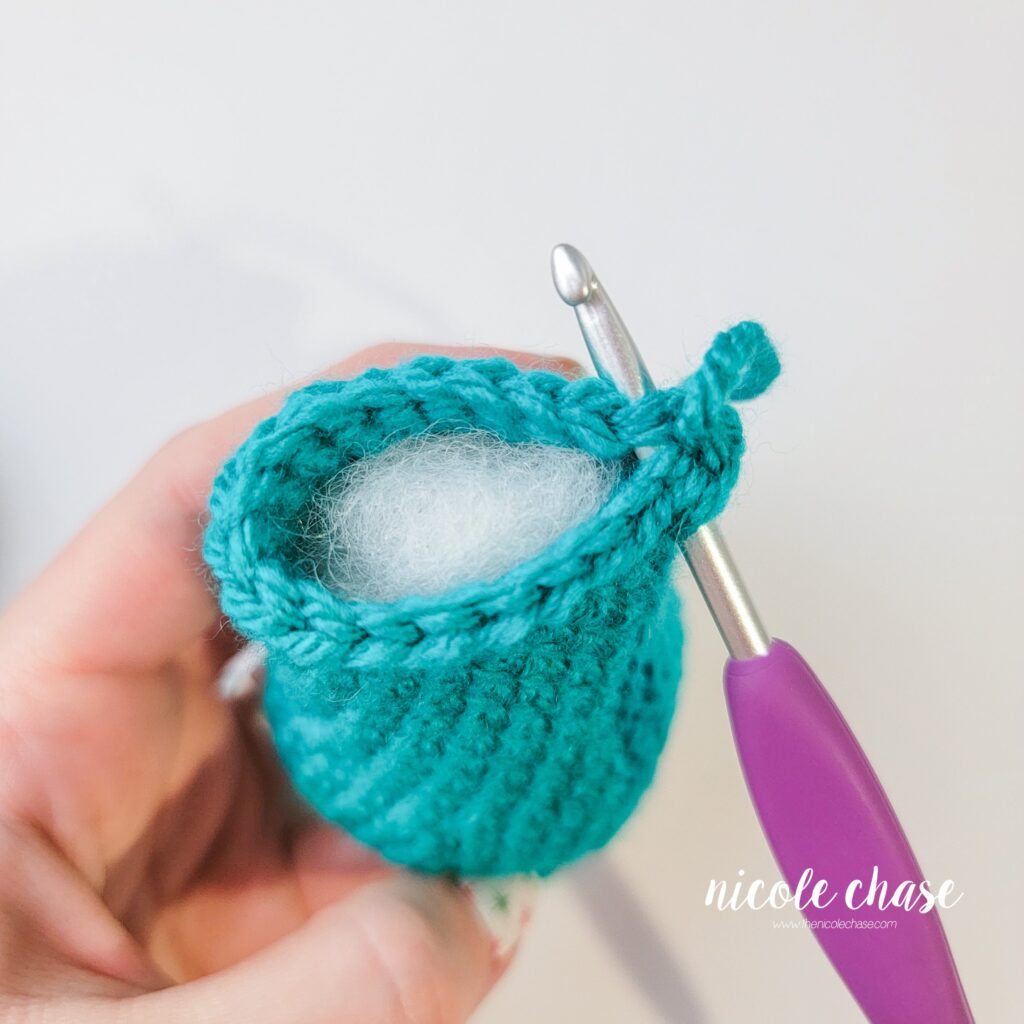
R21: Fold the leg closed. Working through both sides, 1 SC in each st across, leaving 1 unworked st on each side. See tutorial photos. (9 sts)
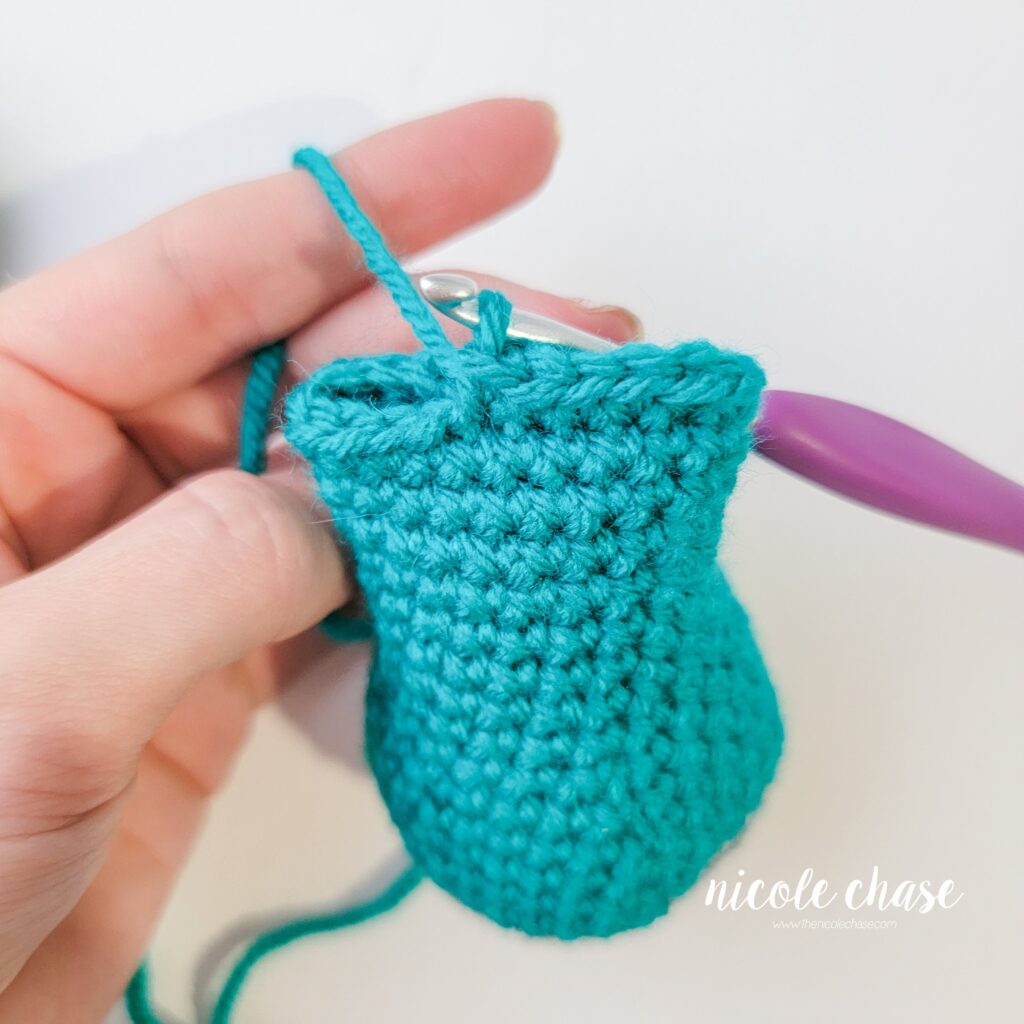
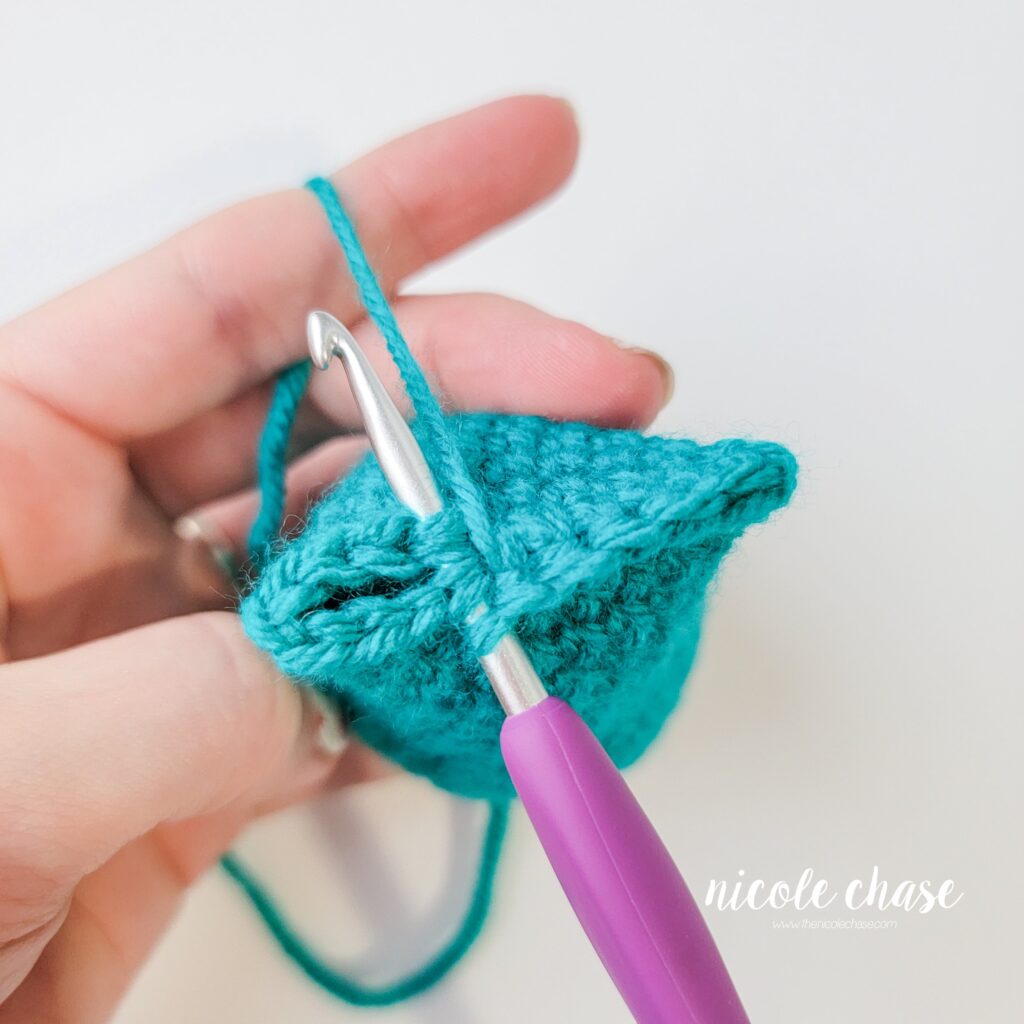
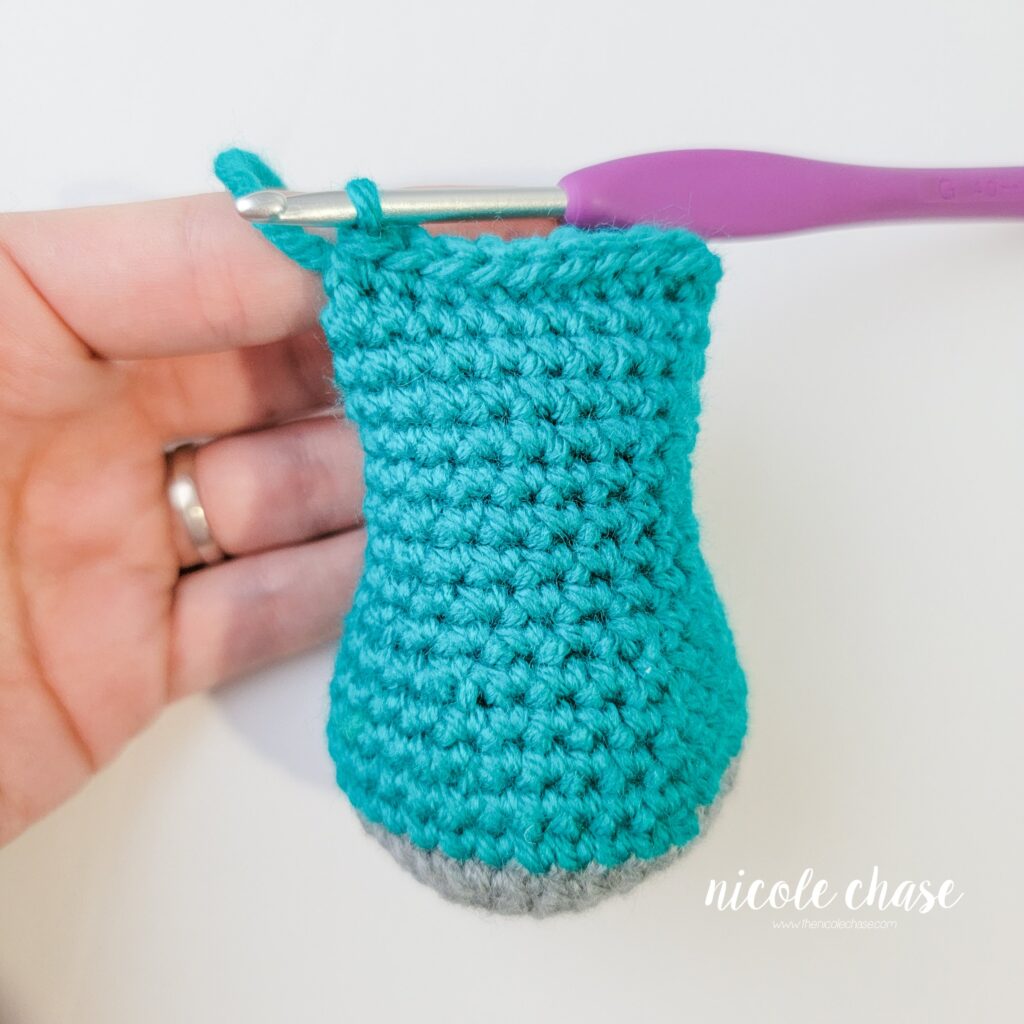
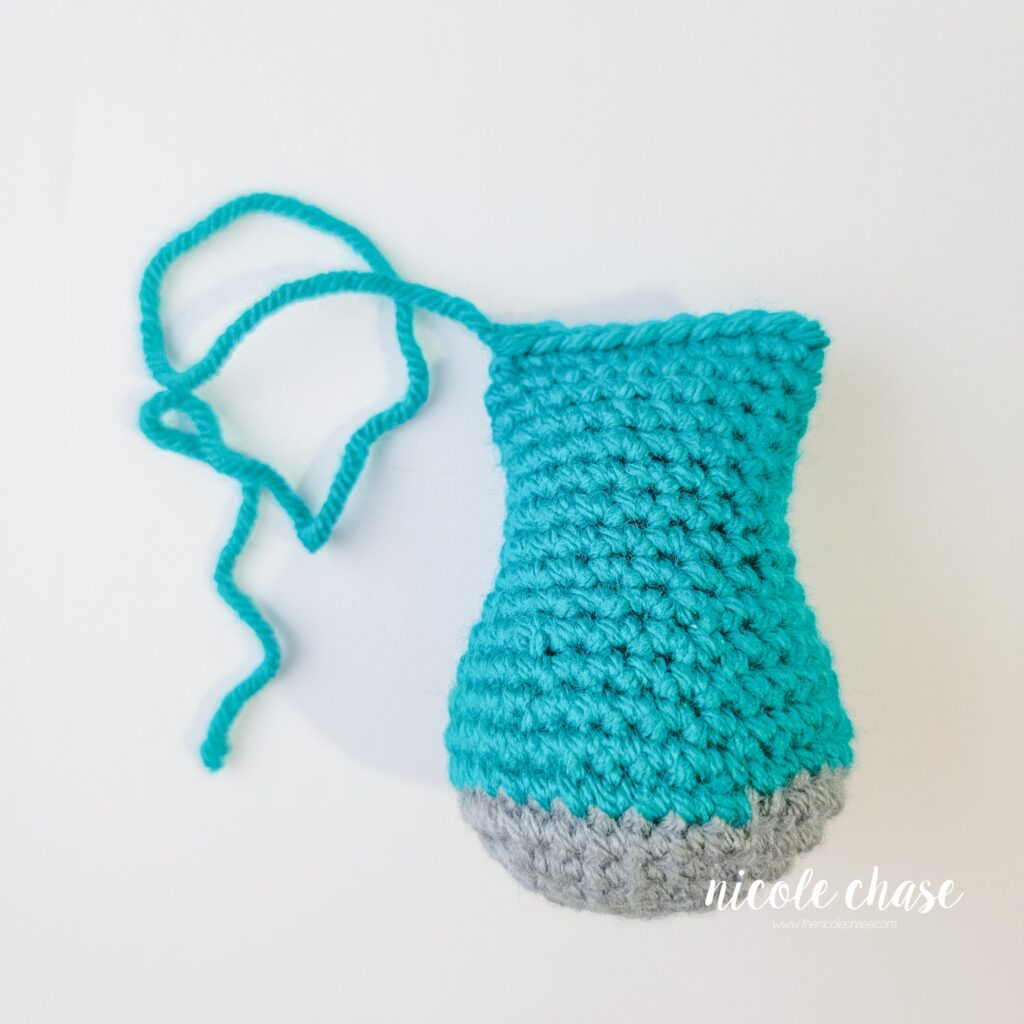
Cut yarn, leaving long strand for sewing.
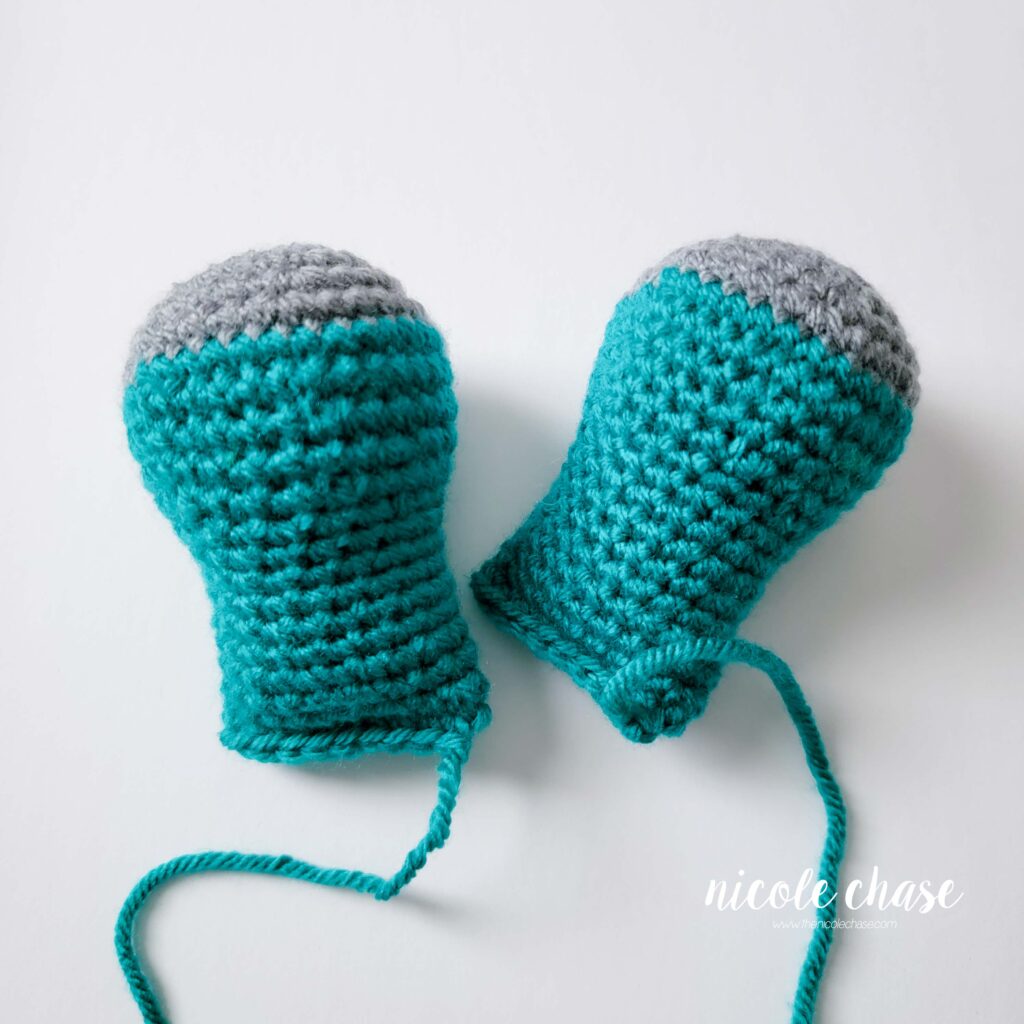
Arms (make 2)
Using color B (shown as gray):
R1: Begin with 6 SC in a magic ring. (6 sts)
R2: 2 SC in each st around. (12 sts)
R3: *2 SC in next st, 1 SC in next st. Repeat from * around. (18 sts)
R4: *2 SC in next st, 1 SC in each of the next 2 sts. Repeat from * around. (24 sts)
R5: *2 SC in next st, 1 SC in each of the next 3 sts. Repeat from * around. (30 sts)
Using color A (shown as teal):
R6-7: 1 SC in each st around. (30 sts)
R8: *SC2tog, 1 SC in each of the next 3 sts. Repeat from * around. (24 sts)
R9: 1 SC in each st around. (24 sts)
R10: *SC2tog, 1 SC in each of the next 2 sts. Repeat from * around. (18 sts)
R11-18: 1 SC in each st around. (18 sts)
Fill with stuffing.
R19: Fold the arm closed. Working through both sides, 1 SC in each st across, leaving 1 unworked st on each side. See tutorial photos. (8 sts)
Cut yarn, leaving long strand for sewing.
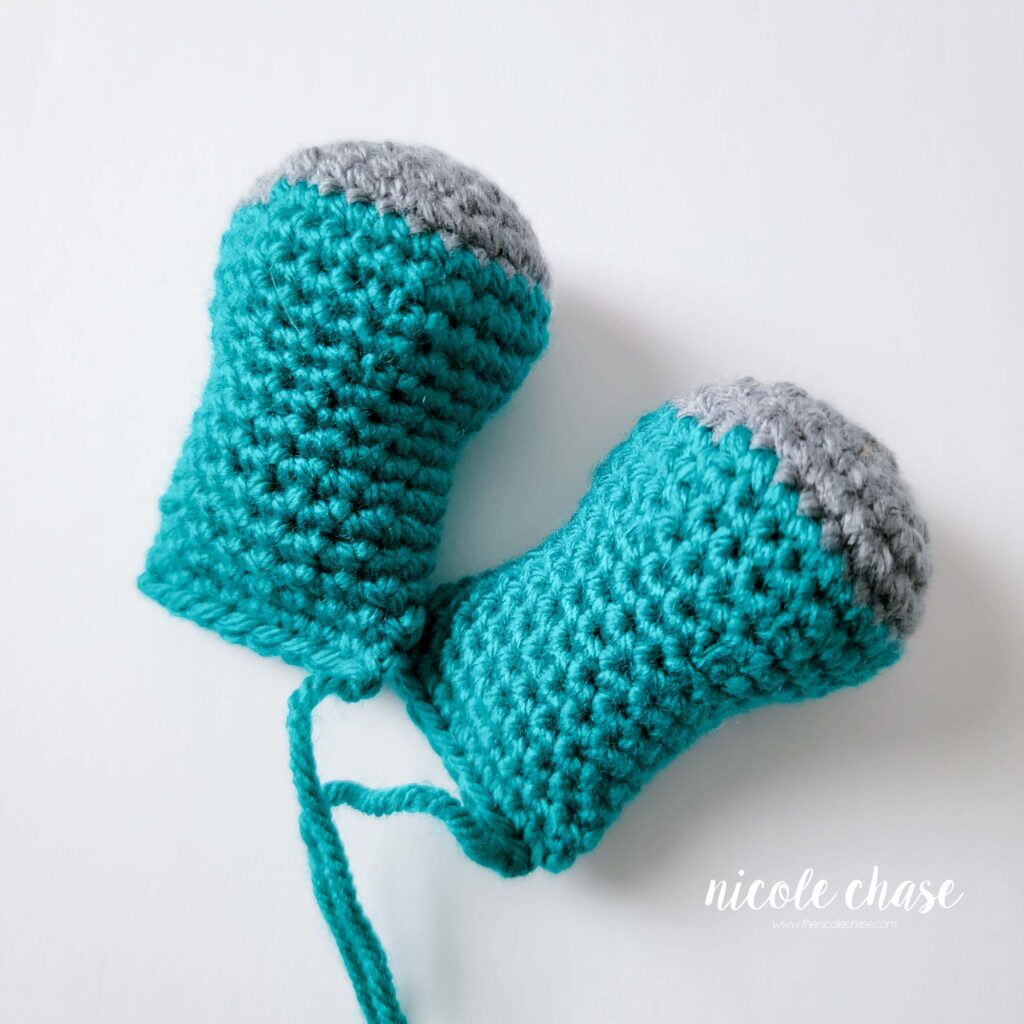
Tail
Using color A (shown as teal):
R1: Begin with 6 SC in a magic ring. (6 sts)
R2: 1 SC in each st around. (6 sts)
R3: *2 SC in next st, 1 SC in next st. Repeat from * around. (9 sts)
R4: 1 SC in each st around. (9 sts)
R5: *2 SC in next st, 1 SC in each of the next 2 sts. Repeat from * around. (12 sts)
R6-7: 1 SC in each st around. (12 sts)
R8: *2 SC in next st, 1 SC in each of the next 3 sts. Repeat from * around. (15 sts)
R9: 1 SC in each st around. (15 sts)
R10: *2 SC in next st, 1 SC in each of the next 4 sts. Repeat from * around. (18 sts)
R11-12: 1 SC in each st around. (18 sts)
R13: *2 SC in next st, 1 SC in each of the next 2 sts. Repeat from * around. (24 sts)
R14-15: 1 SC in each st around. (24 sts)
Cut yarn, leaving long strand for sewing. Fasten off.
Fill with stuffing.
ASSEMBLY & FINISHING
See tutorial photos.
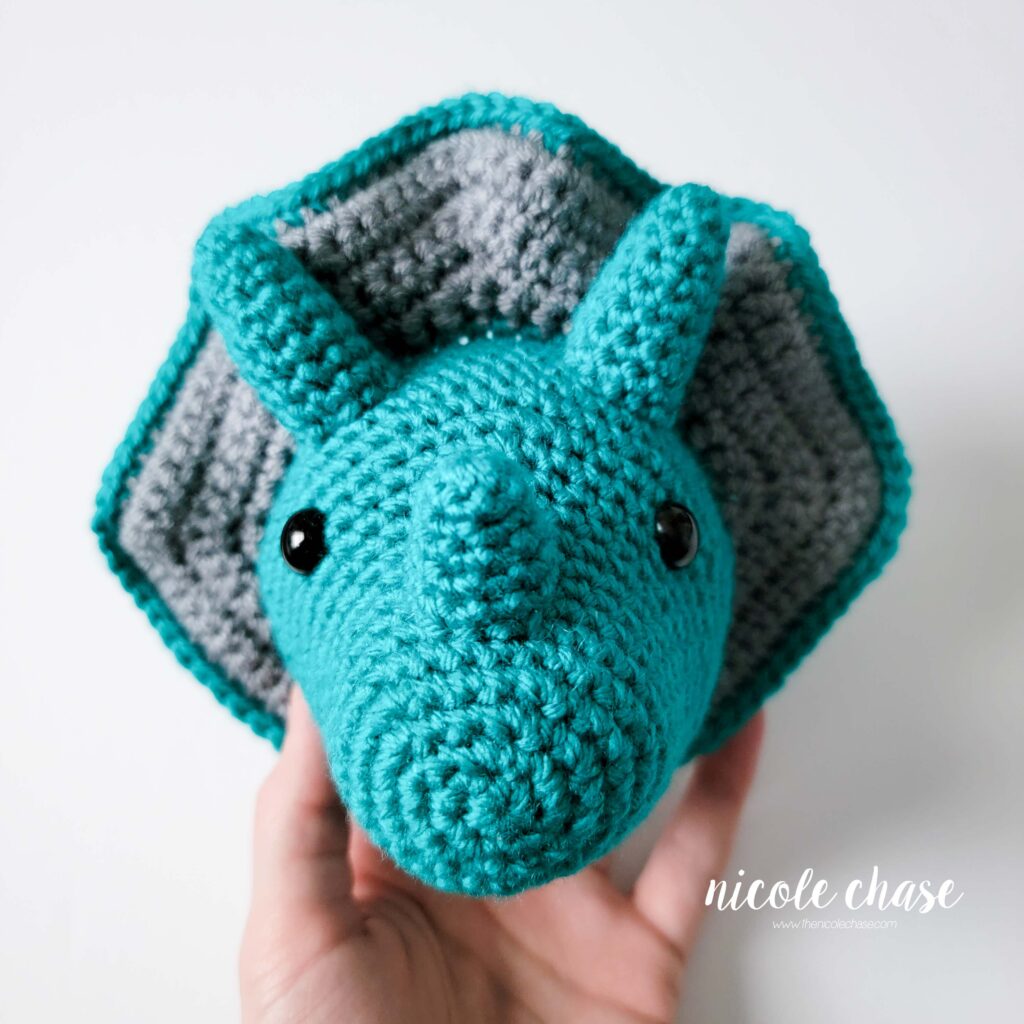
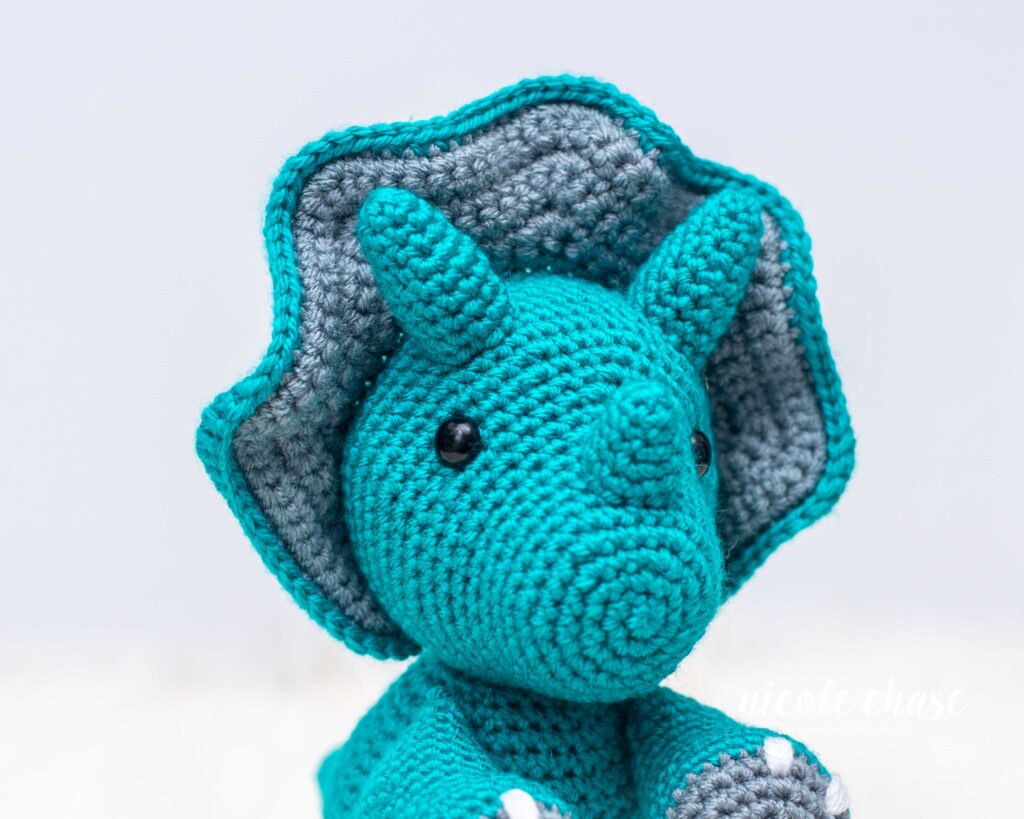
Attach small horn over R6-9, on the top middle of snout. Attach large horns between R17-21 on the top of the head.
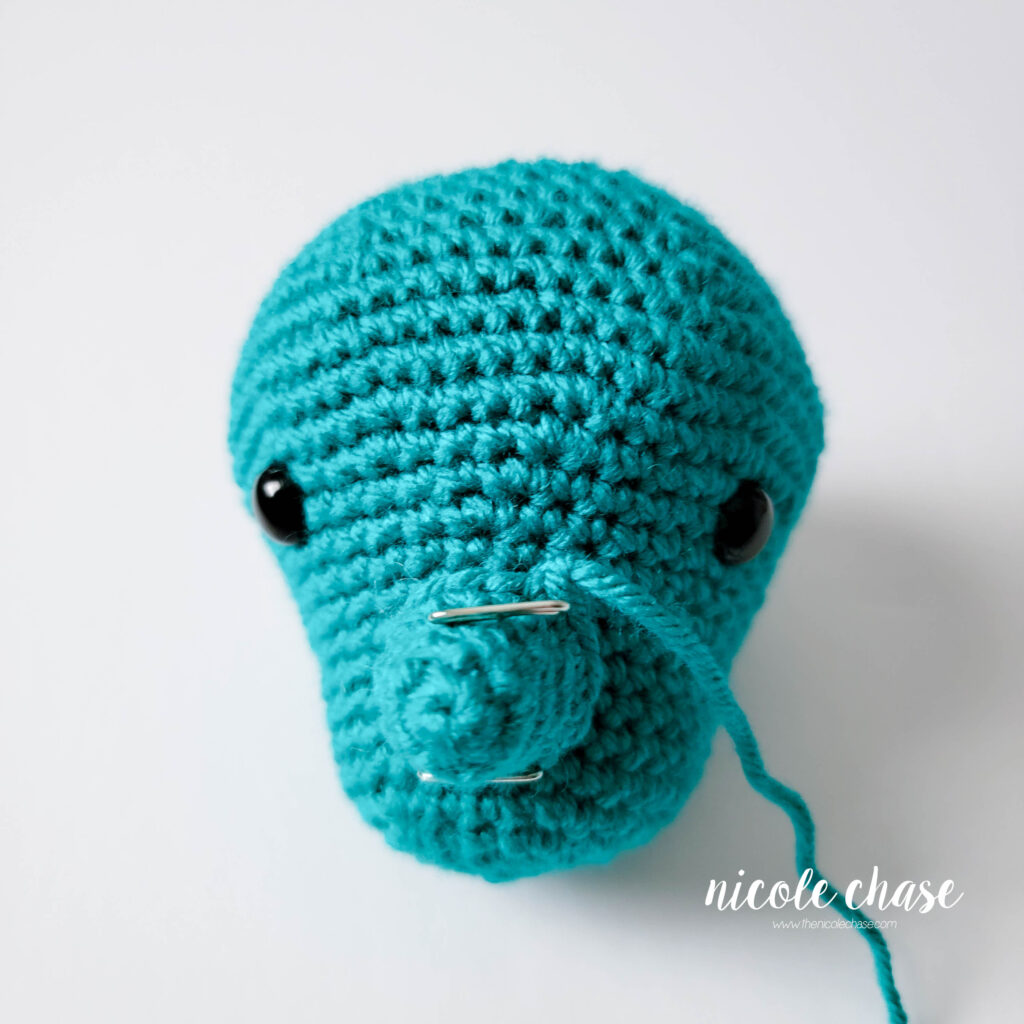
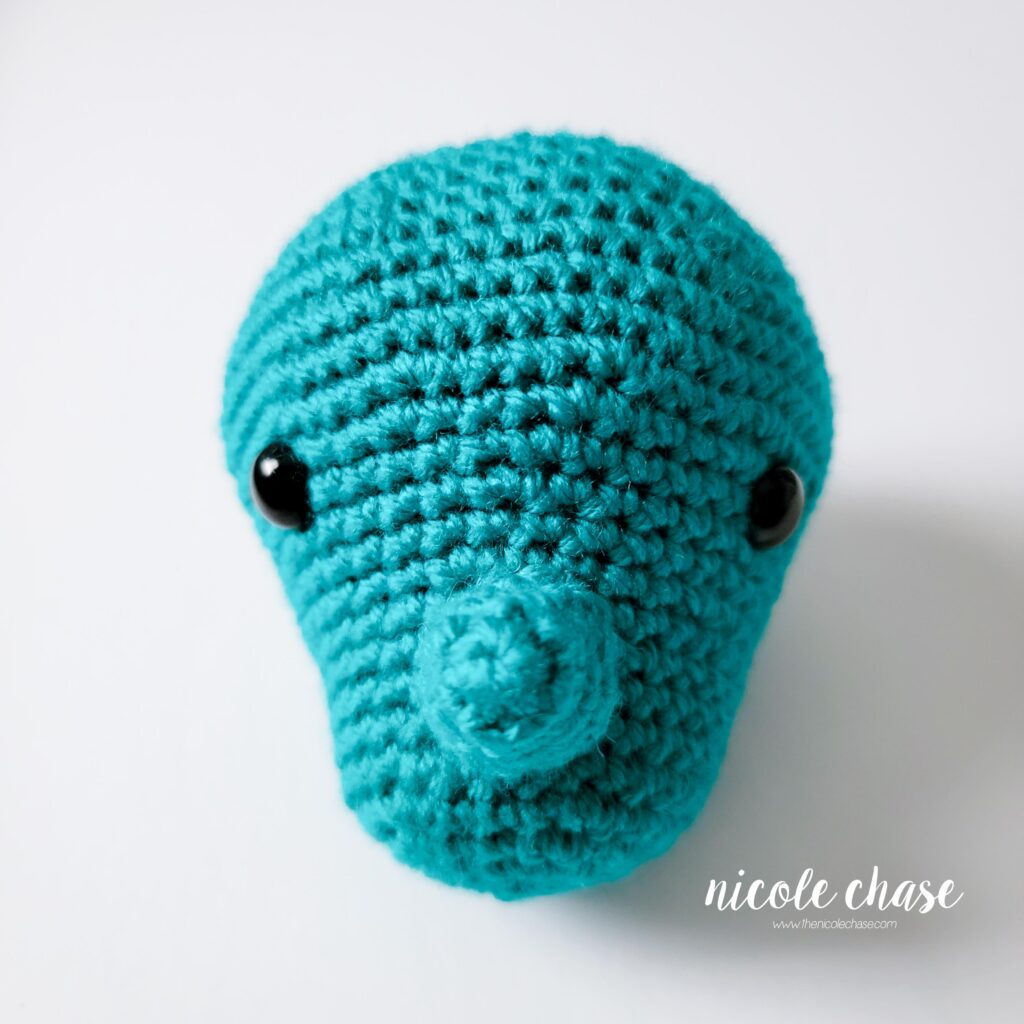
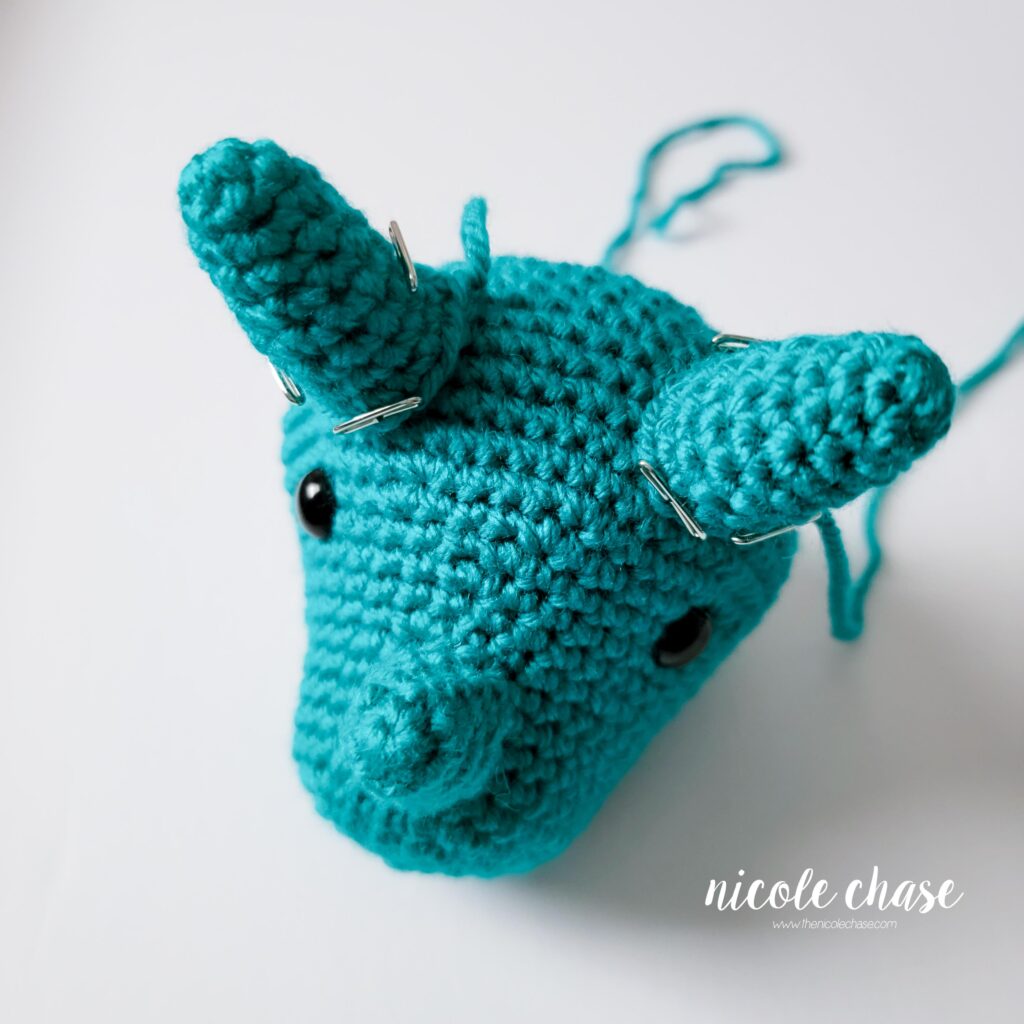
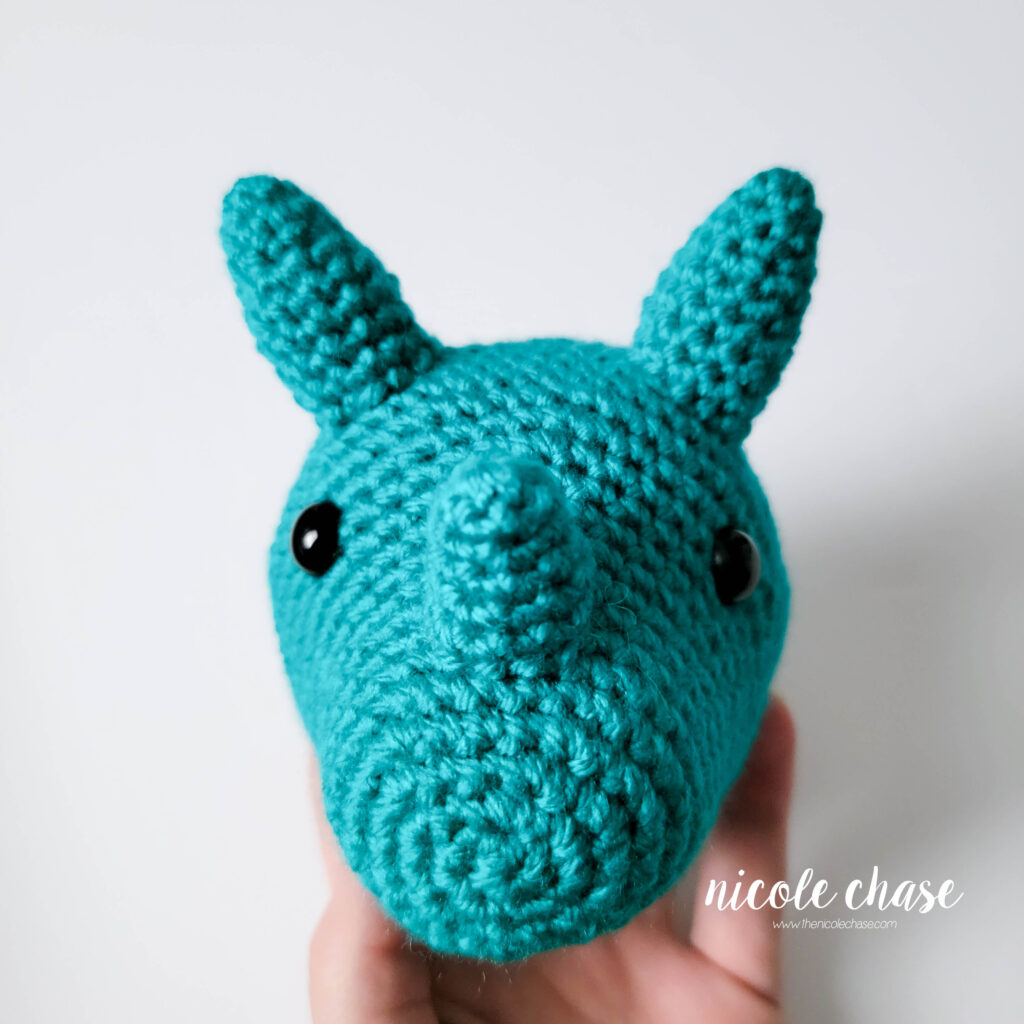
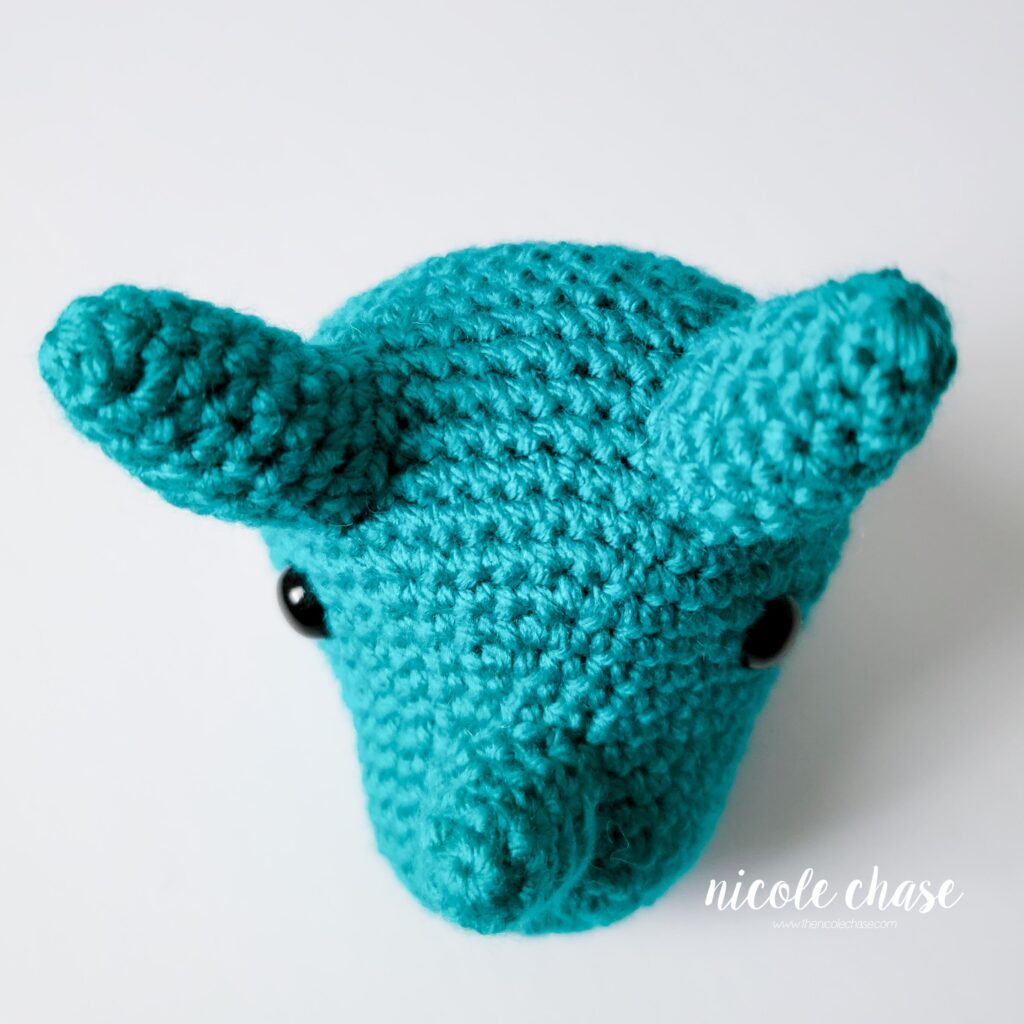
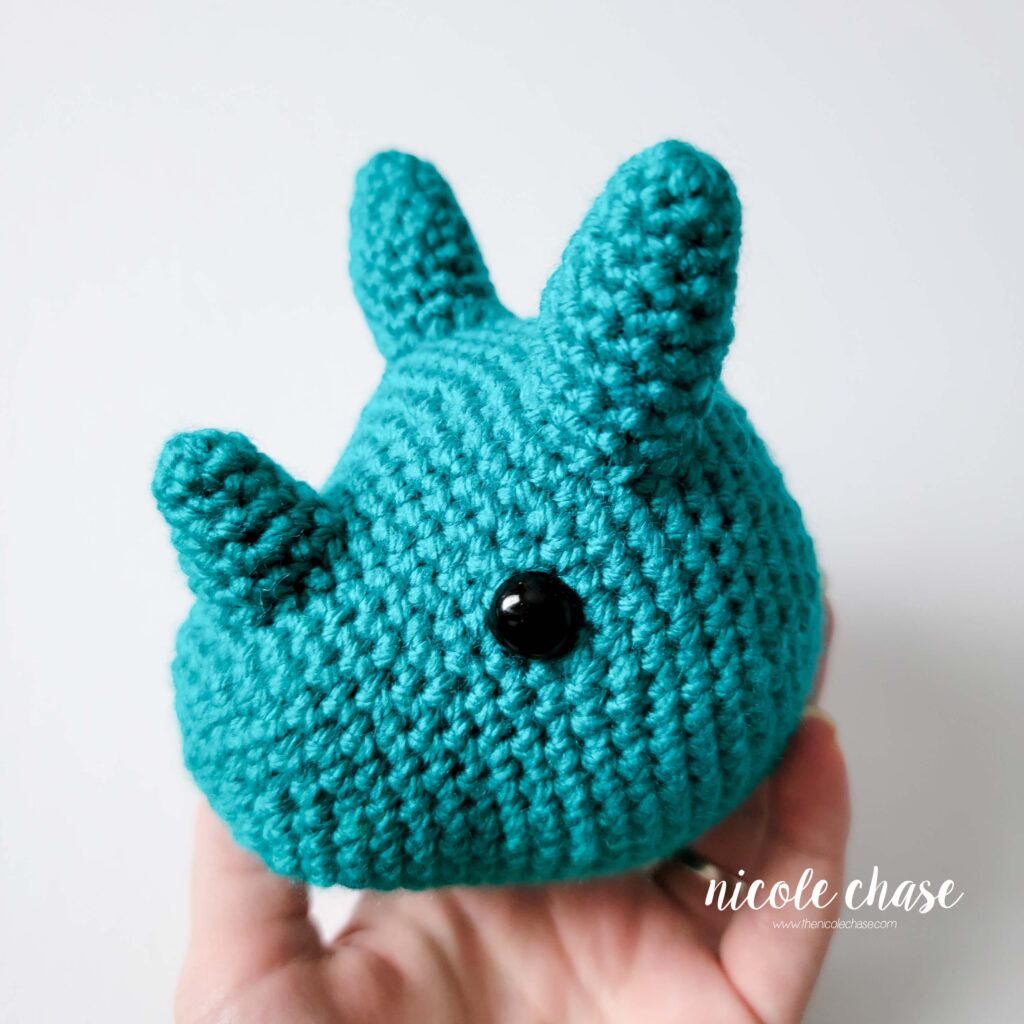
Attach frill around the head, directly behind the large horns, at approximately R22.
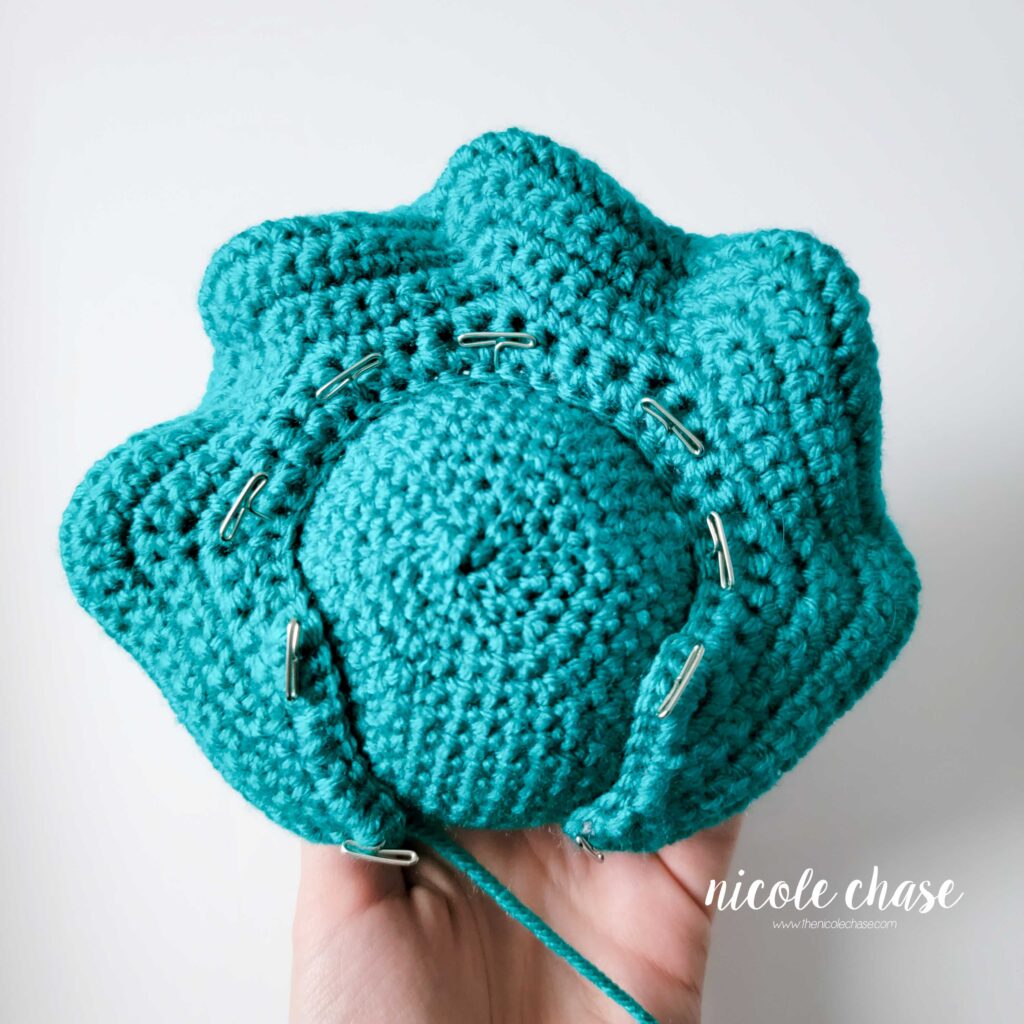
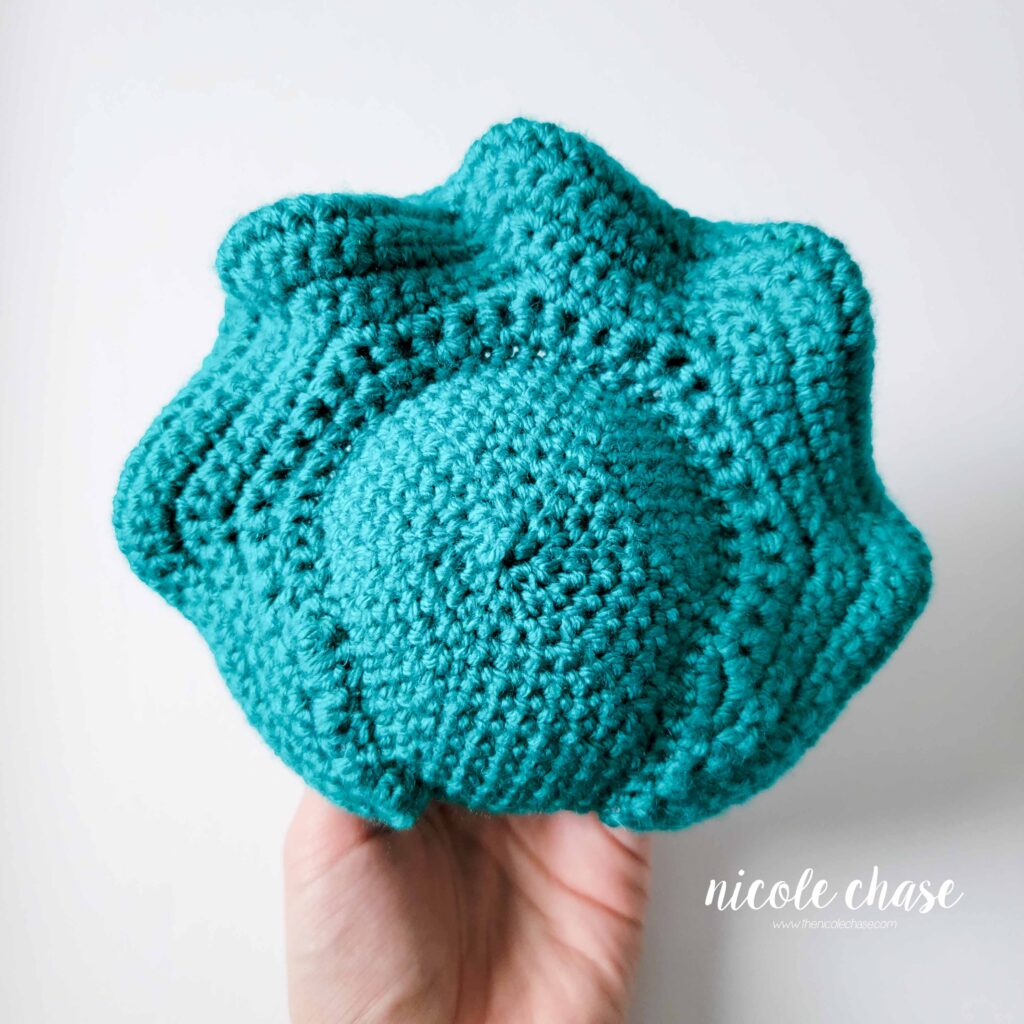
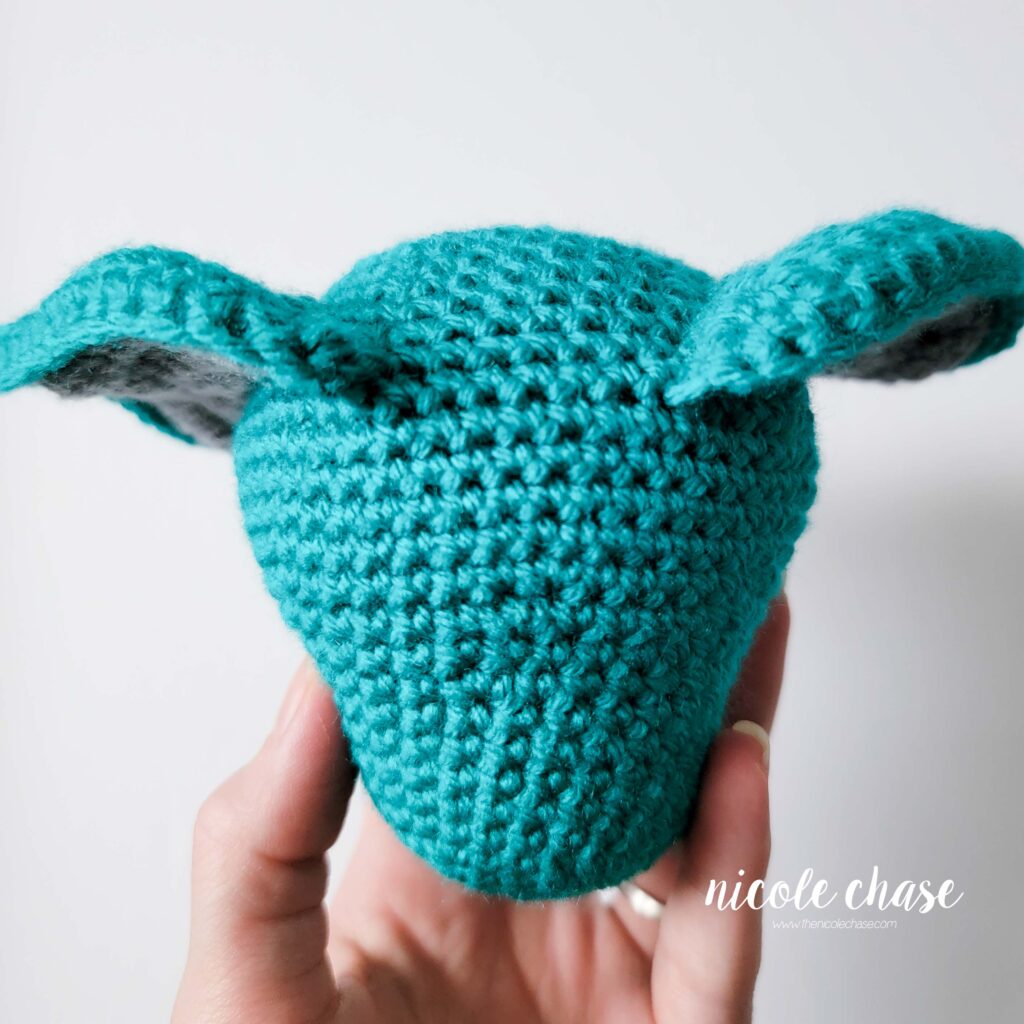
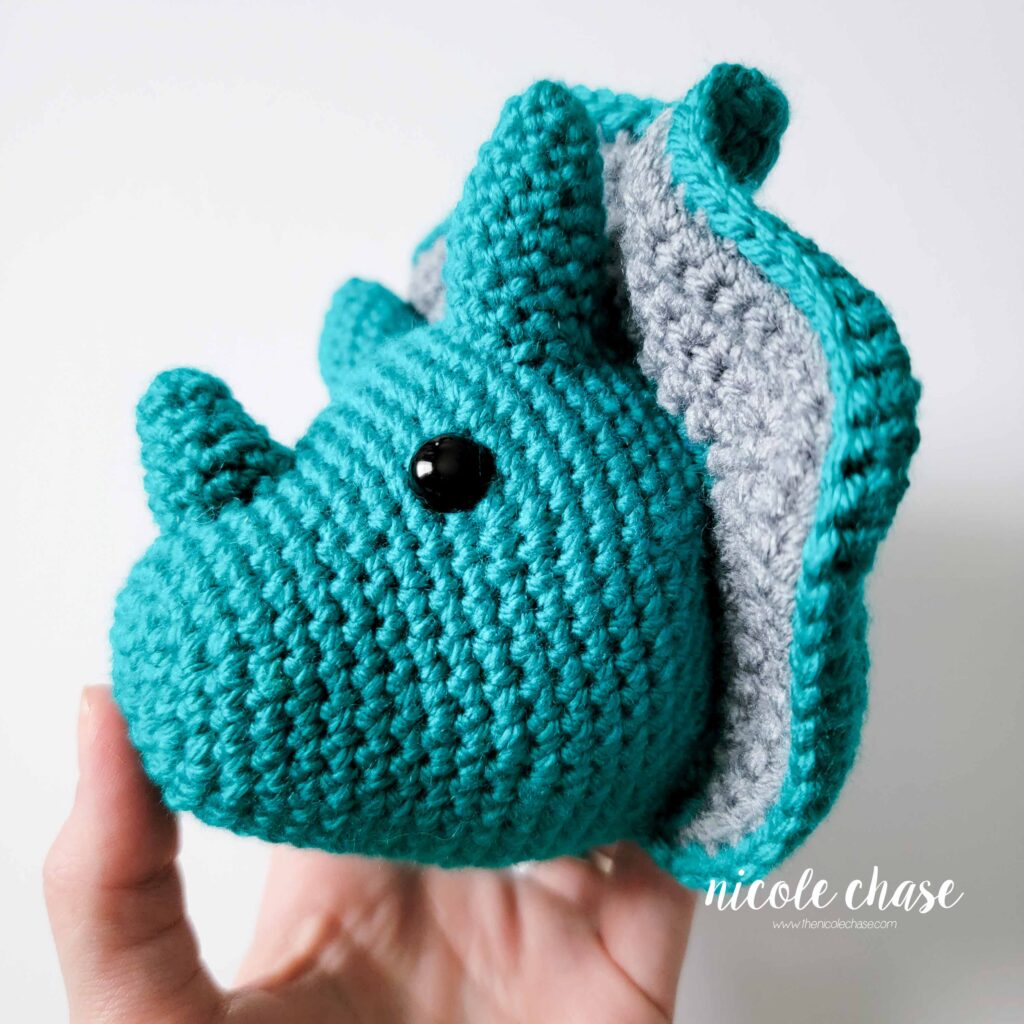
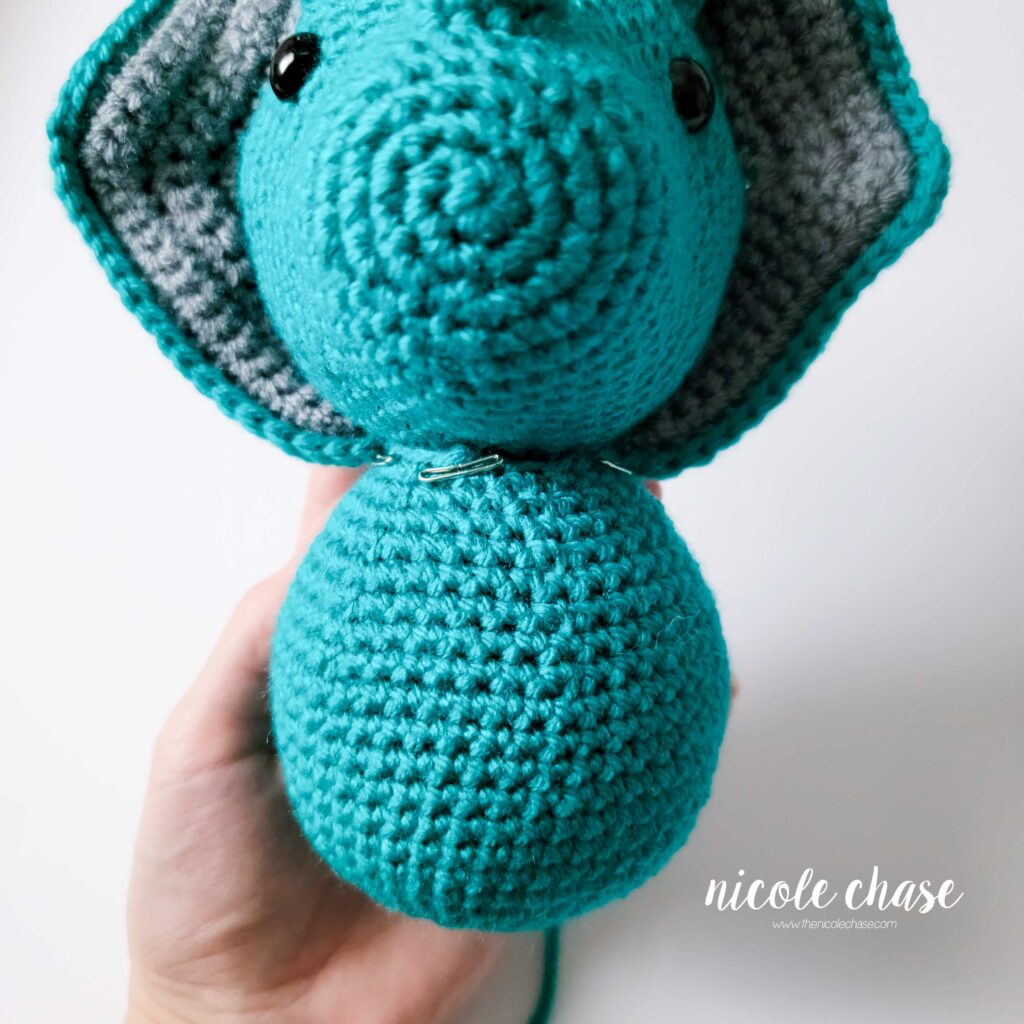
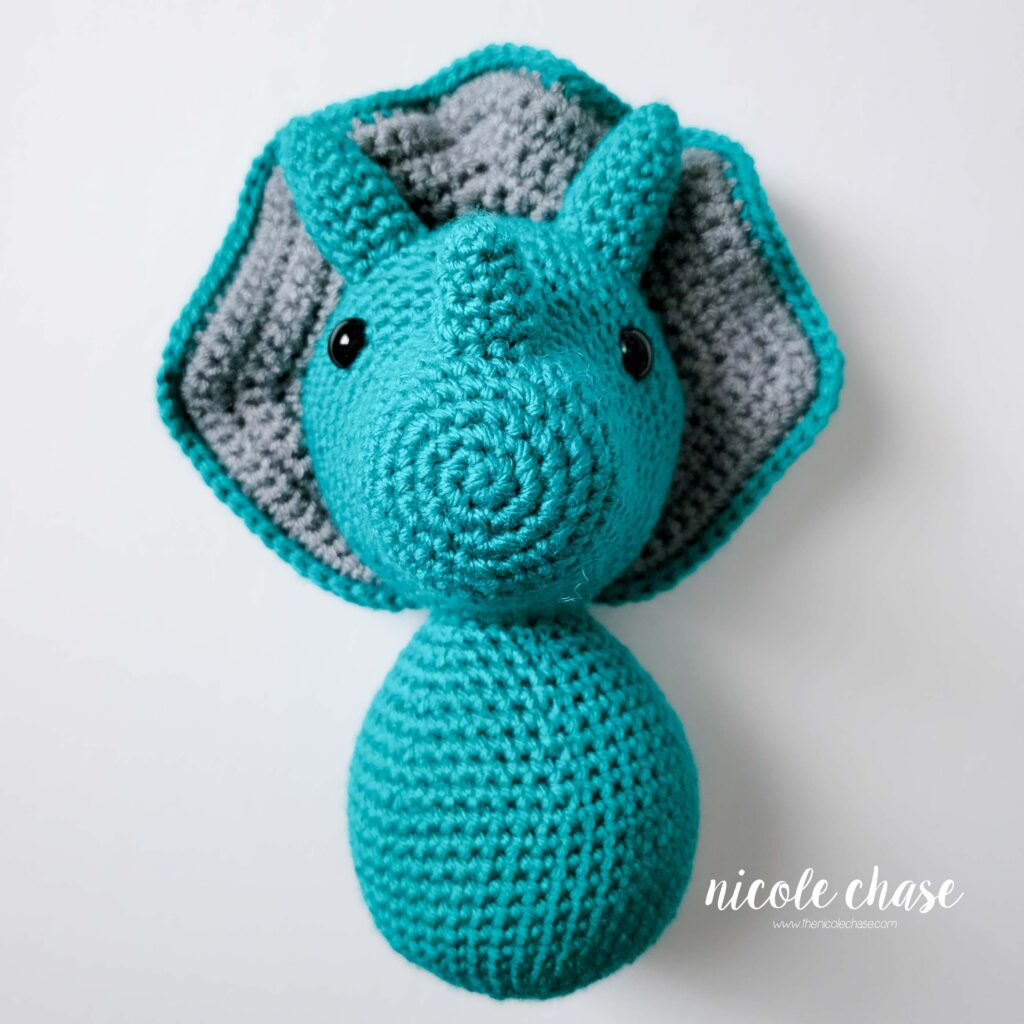
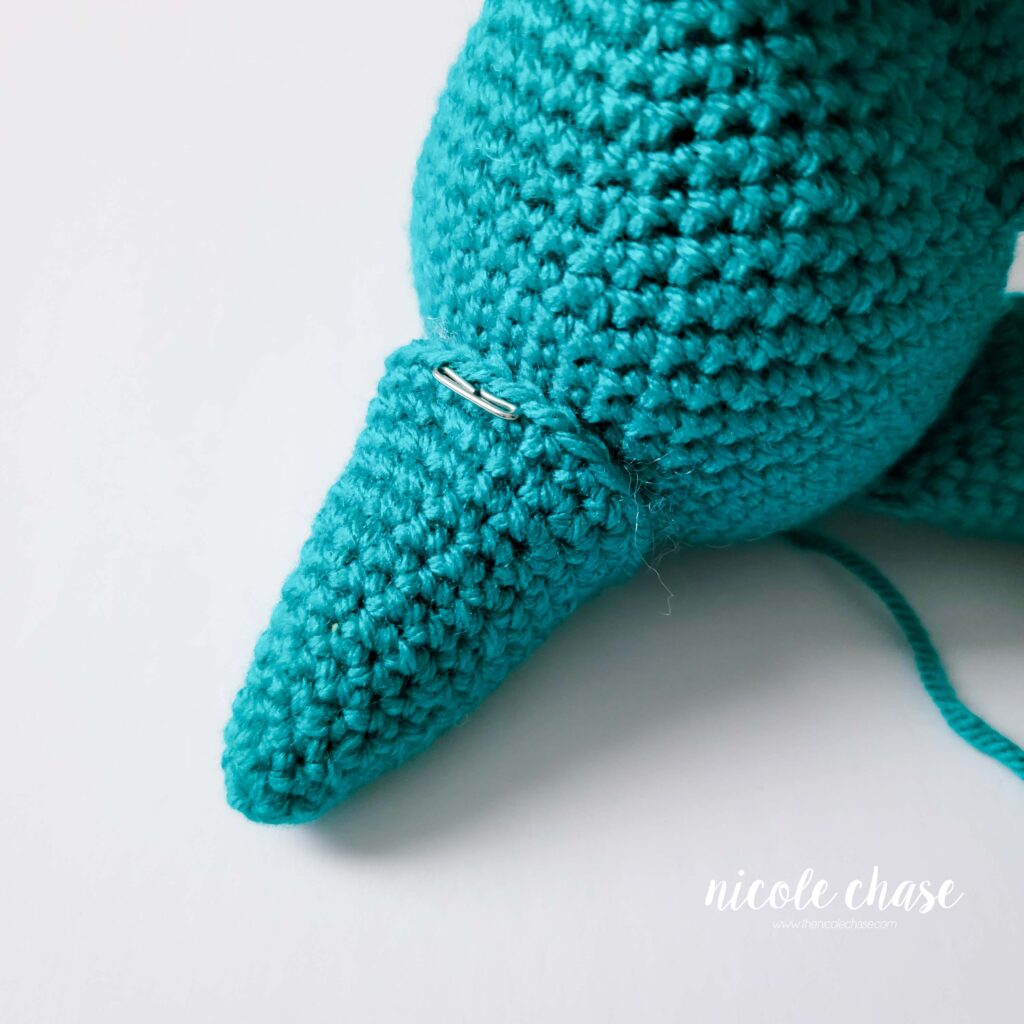
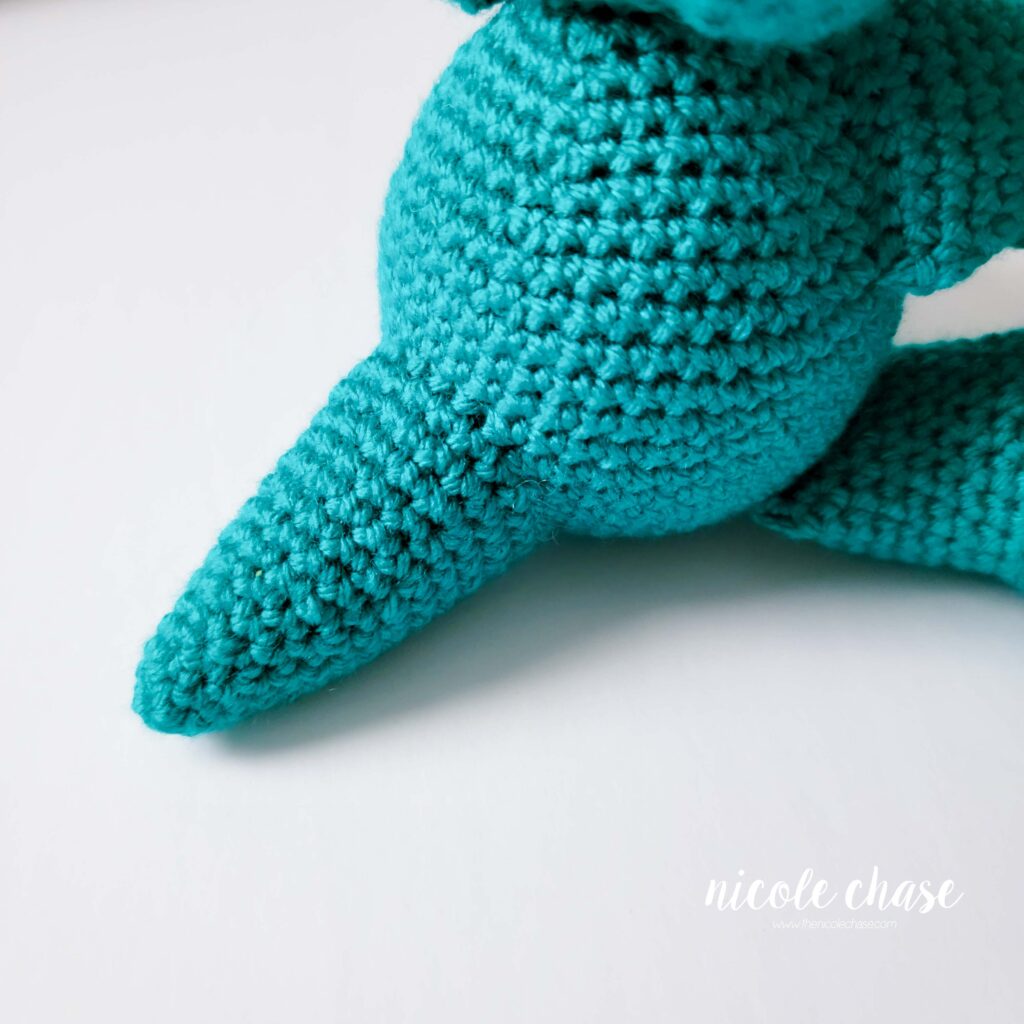
Attach head to body so that the frill is upright, in line with the body, and the nose is facing straight out; attaching body to approximately R14-19 of the bottom of the head.
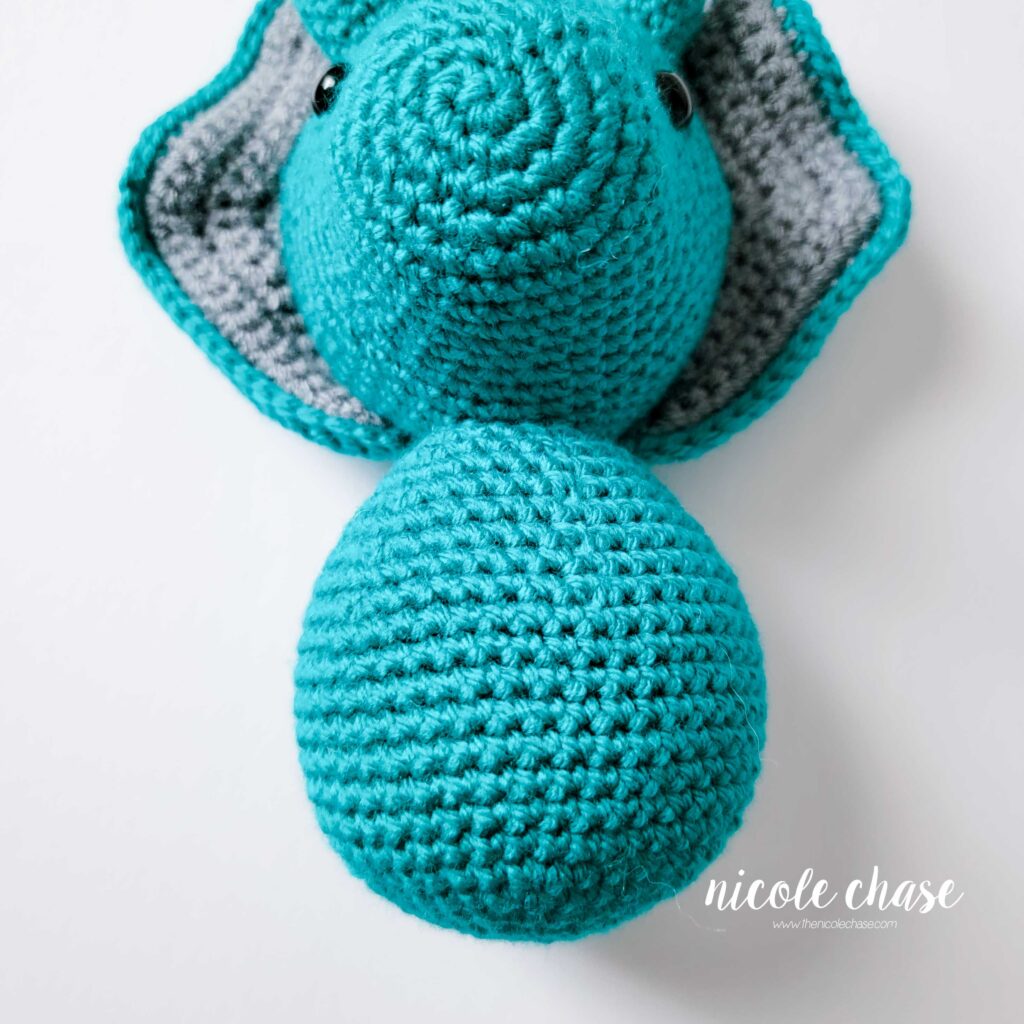
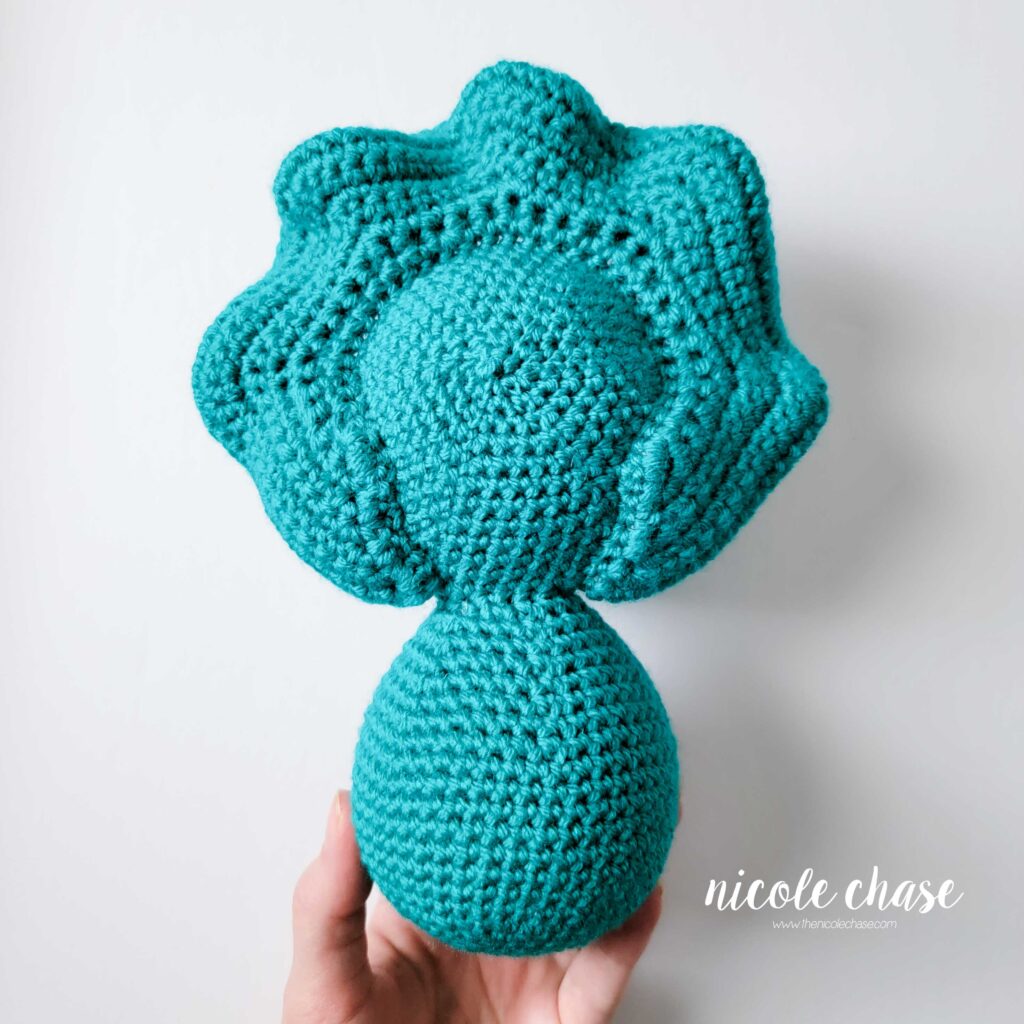
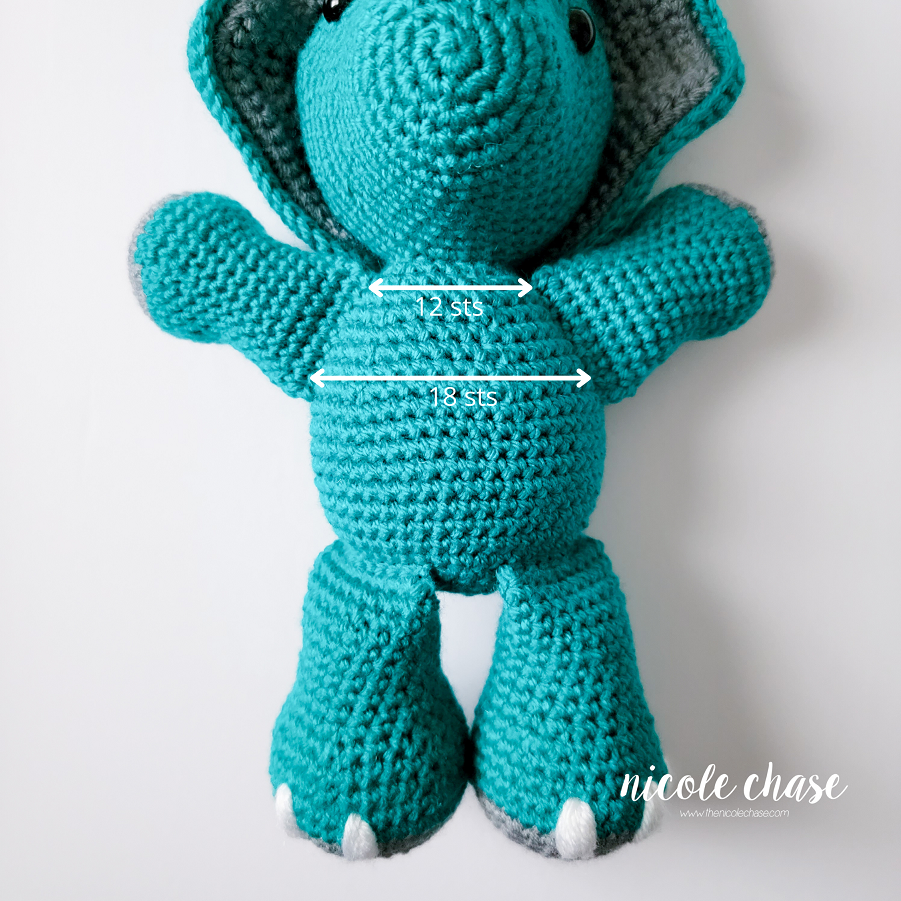
Attach legs over R7-8 of body, with 4 sts showing between.
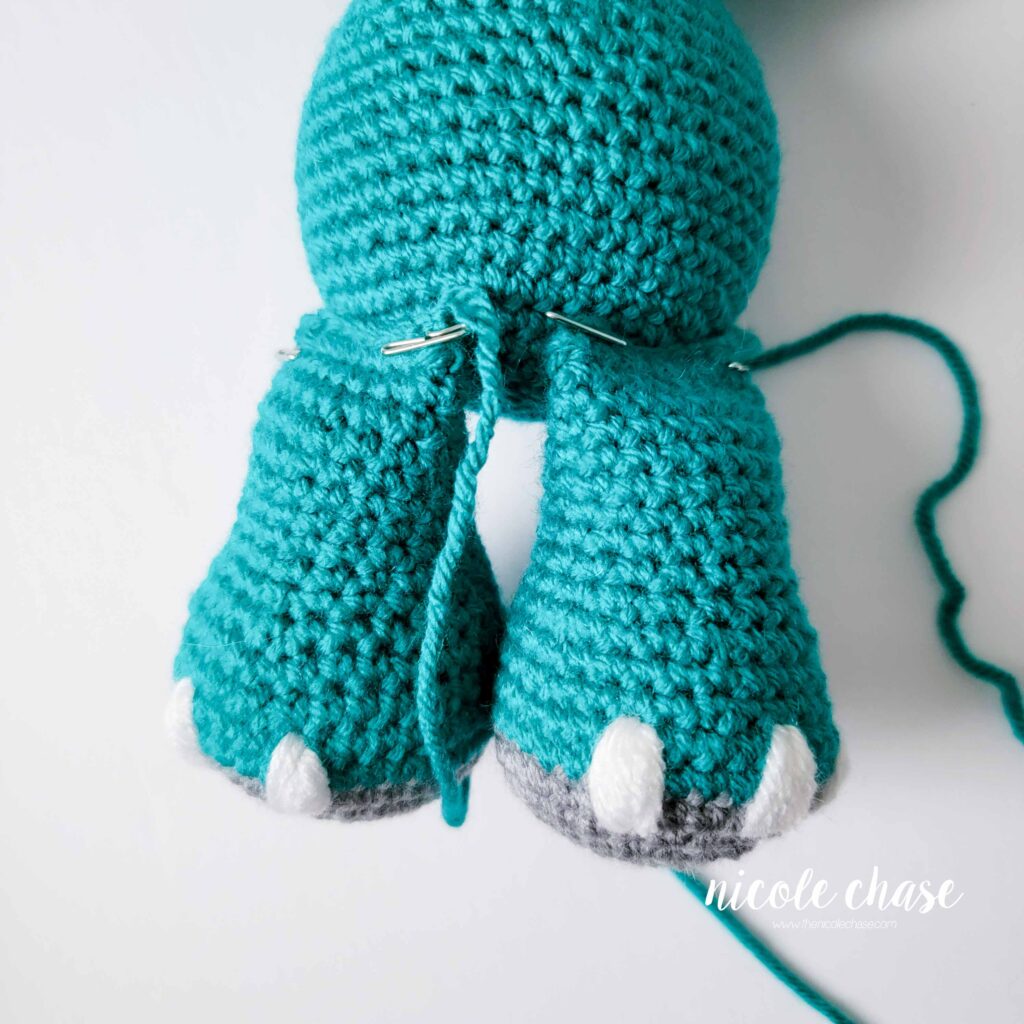
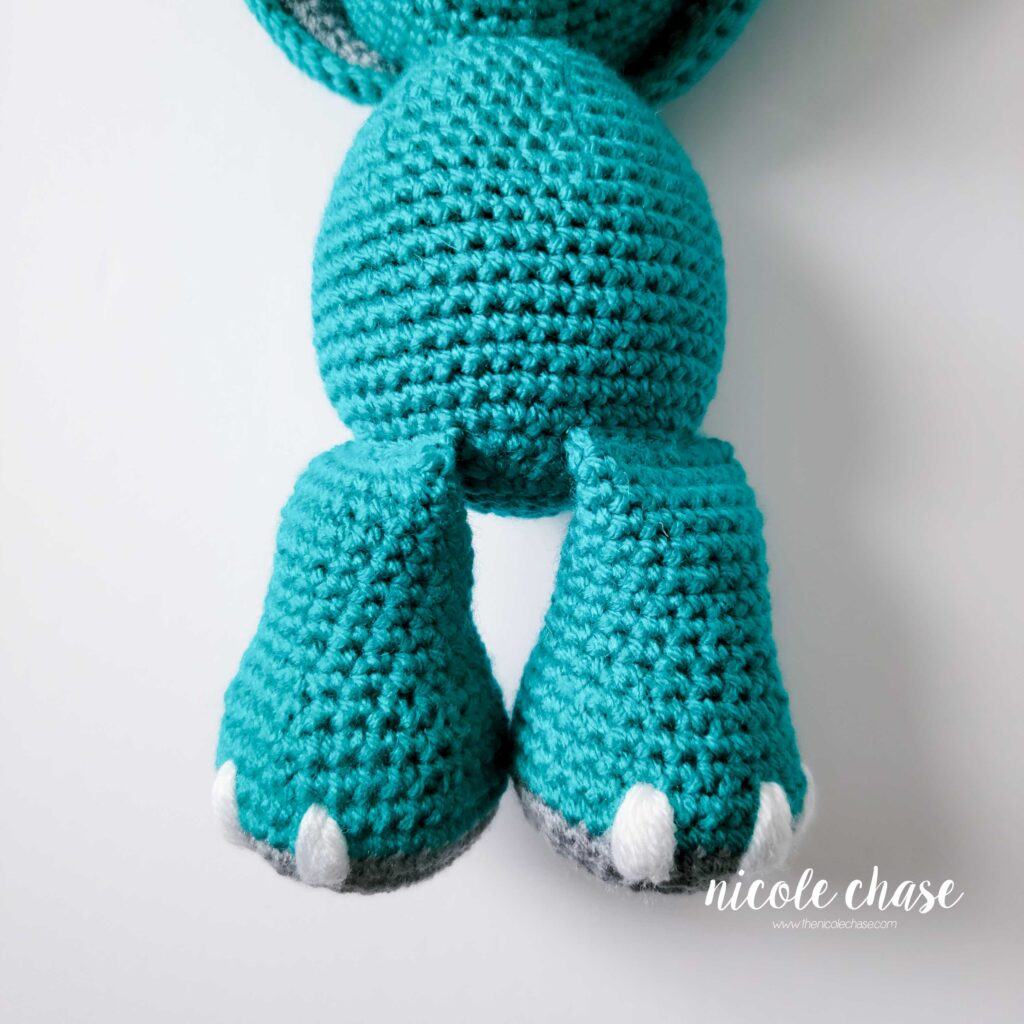
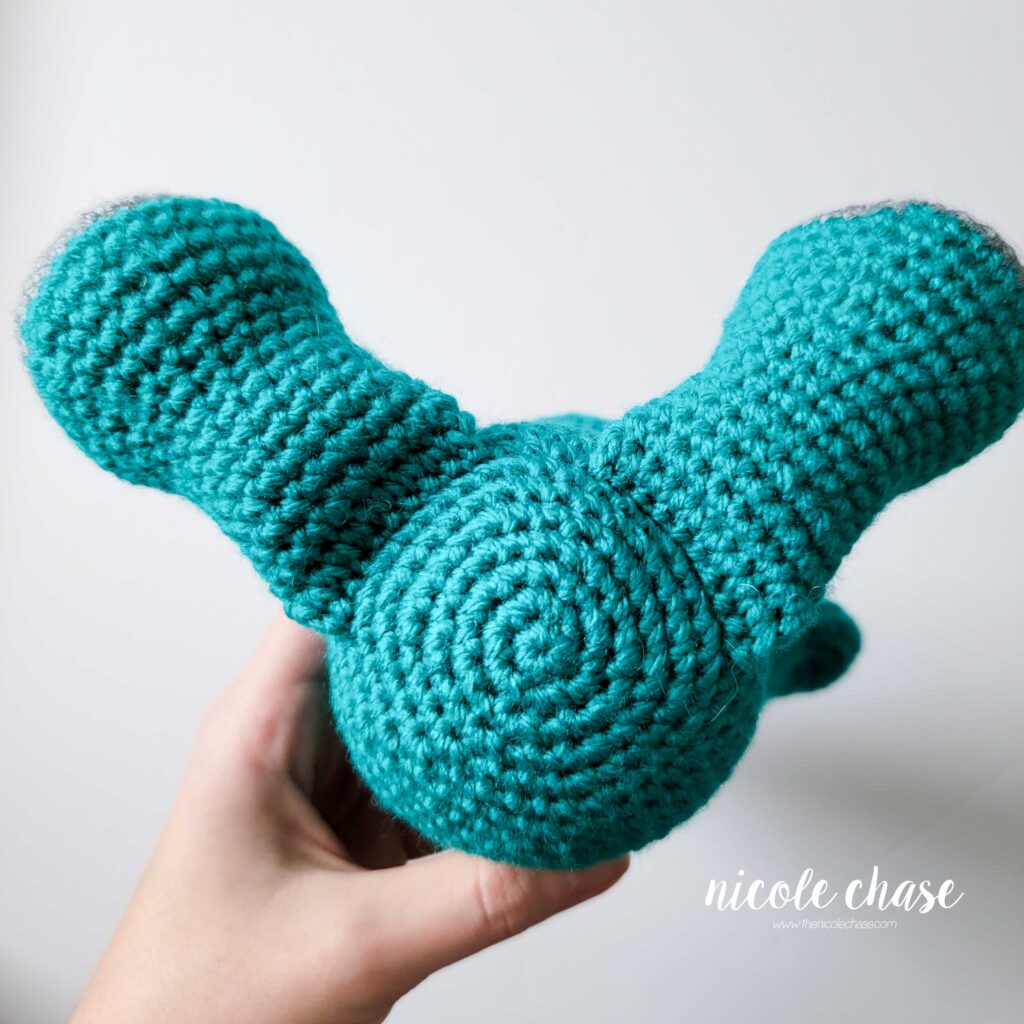
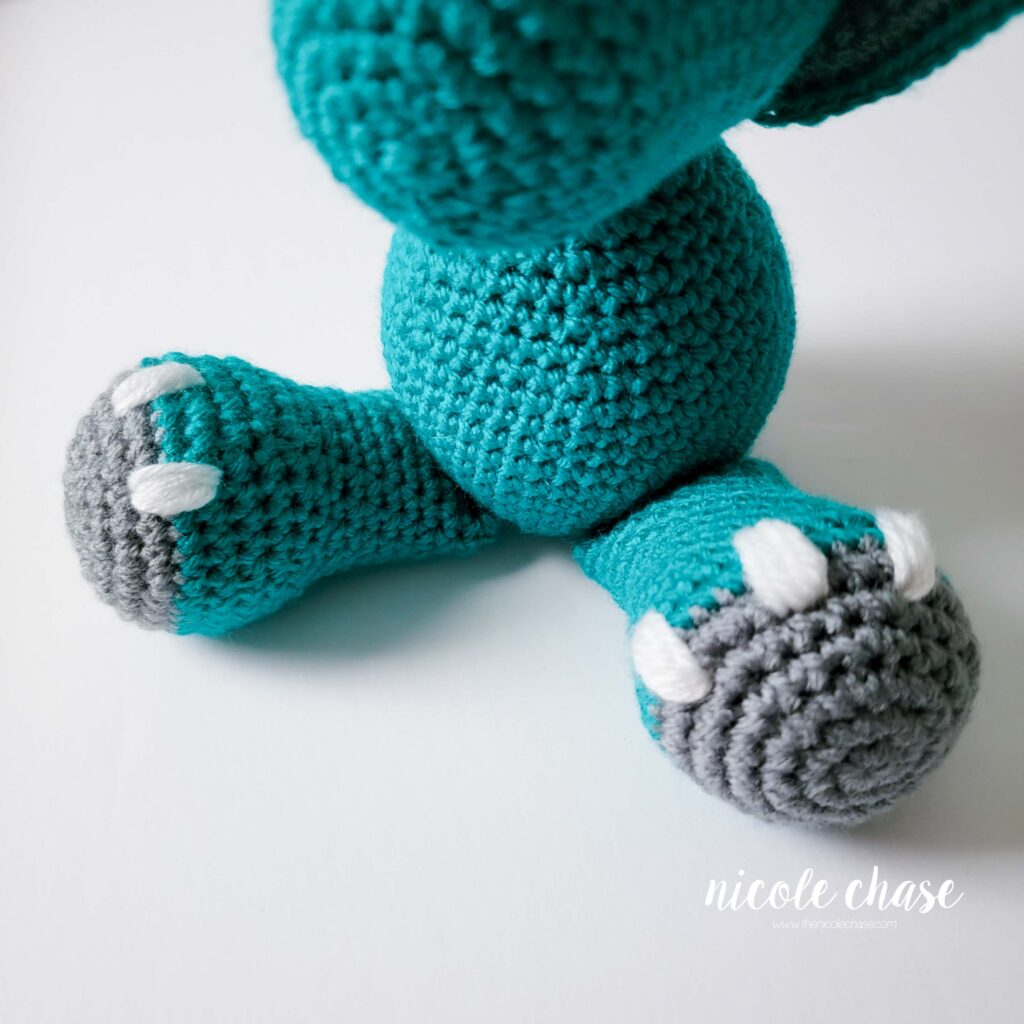
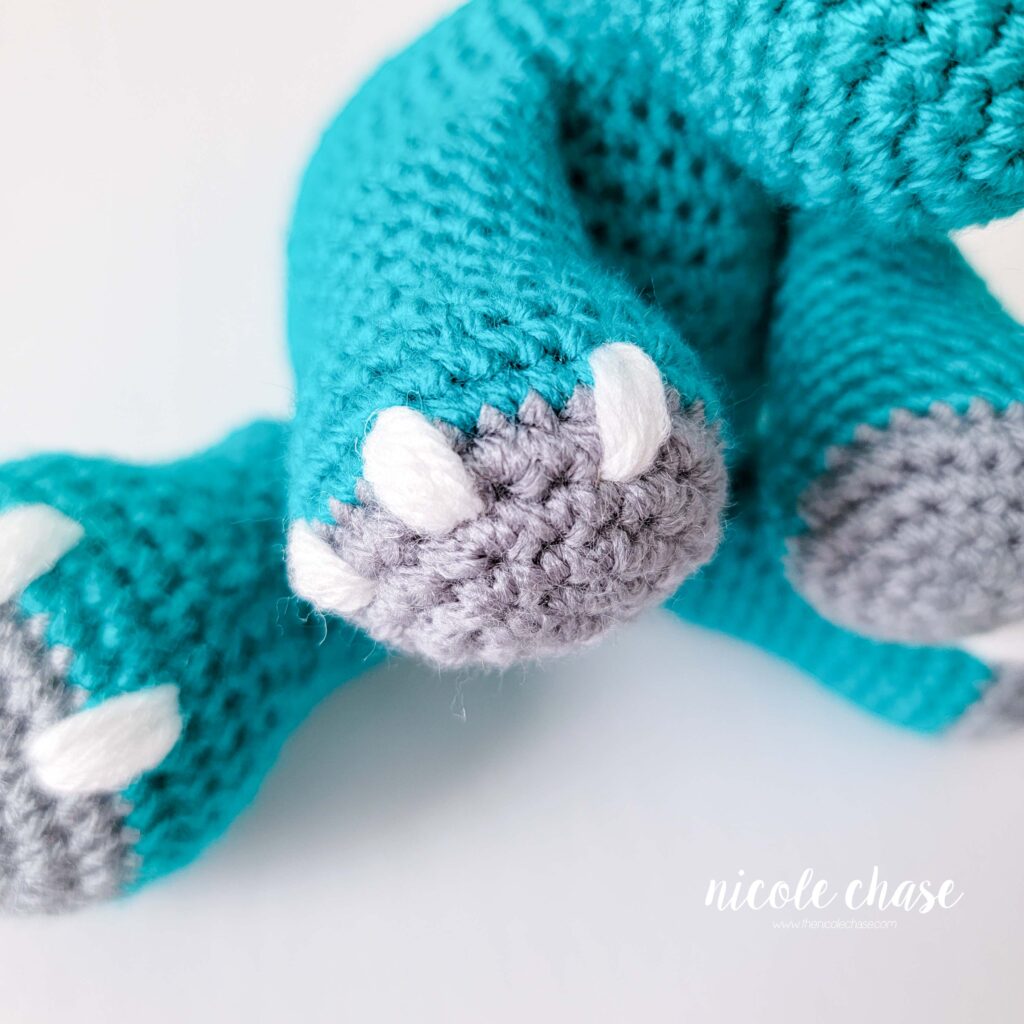
Embroider 3 nails on each leg, over R6-8, leaving about 2 sts between each nail.
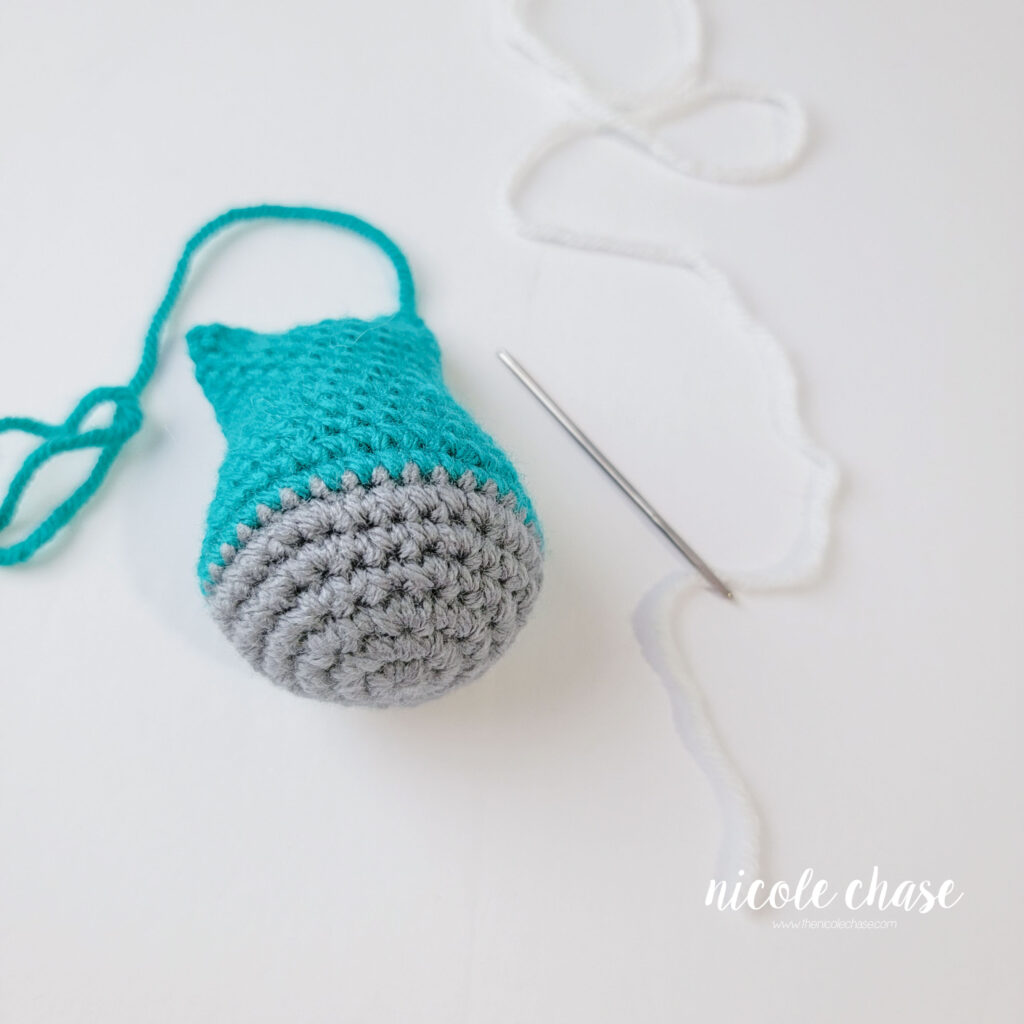
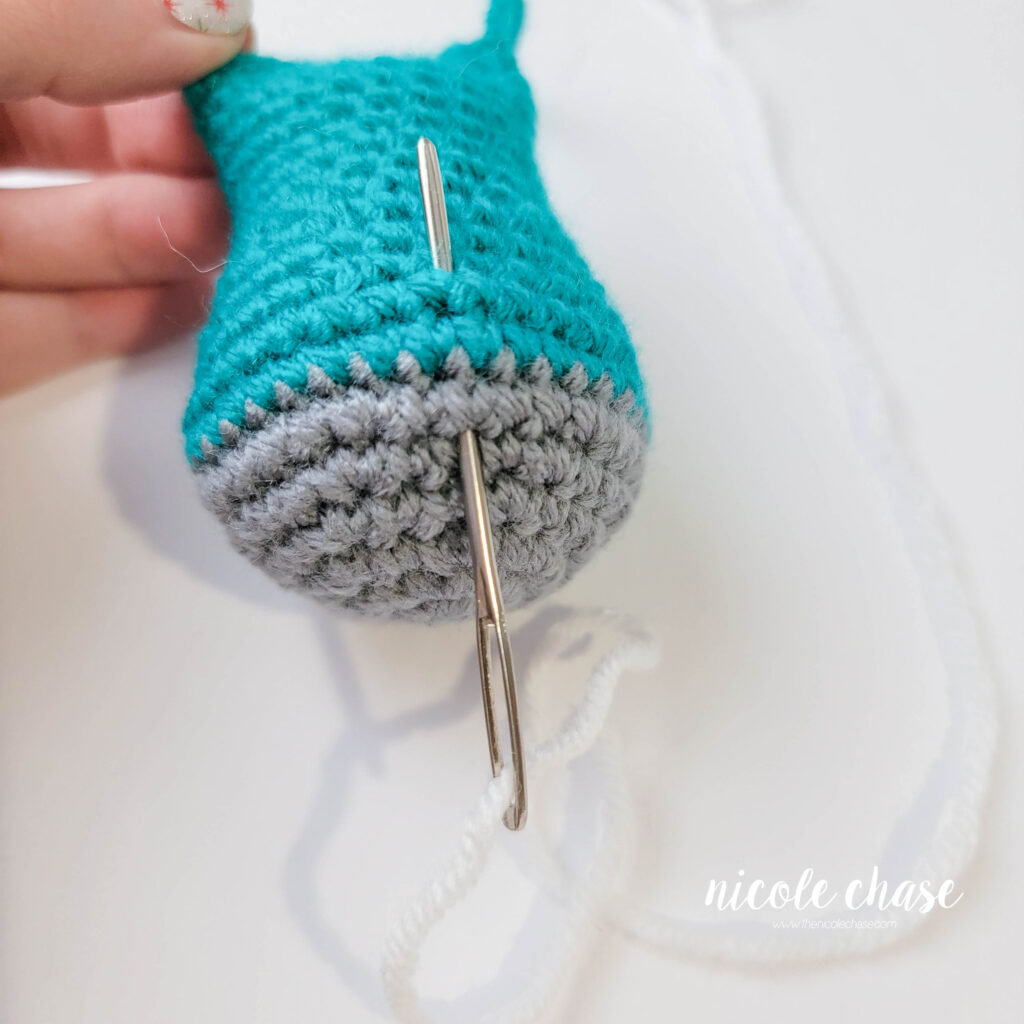
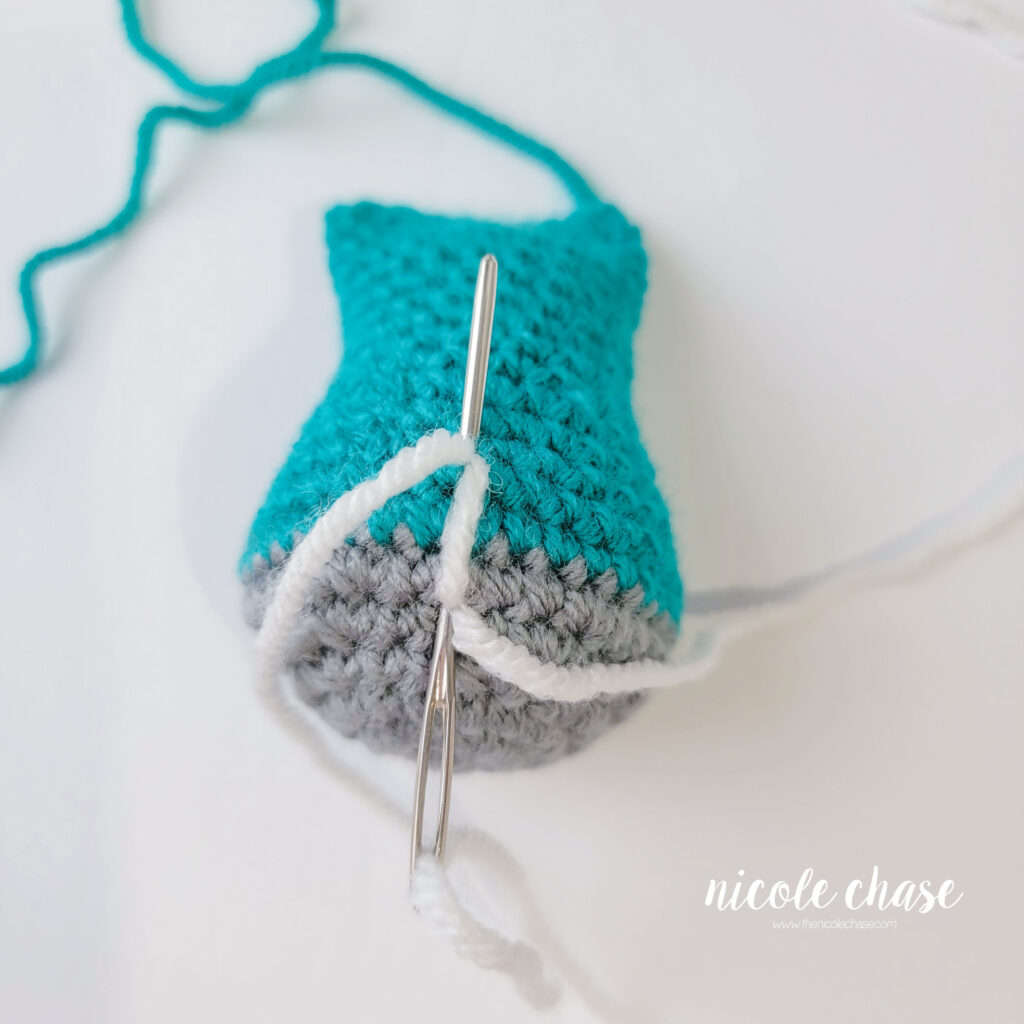
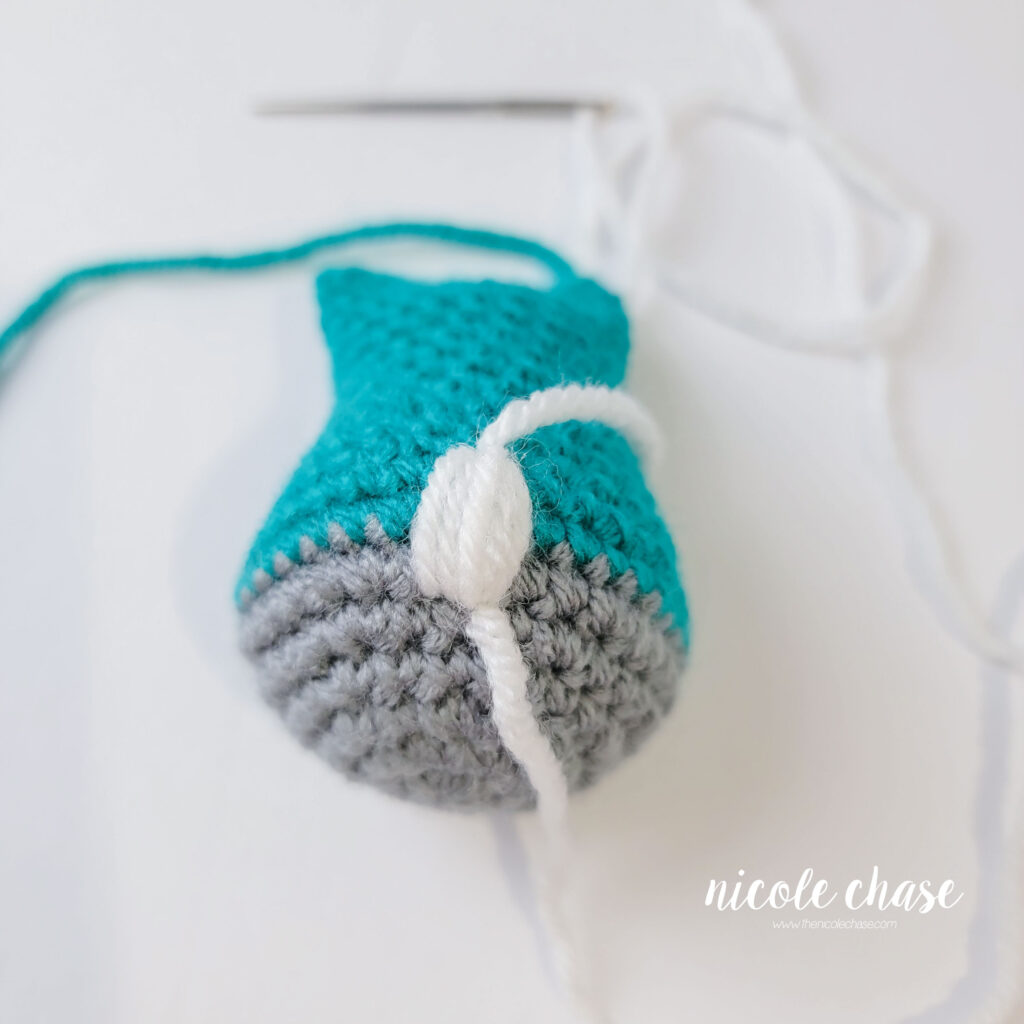
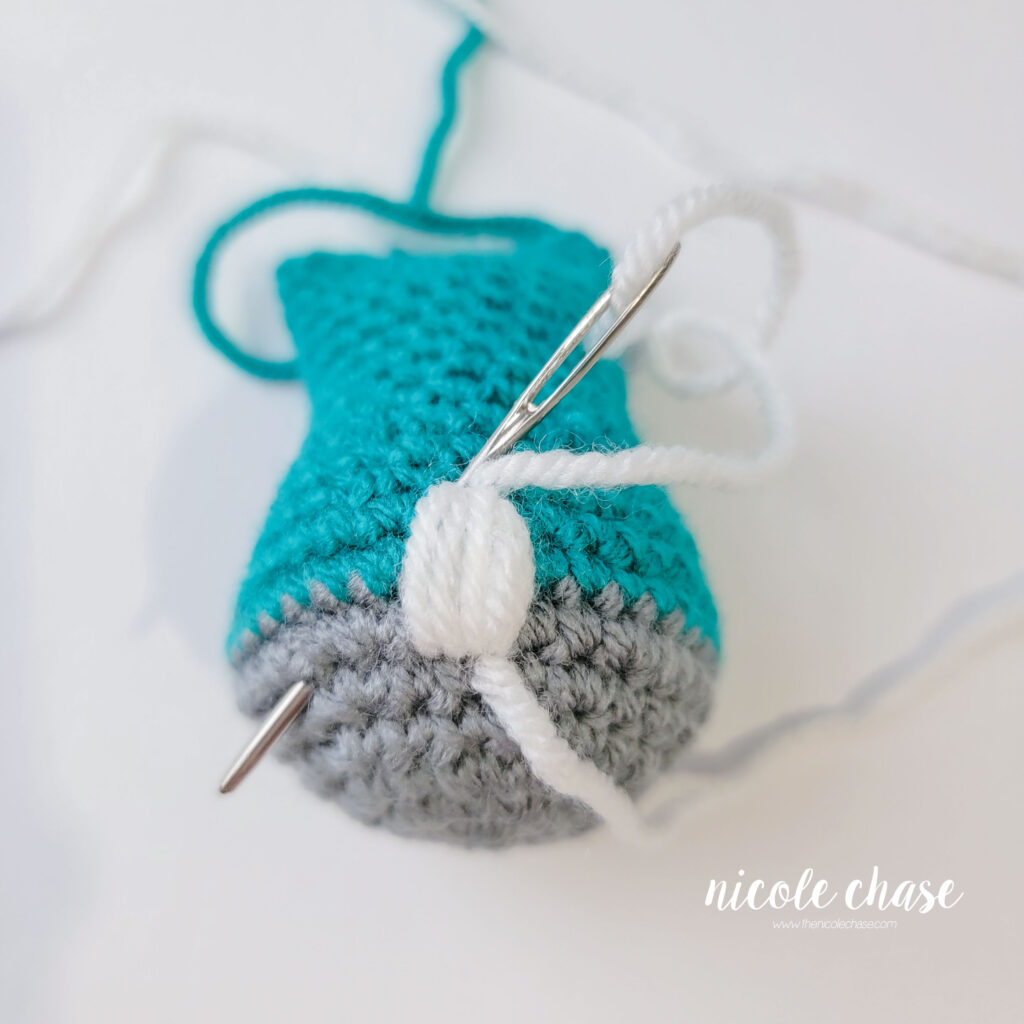
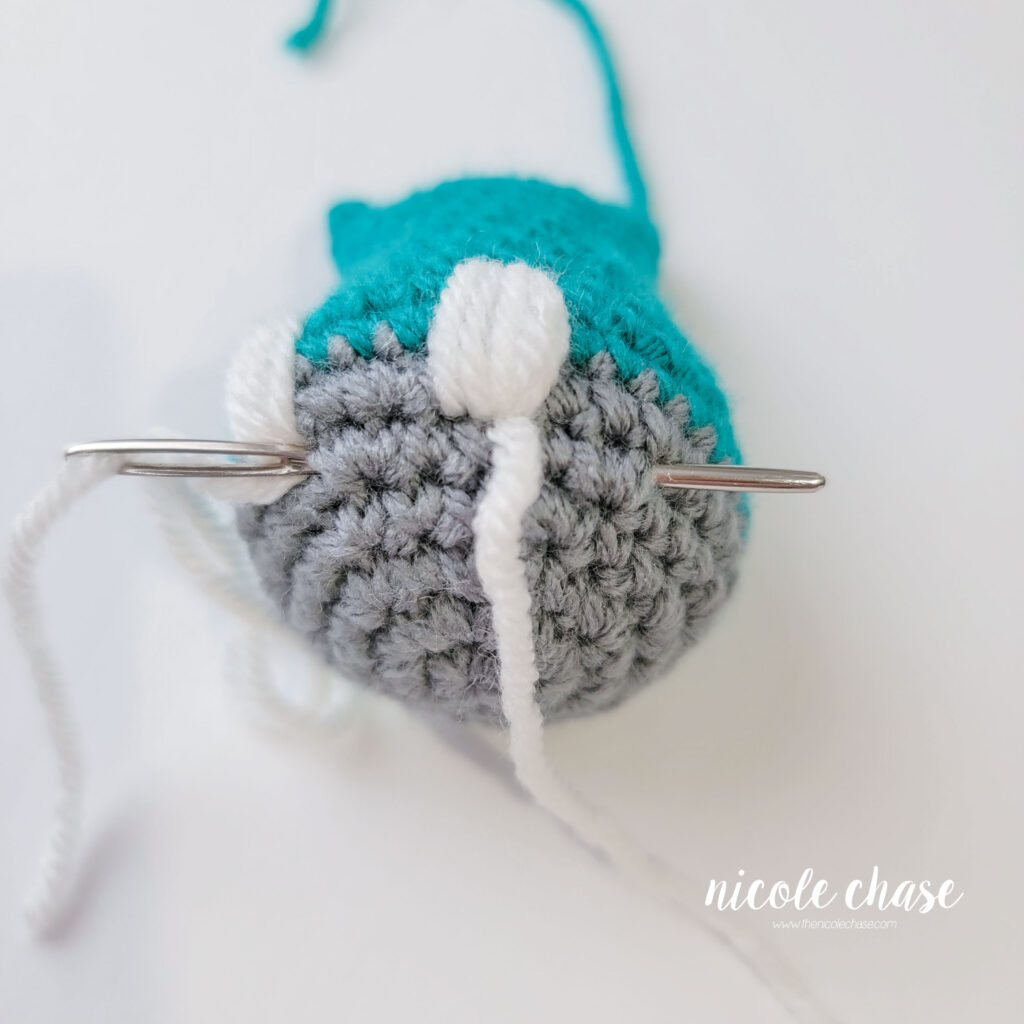
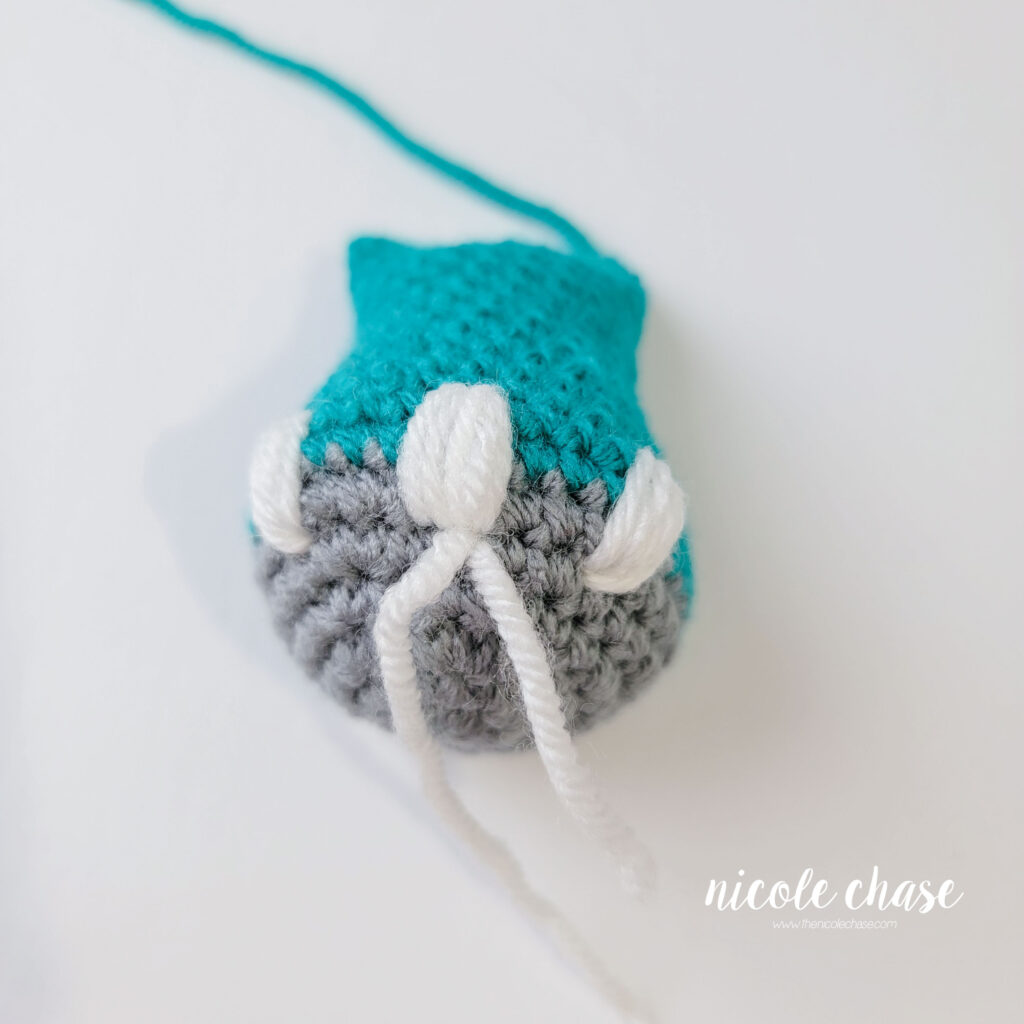
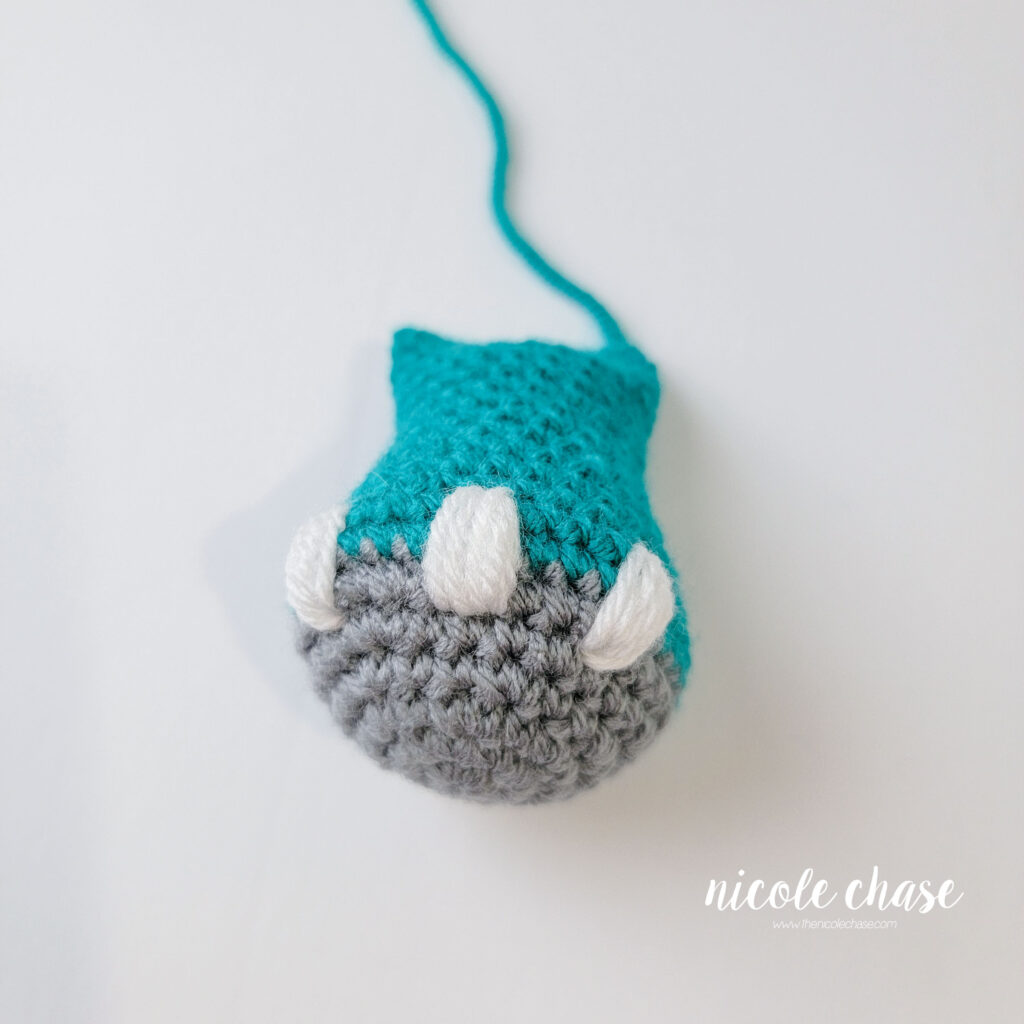
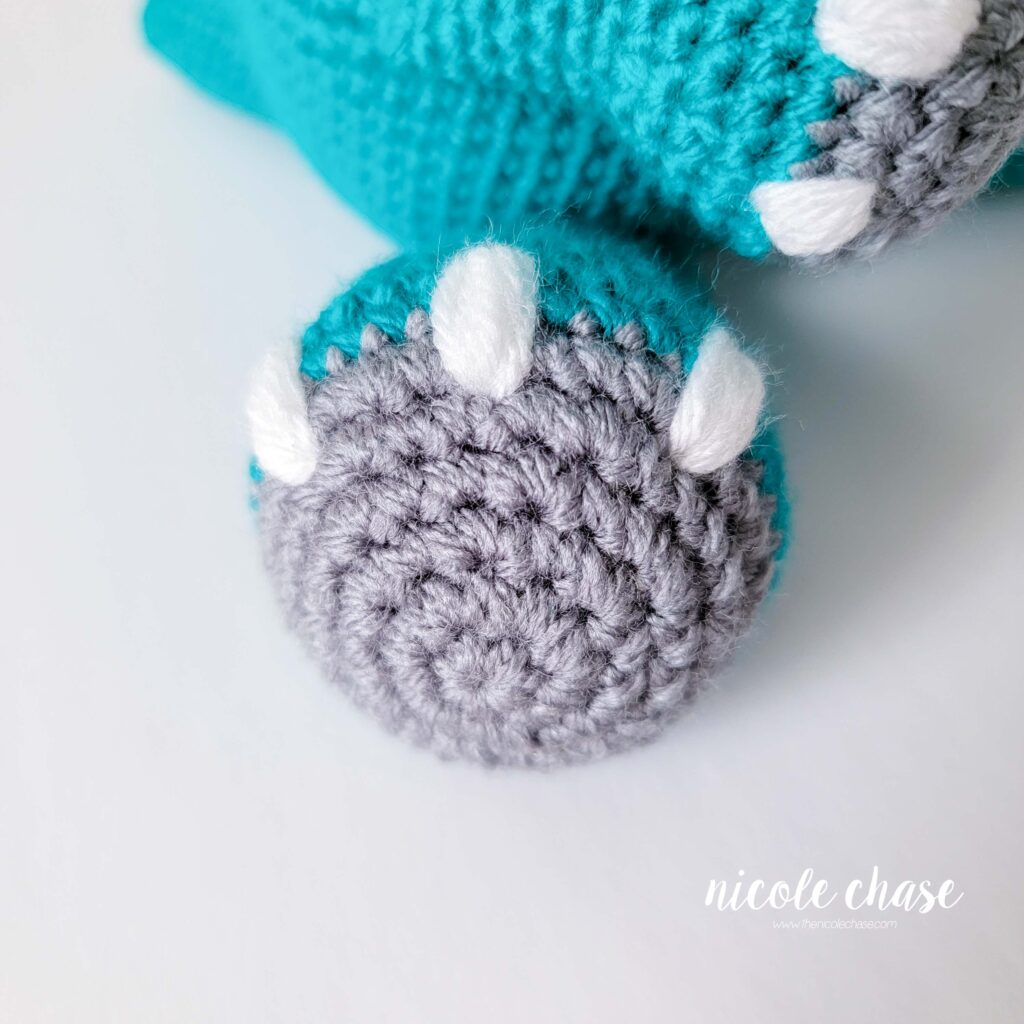
Attach arms over R16-23 on each side of the body. At the top of the arms, leave approximately 12 sts between each arm across the front of the body. At the bottom of the arms, leave approximately 18 sts between each arm across the front of the body.
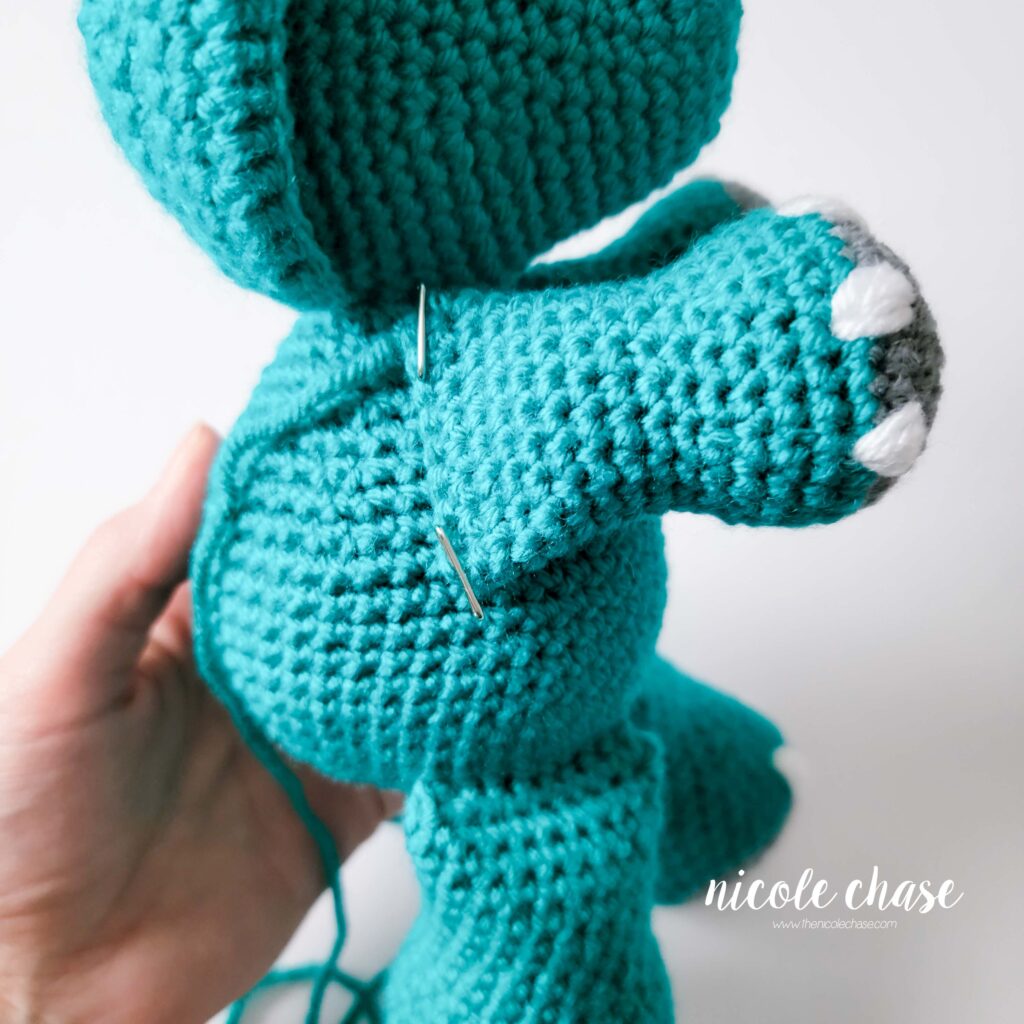
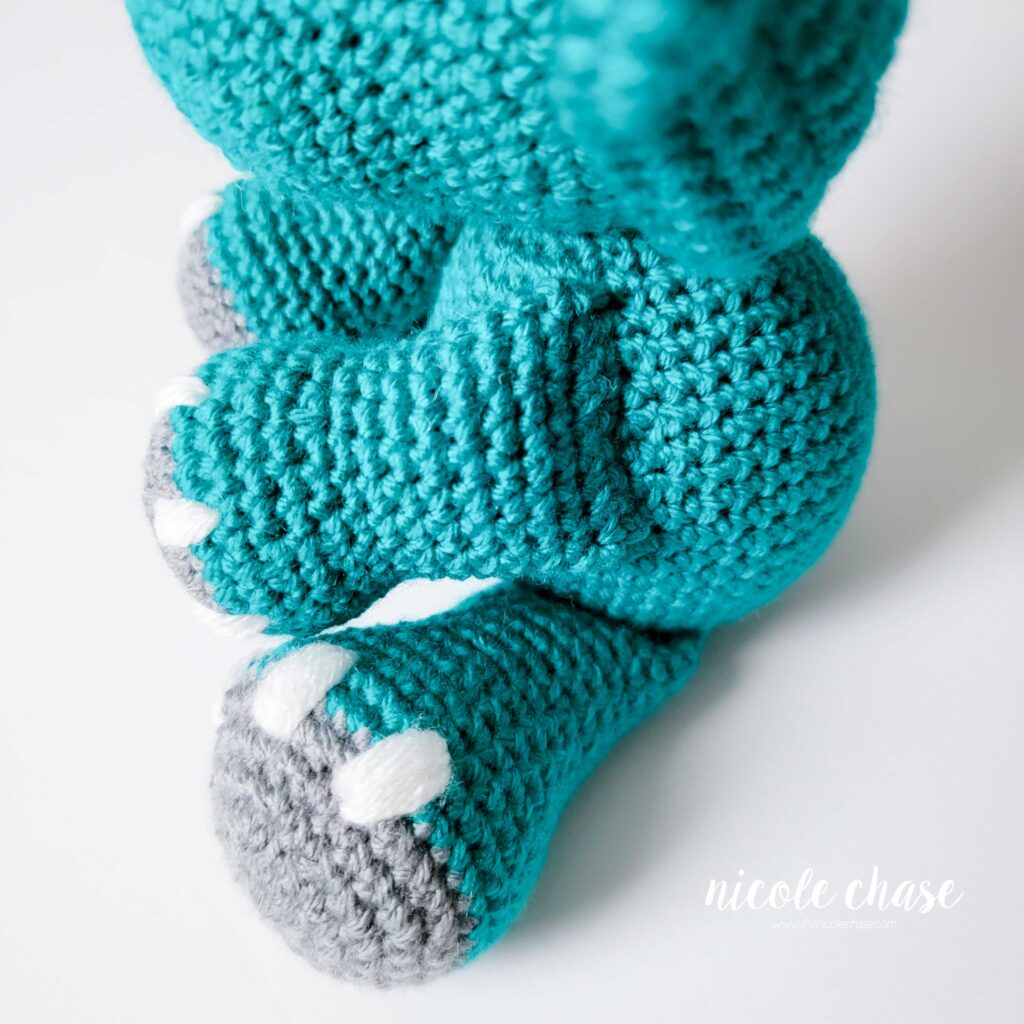
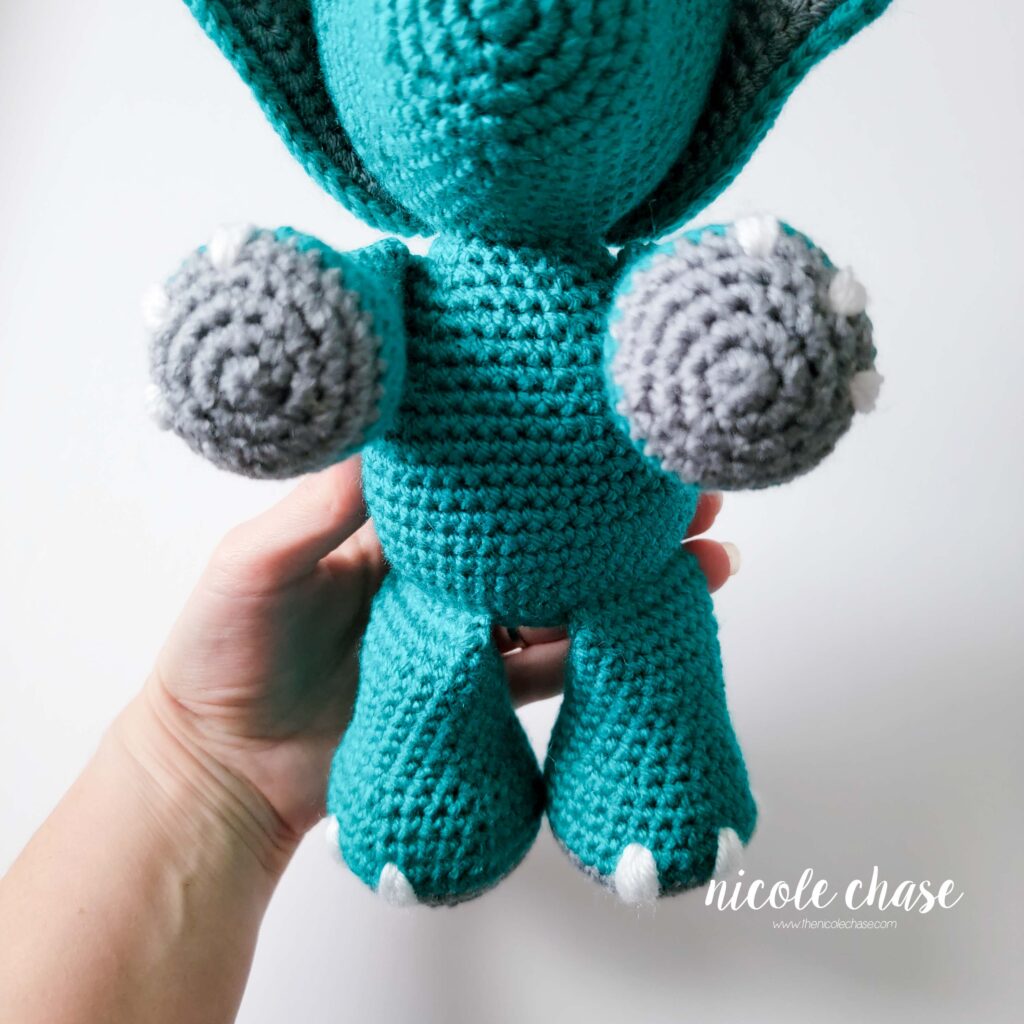
Embroider 3 nails on each arm, over R5-6, leaving about 2 sts between each nail.
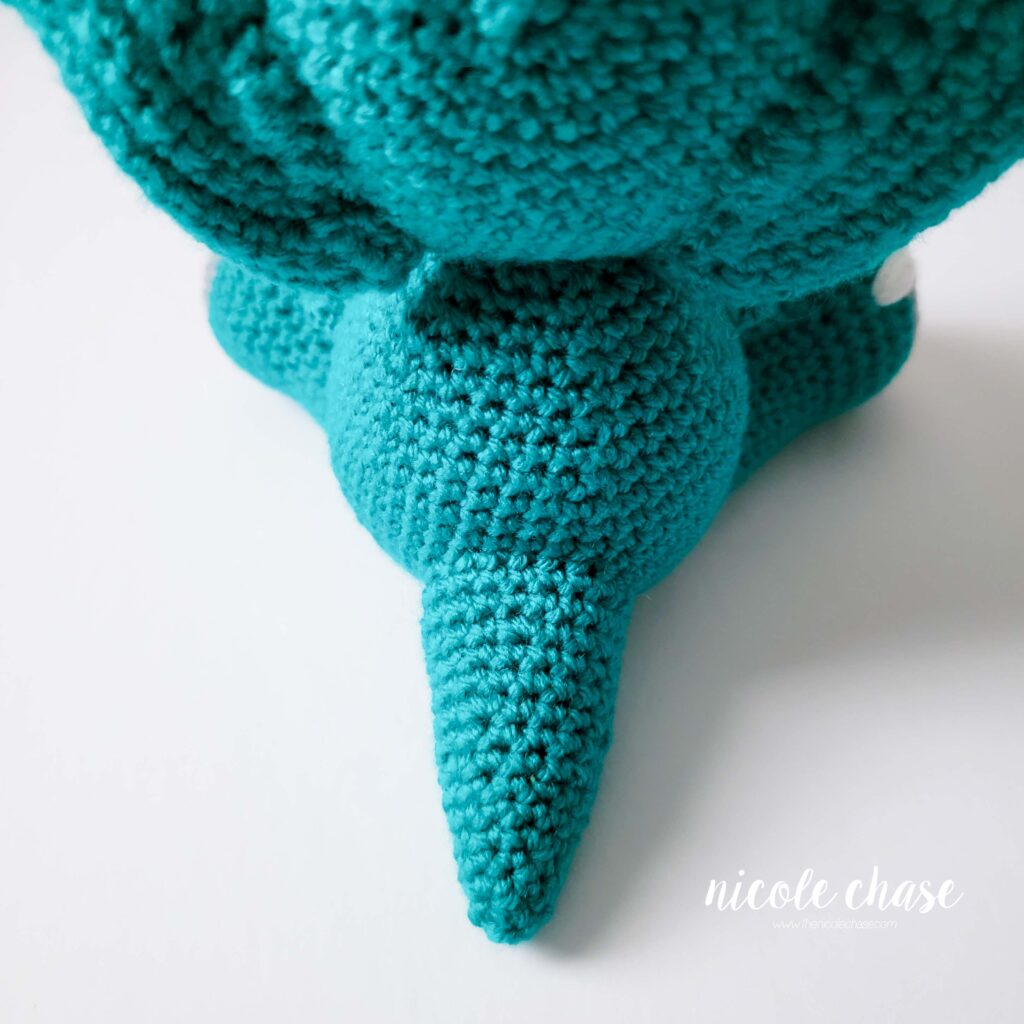
Attach tail over R6-13, on the back of the body.
*Note: Safety eyes and noses pose a choking risk for babies; therefore, if making this toy for a baby, I recommend using yarn, felt, or embroidered details.


If you’ve enjoyed this pattern, be sure to subscribe to my email newsletter so that you never miss a pattern release, and have subscriber only access to exclusive discount codes, offers, and freebies!
Thanks for stopping by! Happy crafting!
Nicole
PATTERN COPYRIGHT © 2023 NICOLE CHASE. ALL RIGHTS RESERVED.
PATTERN MAY NOT BE ALTERED, COPIED, REDISTRIBUTED OR SOLD AS YOUR OWN PATTERN.
YOU MAY SELL THE FINISHED PRODUCT ON A SMALL SCALE. PATTERN/DESIGN CREDIT GIVEN TO WWW.THENICOLECHASE.COM IS APPRECIATED. PERMISSION TO SELL DOES NOT INCLUDE MASS PRODUCTION. LARGE SCALE PRODUCTION IS PROHIBITED.
PHOTOGRAPHY COPYRIGHT © 2023 NICOLE CHASE. ALL RIGHTS RESERVED.
PHOTOS MAY NOT BE ALTERED, COPIED, REDISTRIBUTED OR SOLD AS YOUR OWN.
Hi. thankyou so much for this pattern! question: can i make these and sell them??
Hello! Absolutely, I encourage selling your finished items made with my pattern. 🙂
Hi Nicole! I have already made Tanner once but I made the strawberry version. Im amusing the original this time and am kinda confused about the small horn. How many rows do I do for the small one?
Hi Abby! The small horn has a total of 6 rounds and the larger horns have a total of 9 rounds. Notice that the large horns show R6-9, where the small horns stop at R6. Hope that helps!
Thank you for this cute pattern! It is very well written and easy to follow, and I even learned something new – the foundation single crochet – which I think will be useful going forward!
Thank you so much! I’m so glad that you enjoyed it!
Thank you this pattern was amazing! Not sure how to share the picture but absolutely adorable!!!!
Thanks so much for your comment, I’m so glad you enjoyed it!
Hi! I don’t understand what you mean by leaving an h worked stitch at the end of each leg / arm. Do you mean, say take the hook out the strand and work the first two loops and when pulled through it brings them together?
Currently I’ve just done them all as best as I could together as I didn’t understand that point 🫣
Thanks 🙂
Hi Kristy, did you have a look at the included photos? That should help make it clear. Feel free to email me if you’re still not sure.
Thanks!
Love the outcome of my triceratops! your pattern was very easy to follow and I always love a good photo tutorial thank you so much for this pattern!!
Can I ask how you did the leg close please 😀
I’m so glad that you enjoyed it! Thanks for your comment!
Hi I’m doing the frill and I have done 30sc but then moving on to R2 42sc it just cant be done where am I going wrong as I run out on sc.
Hello! It sounds like you aren’t doing the entire repeat. Be sure that you are both starting and ending the repeat with 2 SC, so it should look like this: 2, 1, 1, 1, 2, 2, 1, 1, 1, 2, 2, 1, 1, 1, 2, and so on. There is also a video tutorial that you could take a look at if you are still having trouble. Hope that helps!
I had the same problem on one of my rows, I went back and I guess I had forgotten to chain before I turned for the next row. Maybe try going back and check that?
I used this pattern to make as a christmas gift for one of my friends but now everyone else is jealous 😂 it came out amazing! The pattern was easy to follow, I love it!
Thank you so much for sharing, I’m so glad you enjoyed it! 🙂
First of all, thank you for offering this pattern! I have found this pattern very easy to follow and can’t wait to finish this adorable dinosaur. One question I have is where is the part of the pattern for the tail? I’ve looked through the whole pattern multiple times, and unless I pass over it each time, I don’t see where it says how to make the tail.
I’m so glad to hear that! The tail instructions are just after the arms, and just above the assembly. 🙂
Oh, I see it now. 🤪 Thank you!
I am teaching my grand daughter to crochet I am allowing her to pick free patterns to learn. We found Tanner on your website. What a fantastic pattern. As a new crocheter she di need help and l started her magic rings and did the frilln but the pattern was clearly written and easy to follow. The pics were very helpful for her . I will post our project pics on ravelry.com (mamcelroy). thanks for sharing.
Mary Anne
Thank you so much for your comment! I’m honored that she chose my pattern to help her learn! I’ll keep an eye out for your Ravelry project!
Ok so I followed to instructions for connecting all the body parts and my head doesn’t sit up and it’s kind of floppy is there anything I can do to fix this
The best way I’ve found to prevent a wobbly head is to add extra stuffing in the neck before it is completely sewn shut. If you’ve already sewn yours, and can’t get it undone, I would suggest going through with another piece of yarn, just as if you were attaching the head all over again, but just pull the yarn harder so it is sewn more tightly. That should help a bit.
I have a video on the stuffing technique I mentioned here:
https://www.instagram.com/thenicolechase/guide/amigurumi-tips/18174565909203182/?igshid=YmMyMTA2M2Y=
So I have finished both frill pieces and just realized I didn’t do FSC, just did a chain 30 for row 1 then started row 2 into the chain. Will this cause a problem stitching the two frill pieces together?
Your frill will be shorter than it is supposed to be if you didn’t actually do R1, but if you did both the same, you shouldn’t have an issue when putting them together. The finished frill will just not be as tall as intended.
If you’re not confident in doing a FSC for R1, you could alternatively do a ch 31 and SC 30. The FSC just eliminates the need for a ch. What you did is essentially skipped a row of SC.
Hope that helps!
Ok great thank you so much! I’m loving the pattern and can’t wait to finish it!
Approximately how long did this project take you? I love it so much!
Probably about 6-7 hours, including assembly.
Hi nicole! love this pattern. real quick, after reading the comments, I also was stuck on row 16. Your pattern says to repeat the "SC 2, SC 4 st" 5 times when in a comment you said 6. Could you clarify? If I add the last repeat I get to the correct stitch count at the end of the round. Thanks!
** row 16 for the head
Hello! Glad to hear that you are enjoying it!
You repeat it an ADDITIONAL 5 times, which gives you a total of 6 times.
Let me know if you have any other questions. 😊
Hi! Love Tanner! Bought this pattern and Toby. I love the candy corn version too. But can you please tell me how to embroider the toes? Thanks!
Hello! So glad you like the patterns! So for the nails, you just insert your needle and yarn through the designated stitch, come out through the next stitch, and just sort of wrap it around that way a few times. You’ll do that for each nail and then fasten off and hide the tail ends of the yarn. Hope that helps!
Hi Nicole. I’m working on the face and trying to figure out what I’m doing wrong. My face is a big circle. It doesn’t have the shape of yours at all. I’ve gone over the pattern and not seeing my mistake. Heard this with anyone else?
Hello! Not that I can think of. It sounds like you may be missing the repeating rounds (like R6-10, where you do SC around for R6, 7, 8, 9, and 10. If that’s not it and you need additional help, feel free to send me an email with a picture and I’ll try to help you.
Thanks!
That’s it!!! I was going so fast that I did one row and went on to the next one! Duh! Thank you so much!!
Hi! im confused about the body. do i slip stitch after each round or do i continue in a spiral?
Continue in a spiral (working in a continuous round), and use a stitch marker to keep track of each round. 😊
Hello,
I am on the step to merge both frills.
About the instruction "working 1 SC in each st, and 3 SC when rounding each of the four corners", I do not understand where to stitch 3 sc.
A corner is made of 2 increases, so a total of 4 stitches. So in what stitch should be done the 3 stitches ? The 1st one ? 2nd one ?
Thank you very much
It sounds like you are confusing the 5 points on the frill with the corners. If you lay out the frill to be as close to a rectangle shape as it would be, that is how you would identify the 4 corners. The 3 sts in the corners are just to prevent any bunching when you are turning around to the other side. All other spots on the frill (including the points where there are the increases you’re referring to), will only have one SC in each. Hope that helps!
Yes you’re right ! Corners are corners… Thank you
serait il possible d’avoir la traduction en français , merci d’avance
Great pattern my Nephew is going to love him
Thank you! I hope he does!
I love my sweet Dino! Thank you for the pattern! My only wish is that the head and body was made in 1 piece. Besides that it’s wonderful!
I just finished this as my first larger sized project and I am absolutely in love ! I will definitely be making more !! Xoxo
Thank you so much Taylor! I’m so glad you enjoyed it!
Hi! I noticed the pictures of the frill show it in a pentagon shape, but both the paid and online instructions create a hexagon. Is this intentional?
The instructions create 5 points on the frill, as pictured. The points are created when one repeat starts and another repeat ends. If yours is not working out with the 5 points, then you must have an incorrect stitch count or are not doing the repeats correctly.
Some people have missed the 2 sc at the end of each repeat. It should look like this:
(2, 1, 1, 1, 2) ^ (2, 1, 1, 1, 2) ^ (2, 1, 1, 1, 2) ^ (2, 1, 1, 1, 2) ^ (2, 1, 1, 1, 2) ^ (2, 1, 1, 1, 2), with the points happening where the ^ are.
Mary, I thought the same thing but if you look at the pictures, it only looks like a pentagon because 2 of the sections are overlapped. It should make a hexagon so you can center one of the points when you attach it to the head.
Loved the pattern! Very easy to follow and the final product was so cute!!! Made one for a Baby shower gift and now I have several more request.
So glad to hear that! Thank you for sharing!
Great pattern!! So easy to follow!
So glad you’ve enjoyed it!
Thank you so much for this pattern! It is very cute and easy to follow.
Hi Nicole! If I were crocheting this body of this pattern with blanket yarn and an 8mm crochet hook, on what row would I start to notice the shape becoming less flat and starting to form the shape of the body?
The body *
Hello! R8 is the last row that would be the "flat" bottom. R9 will likely still be fairly flat, but you’ll see it start to curve upward from there. Hope that helps!
Thank you so much!
This is a fabulous pattern-I’m making it for my grandson. Very easy to follow and it’s super cute. Thank you for sharing it!!
So glad to hear that, thank you!
Hi i am from costa rica and i started crochet one year ago. Love the pattern, thank you so much.
Thanks for your comment! Enjoy!
R1: Begin with 6 SC in a magic ring. (6 sts)
I’m not sure what a magic ring is
Loving this pattern so far – have done the head and the body. How much stuffing do you think it needs? Bags online come in 250g or 500g or bigger but I have no idea how big that is in volume! Thank you x
Hello! So glad you’re enjoying it! — I’ve never actually weighed the amount of stuffing used; however, if I were to take a guess based on a 20 oz (567g) bag of stuffing that I have, I would say the 250g would be plenty. Hope that helps!
Amazing – thanks!
Hi Nicole! I just finished making this pattern with a special twist – I have just applied to join your FB group so I can show it to you! I’m in love with your dinosaur patterns so would love to show you the way I’ve done it and get your permission before I try it with others you’ve created! X
Thanks Hannah!
Hi nicole firstly lovi g the pattern but im so confused on the head, im on row R15 and getting 54st then on R16 im pnly getting 58st at the end! Please help im cant rack my brains!
So glad you’re enjoying it! It sounds like you’re only doing the repeat 4 times instead of a total of 6. I’d suggest using stitch markers to indicate the start and end for the repeat section to make sure that is correct before moving on to the remaining SCs. Hope that helps!
Hi thank you for the free pattern!
Wondering if it was possible to use larger safety eyes, i have some larger ones from another project and was wondering if 12mm was the only size that would work
Of course, you can use any size that you like! 12mm is just what I use. You will be able to insert them and see how it looks before you put the back on to decide what you like.
This is my first attempt at following a pattern to do something like this. The pattern was easy to follow. Thanks for sharing and giving me the opportunity to make such a creature. My nephew will love it. Once again thanks for sharing.😀
I’m so glad you enjoyed the pattern! Thank you for your comment!
I am new to crochet and found your free pattern (thank you, by the way). I struggled a little but your detailed instructions and pictures really helped. Thanks again.
I’m so glad you enjoyed it!
Hi, Nicole. This is a beautiful pattern. I’m struggling, still, with the frill. When you are connecting the two frills, I don’t understand which are the "four corners." You said below to "lay it out like a rectangle." Do you mean that the five frill points are essentially one edge, and you’re talking about the FSC edge, and then the two sides – those four intersections?
Yes that is exactly correct!
Hi, thank you so much for this pattern, but I do have a doubt about the frill, after the 30 FSC, we do 2SC, 1×3, and again 2SC and we repeat, right? Until the end, it says it´s supposed to be 42 by the end but I just get 38, what am I doing wrong?
Hi Lucy! Be sure that you are doing the entire repeat. 2SC, 1 SC x 3, 2SC, 2 SC, 1 SC x3, 2SC, 2SC, 1 SC x3, 2 SC. Let me know if you need anything else!
Thank you so much, I got it right this time and it’s taking shape already !!!
Slightly confused with attaching front frill to back it says 3sc in 4 corners but I have 5 corners
In photo tutorials second from last pic has 4corners but last pic has 5??
Hi Helen, I think that you’re referring to the points of the frill. The corners are the 4 edges. Imagine laying the frill out into as close to a rectangle shape as it could be… those are the 4 corners. Hope thay helps!
I used this pattern to make a "My Triceratops Won’t Wash". I appreciate the detailed instructions on putting it together. Thanks!
I’m so glad you enjoyed it!
Thank you so much for this adorable pattern.
I’m so glad you like it!
I’m confused on sewing the front frill and back frill. If I add 3sc around the edges I get a square. It’s not looking right
Hi Bri, you are only doing 3 SC around each of the 4 corners of the frill, not around the entire piece. I hope that helps!
I am confused on the counts for the frill section. I have 30 FSC but if I do (2 sc in the same st, 1 sc in each of the next 3…) that doesnt add up to 42 on round 2. Am I reading something incorrectly?
Hi Alana, it sounds like you aren’t doing the entire repeat. The repeat has 2 SC at the beginning and end. So it would be 2 SC, 1 SC x3, 2 SC, 2 SC, 1 SC x 3, 2 SC, and so on.
I am a bit confused on the head. Round 15 says there should be 54 stitches and round 16 says there should be 60. Each time I’m getting 48 stitches in round 15 and 54 stitches in 16. But round 17 I get to 60 stitches like it says. Any advise is appreciated.
Hi Mari, is your stitch count correct after R14? If so, it sounds like you probably didn’t do the repeat the full number of times indicated. So if R14 you have 48 sts, you are good at that point. Then R15, You will repeat that first sequence from the * a total of 6 times, then SC x 24. That will get you to 54 sts. Hope that helps! Let me know if you need anything further. Thanks!
Hi Nicole,
I had the same issue as Mari. My stitch count on row 14 is 48. If you count up the stitches on row 15 it equals 49 stitches.
2 in one + 3 sc 5 times = 25 stitches then add the 24 in the pattern and that equals 49 stitches.
I’ll continue on as you indicated above but you may have an error in your pattern. I do LOVE how it’s turning out. 🙂
Hi Rachel! You are not including the first repeat in that sequence in your calculation. You do 2SC + 3 SC which is 5 sts. Then you repeat that sequence an ADDITIONAL 5 times, which you are correct is 25, but with the first 5 (for a total of 6 repeats), that would be 30. Plus the 24 sts, which makes 54. Glad you’re liking the pattern, enjoy!
This is such a great pattern! Thank you for the details on assembly. I always have a hard time with symmetry and your instructions made it achievable. 😊
I’m so glad they were helpful! 🙂
Hola Nicole. Te cuento que acabo de terminar éste hermoso proyecto. Lo disfruté muchísimo y me enamoré de él. Gracias por compartir!!!!!
¡Gracias! ¡Me alegra que lo hayas disfrutado! Disculpe mi probable pobre español; Usé un traductor. 🙂
Thank you! I’m so glad you enjoyed it! Excuse my likely poor Spanish; I used a translator. 🙂
Thank you so much for this pattern! My boy is very excited to get his very own Triceratops. I am a bit confused, though. I have only finished the body and the head and according to the instructions they are still open. I can’t seem to find any instructions about when to go ahead and close them up as in your pictures about assembly they’re already closed up. Thanks so much!
The body will remain open as the body is sewn to the head which takes care of the opening. The head is stuffed and closed completely, perhaps you didn’t see the full instructions for the head, but it goes to R30. Let me know if you have any questions! 🙂
I closed the body up is this ok or should I start over?
The body should not be closed.
Thank you for sharing, I was very concerned that my frill wasn’t going to work but it turned out beautifully!
Thanks for a wonderful pattern. Just finished Tanner. Yesterday I tried The miniTanner. Love them both.
I’m so glad that you enjoyed them both!! Thanks for your comment! 🙂
Please help
6 times I have tried the frill and the count isn’t adding up
Ch 31 2nd chain from hook 30 sc
30 sc across
Ch1 I’ve done 2sc in same stitch and next stitch doesn’t add up
When you get to 7 sc then 2sc I have 4 stitches left over
None of the stitch counts are adding up
It sounds like you aren’t doing the 2 SC at the end of each repeat. The 2 SC are at the beginning and end of the repeat, not just at the end of the frill. Hope that helps!
This messed me up the same way! Glad I’m not the only one that read that incorrectly. Thank you Nicole for clarifying!
Anytime!
Idk if any one clarified this for you. If you read carefully. (I didn’t lol) your supposed to make 2sc in the same stitch 2 times. So it’s 2sc one stitch. 3 sc Over the next 3 stitches. Then 2sc same stitch, then 2sc same stitch.
Thank you Nicola for this pattern. Extremely well written and so easy to follow. The photo tutorials are a brilliant added bonus. I was thrilled with my Tanner and I’m sure my grandson will be too
I’m so glad you enjoyed the pattern! I just added the extra photo tutorials, so I’m really happy to hear that they were worth the effort! 🙂
Thank you much for this pattern!! I was just saying to my DH that the people who write patterns are so clever. The shaping of the head especially is just devine!!
Thank you so much!! The head shaping took me quite a while to get just right, so I’m so glad that it is appreciated! Thanks so much for your comment!
Never mind my question out the frills. I just saw how to put them together on your instructions. Thanks you.
I just finished making the 2 frills of different colours. How do you join them to make one frill?
I see your other comment that you saw the instructions. Hope you’re enjoying the pattern! I’d love if you tagged me if you share a photo of your finished project on social media! 🙂
Hi there. I’m just working on tanner and I’m wondering, do I start the drill right in the head? At what row if yes?
Hello! No, the frill is worked as a separate piece and sewn on. See Assembly instructions at the end of the pattern. Thanks!
Ugh. I’m so struggling. 1) I’ve never done foundation single crochet so that’s a learning curve but 2) I cannot see how the second row doing 2 sc in one stitch and then 3 singles repeated into the initial 30 makes 42. Am I just too tired? Haha
Hi Laura,
Alternatively to the FSC, you could ch 31, and then SC in each to get 30 SC sts; I just happen to prefer FSC. As for the stitch count… the repeat is 2 SC in one, 3 SC, and then 2 SC in one again. You are just missing that last 2 SC in one. 🙂
Hope that helps!
Never mind!!!! I got it. Tired!!
Awesome!
Hi. How are you getting the nose on the head. Mine is just turning into a ball! Also the small horn and the large horns are the exact same.
Hi Laurie,
I’m not sure what you mean for the head. Be sure to use stitch markers and repeat the entire round when doing your repeats. It sounds like you might have missed something with your increases/decreases.
As for the horns, they are not the same. The small horn has 6 rows and the large horns have 9.
I hope that helps! 🙂
Ok I think I get it.. can I email you a picture of what I’m working on. Because I’m using velvet yarn. And it looks different
Of course!
I can’t understand the frills… Like I tried it once and it didn’t work. I just don’t get it… Could someone help me.. maybe with a step by step or I mean I can give my email for a step by step or whatever.. it’s the only part I don’t have done…
Hi Skye, I can absolutely help you! What part are you stuck on? To make it more clear, for R1 you will do your foundation single crochets, then turn and R2. For R2 you will do your 2 SC in the first st, 1 SC in the next 3, 2 SC in the next st, and then you will repeat that entire sequence. So you will again work 2 SC in the first st, 1 SC in the next 3, and 2 SC in the next st. If you need any more help, feel free to send me an email using the email button at the top of the page, or you can message me on Instagram or Facebook. 🙂 Thanks!
Super cute Triceratops.
I am having a small issue with the frill though, the stitch count and increases don’t match up. Each row increases by 12 according to stitch count but row two only increases by 8 when you follow the increase intervals. I thought that maybe you were meaning to increase by 6 but that didn’t add up either and the way the frill looks makes me think it has to increase by more than 6.
So now I went and overthought the entire thing and confused myself way more than necessary, lol.
If you could please advise me, I would greatly appreciate it, thank you.
Hi Stephanie! Thank you!
Be sure that you are repeating the entire repeat. So for R2, you’ll be doing (2 SC, 1 SC x3, 2 SC), then (2 SC, 1 SCx3, 2 SC), and so on. So you are increasing at the beginning and end of each repeat, which gets you to an increase of 12 sts for each row. Hope that helps! Let me know if you have any other questions. 🙂
That makes so much sense, thank you so much, I can’t believe how long I starred at that without realizing what you meant. I guess that’s what I get for crocheting while tired, lol.
No problem at all! Enjoy!
Thank you for sharing with us. Love your patterns.
Thank you so much for your comment! I’m so glad you enjoy them!
35 Mollie Makes Magazines 2021 & 2020
I dedicate these magazines to my old female friends with this type of magazine "mollie makes"
35 magazines pdf
I égaré with You a link to get any copy magazines’pdf’:
https://sites.google.com/view/crochetpatterns/mollie-makes-magazines