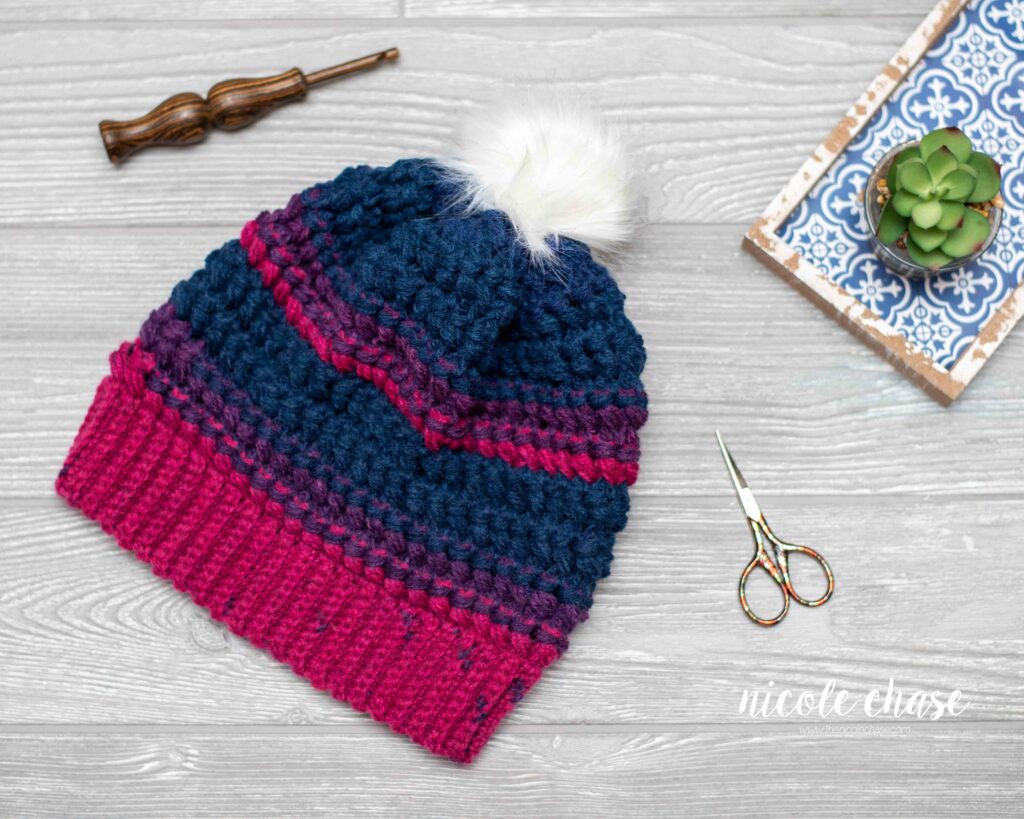
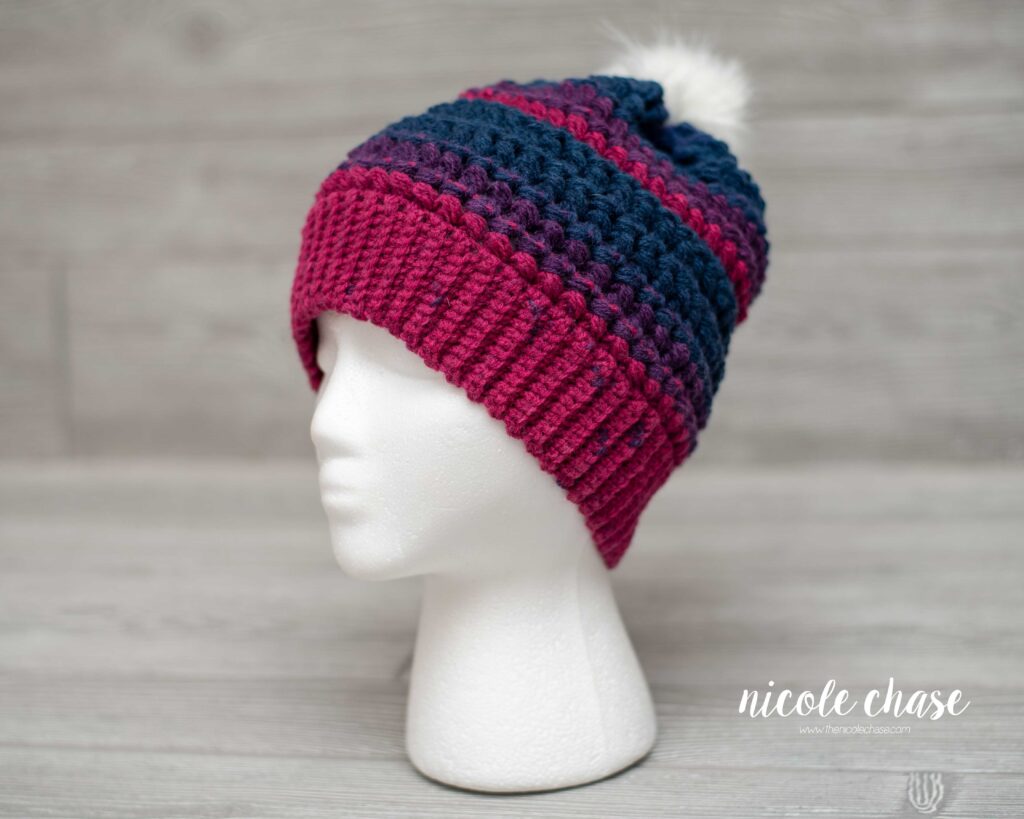
Kady Beanie – Free Crochet Pattern
*** I hope you enjoy this free crochet pattern (adult size) available here on my blog! An ad-free, formatted PDF version of this crochet pattern is also available for purchase at the buttons below. The PDF includes the full range of sizes including 0-3 months, 3-6 months, 6-12 months, toddler, child, teen, and adult.
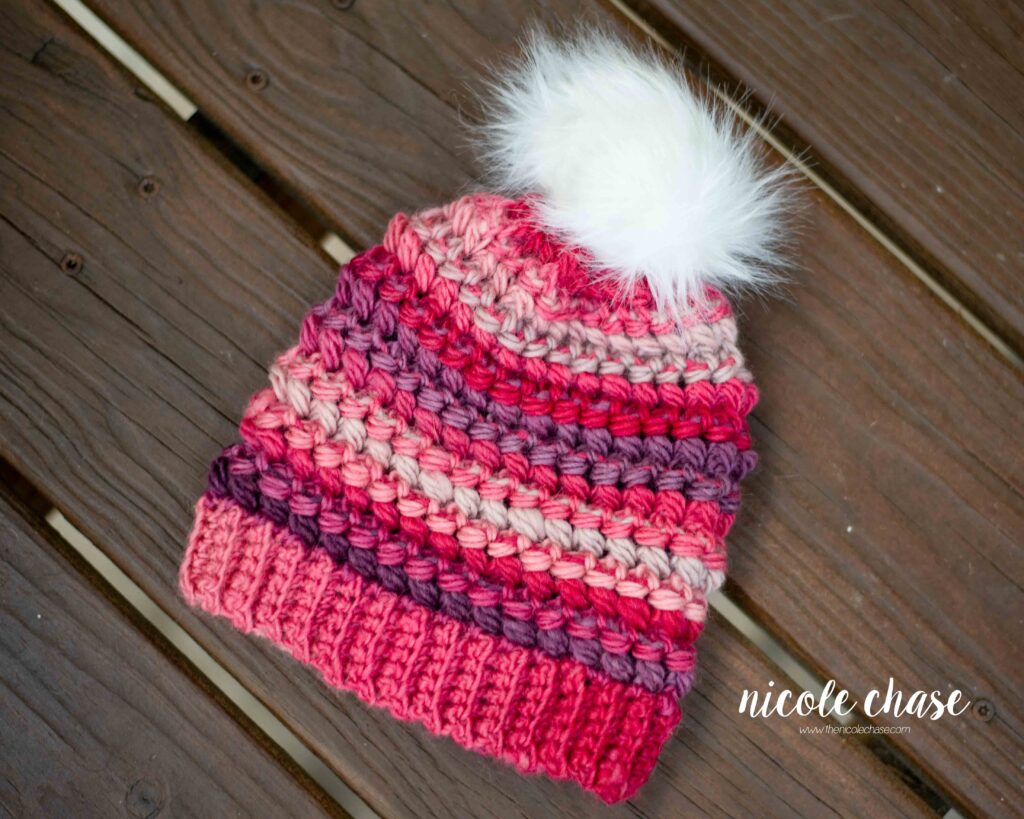
Textured beanies are SO popular these days, and when I stumbled upon the crisscross puff stitch, I knew I just had to create a hat with this beautiful stitch!
Using a cake of Lion Brand Mandala was the perfect fit to highlight this stitch and bring out the awesome colorways and transitions in the Mandala line. Attach a fur pom pom on the top and you have a gorgeous beanie that will impress!
For a step-by-step guide of the crisscross puff stitch, take a look at my tutorial, available here on my blog!

Don’t forget to save this pattern in your favorites and add it to your project queue to save it for later! View this pattern on Ravelry here.
I’d love to see what you make with this tutorial! Don’t forget to share a photo of your finished work in your Ravelry projects and my Facebook group!
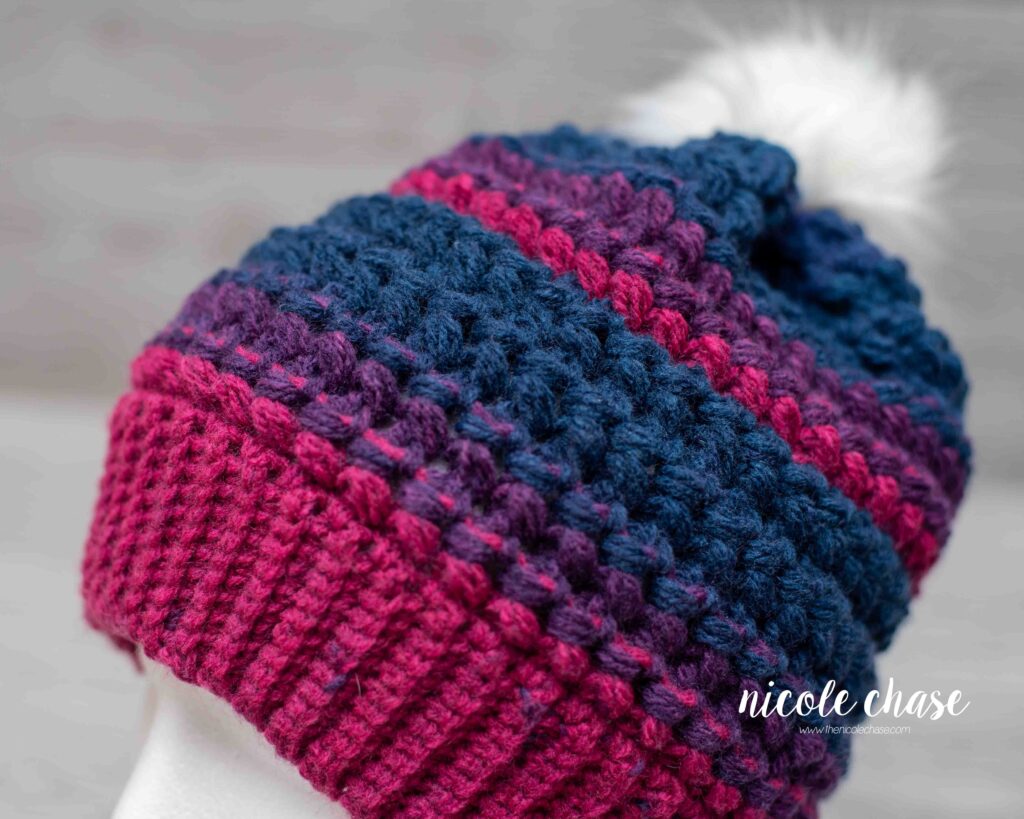
Kady Beanie

PATTERN SPECIFICS
Size: Adult (full range of sizes available in PDF download for purchase)
Gauge: 2” = 9 SC rows of band, unstretched, and 2” = 5 CCpuff st rows (See approximate circumference / length for each size)
Hook Size: 4.0mm (G), 5.5mm (I)
Other Tools: tapestry needle, scissors
Yarn Weight: Light (3), DK
Yarn Used: Lion Brand Mandala
Other Materials: pom pom (optional)
ABBREVIATIONS
st = stitch
sl st = slip stitch
ch = chain
SC = single crochet
DC = double crochet
CCpuff = crisscross puff stitch
SPECIAL STITCHES
CCpuff = Draw up a loop in last ch 1 space worked, pick up a loop in ch 1 space between next 2 puffs, [cross over the loop just picked up, draw up a loop in the first space again, pick up a loop in second space again] twice (7 loops on hook). Yarn over, draw through all loops on hook. Ch 1.
For additional stitch explanation, visit the stitch tutorial on my blog.
NOTES
- Chain 1 or 2 at the beginning of each row does NOT count as a stitch (unless otherwise specified).
- For stitch tutorial photos, see photo instructions here.
- Approximate circumference for each size is the measurement that your band should comfortably stretch to (the actual length of your band will be shorter).
- If you need to adjust the length of the band to meet gauge, be sure to do so in multiples of 4. The number of band rows should then also become the number of starting stitches in R1 of the hat body.
PATTERN (Size: Adult)
Approx. circumference: 23 inches / Approx. length: 9 inches
Ribbed Band
Using 4.0mm (G) hook:
Ch 11.
R1: SC in second ch from hook and each st to end of row. (10 sts)
R2-92: Ch 1. Turn. Working in the back loops of previous round, SC in each st across. (10 sts)
Bring both ends of band together and join with a sl st to the top of first row. Sl st the two ends of the band together.
Do not fasten off.
Hat Body
Using 5.5mm (I) hook:
R1: Ch 1. Work 1 SC along the top of each row in the ribbed band. Join with a sl st to beginning SC. (92 sts)
R2: Ch 2. Draw up a loop in the first SC, skip next SC, draw up a loop in next SC, [cross over the loop just picked up and draw up a loop in the first SC again, draw up a loop in same st as second loop] twice (7 loops on hook).Yarn over, draw through all 7 loops on hook. Ch 1. This has made your first CCpuff. *Draw up a loop in the last SC worked, skip the next SC, pick up a loop in the next SC, [cross over the loop just picked up, draw up a loop in the first SC again, draw up a loop in the same st as second loop] twice (7 loops on hook). Yarn over, draw through all loops on hook. Ch 1. This creates another CCpuff. Repeat from * to beginning of round. Work 1 DC in last SC. Sl st to the top of the beginning CCpuff. (45 CCpuff sts + 1 DC st)
R3-19: Ch 2. Turn. Draw up a loop in the ch 2 space from previous round, pick up a loop in ch 1 space between first puff and second puff, [cross over the loop just picked up, draw up a loop in the first space again, pick up a loop in second space again] twice (7 loops on hook). Yarn over. Draw through all loops on hook. Ch 1. This has made your first CCpuff. CCpuff around to beginning (refer to Special Stitches section). Sl st to the top of the beginning CCpuff. (45 CCpuff sts)
Leave long tail for finishing.
Fasten off.
FINISHING
Closing Top
Weave tail of yarn through every other stitch from your last round. Pull tightly and sew hole shut. Fasten off. Weave in ends.
If desired, attach pom pom to the top of the hat.
If you’ve enjoyed this pattern, be sure to subscribe to my email newsletter so that you never miss a pattern release, and have subscriber only access to exclusive discount codes, offers, and freebies!
Thanks for stopping by! Happy crafting!
Nicole
PATTERN COPYRIGHT © 2024 NICOLE CHASE. ALL RIGHTS RESERVED.
PATTERN MAY NOT BE ALTERED, COPIED, REDISTRIBUTED OR SOLD AS YOUR OWN PATTERN.
YOU MAY SELL THE FINISHED PRODUCT ON A SMALL SCALE. PATTERN/DESIGN CREDIT GIVEN TO WWW.THENICOLECHASE.COM IS APPRECIATED. PERMISSION TO SELL DOES NOT INCLUDE MASS PRODUCTION. LARGE SCALE PRODUCTION IS PROHIBITED.
PHOTOGRAPHY COPYRIGHT © 2024 NICOLE CHASE. ALL RIGHTS RESERVED.
PHOTOS MAY NOT BE ALTERED, COPIED, REDISTRIBUTED OR SOLD AS YOUR OWN.